HP ProLiant BL420c HP Service Pack for ProLiant User Guide - Page 11
Mounting an ISO, Copying the SPP to a hard drive
 |
View all HP ProLiant BL420c manuals
Add to My Manuals
Save this manual to your list of manuals |
Page 11 highlights
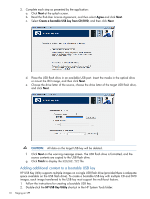
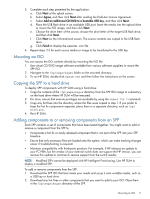
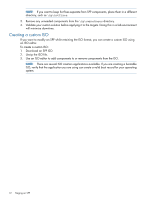
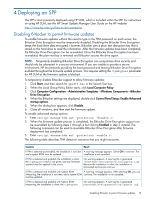
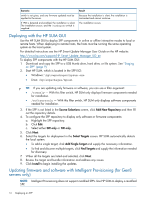
3. Complete each step presented by the application: a. Click Next at the splash screen. b. Select Agree, and then click Next after reading the End-User License Agreement. c. Select Add an additional CD/DVD to a bootable USB key, and then click Next. d. Place the USB flash drive in an available USB port. Insert the media into the optical drive or mount the ISO image, and then click Next. e. Choose the drive letter of the source, choose the drive letter of the target USB flash drive, and then click Next. f. Click Next on the informational screen. The source contents are copied to the USB flash drive. g. Click Finish to display the README.TXT file. 4. Repeat steps 2-3 for each source media or image to be transferred to the USB key. Mounting an ISO You can access the ISO contents directly by mounting the ISO file: 1. Use virtual CD/DVD image software available from various software suppliers to mount the SPP ISO. 2. Navigate to the \hp\swpackages folder on the mounted directory. 3. To run HP SUM, double-click hpsum.exe and then follow the instructions on the screen. Copying the SPP to a hard drive To deploy SPP components with HP SUM using a hard drive: 1. Copy the contents of the \hp\swpackages directory from the SPP ISO image to a directory on the hard drive where HP SUM will be executed. 2. For Linux, ensure that execute privileges are available by using the chmod 700 * command. 3. Copy any hot fixes into the directory where the files were copied in step 1. If you prefer to keep the hot fix components separate, place them in a separate directory, such as \hp\ hotfixes. 4. Run HP SUM. Adding components to or removing components from an SPP Each SPP contains a set of components that have been tested together. You might want to add or remove a component from the SPP to: • Incorporate a hot fix or newly released component that is not part of the SPP into your SPP baseline. • Ensure that only necessary files are loaded onto the system, which can make tracking changes easier if troubleshooting is required. • Maintain compatibility with third-party products. For example, if HP releases an update to your FC HBA, but the vendor of your external switch does not support the HP version, you can remove this update to continue to receive support from the switch vendor. NOTE: Modified SPPs cannot be deployed with HP Intelligent Provisioning. Use HP SUM to deploy a modified SPP. To add or remove components from the SPP: 1. Download the SPP ISO that best meets your needs and unzip it onto writable media, such as a USB key or hard drive. 2. Download any hot fixes or other components that you want to add to your ISO. Place them in the \hp\swpackages directory of the SPP. Mounting an ISO 11
-
 1
1 -
2
-
3
-
4
-
5
-
 6
6 -
 7
7 -
 8
8 -
 9
9 -
 10
10 -
 11
11 -
 12
12 -
 13
13 -
 14
14 -
 15
15 -
 16
16 -
17
-
18
-
19
-
20
-
21
-
22
-
23
-
24
-
25
-
26
-
27
-
28
-
29
 |
 |