HP ProLiant DL160se HP ProLiant DL160se G6 Server Maintenance and Service Guid - Page 45
Optical disc drive Bay, Push the optical disk drive toward the front of the unit.
 |
View all HP ProLiant DL160se manuals
Add to My Manuals
Save this manual to your list of manuals |
Page 45 highlights
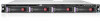
Optical disc drive Bay The optical media device bays of the servers with 2 HDDs and 4 HDDs and 8 HDDs support a 9.5 mm (0.37 in.) DVD ROM. The following procedure is an example using the server with 4 HDDs model. To remove the optical disk drive carrier: 1. Remove the top cover and then unplug the SATA and power cables. 2. Loosen the screws. Figure 8 Removing the Cables and Screws 3. Push the optical disk drive toward the front of the unit. 4. Pull the optical disk drive out of the chassis. Removal and replacement procedures 45
-
 1
1 -
2
-
3
-
4
-
5
-
6
-
7
-
8
-
9
-
10
-
11
-
12
-
13
-
14
-
15
-
16
-
17
-
18
-
19
-
20
-
21
-
22
-
23
-
24
-
25
-
26
-
27
-
28
-
29
-
30
-
31
-
32
-
33
-
34
-
35
-
36
-
37
-
38
-
39
-
 40
40 -
 41
41 -
 42
42 -
 43
43 -
 44
44 -
 45
45 -
 46
46 -
 47
47 -
 48
48 -
 49
49 -
 50
50 -
51
-
52
-
53
-
54
-
55
-
56
-
57
-
58
-
59
-
60
-
61
-
62
-
63
-
64
-
65
-
66
-
67
-
68
-
69
-
70
-
71
-
72
-
73
-
74
-
75
-
76
-
77
-
78
-
79
-
80
-
81
-
82
-
83
-
84
-
85
-
86
-
87
-
88
-
89
-
90
-
91
-
92
-
93
-
94
-
95
-
96
-
97
-
98
-
99
-
100
-
101
-
102
-
103
-
104
-
105
-
106
-
107
-
108
-
109
-
110
-
111
-
112
-
113
-
114
-
115
-
116
-
117
-
118
-
119
-
120
-
121
-
122
-
123
-
124
-
125
-
126
-
127
-
128
 |
 |

Removal and replacement procedures
45
Optical disc drive Bay
The optical media device bays of the servers with 2 HDDs and 4 HDDs and 8 HDDs support a 9.5
mm (0.37 in.) DVD ROM. The following procedure is an example using the server with 4 HDDs model.
To remove the optical disk drive carrier:
1.
Remove the top cover and then unplug the SATA and power cables.
2.
Loosen the screws.
Figure 8
Removing the Cables and Screws
3.
Push the optical disk drive toward the front of the unit.
4.
Pull the optical disk drive out of the chassis.