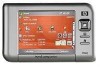
HP Rx5910 HP iPAQ rx5700/rx5900 Travel Companion Product Information Guide - Page 24
Synchronization Setup Wizard, Synchronization Options, Finish, Start, Programs, Microsoft, ActiveSync - ipaq manual
 |
UPC - 882780587625
View all HP Rx5910 manuals
Add to My Manuals
Save this manual to your list of manuals |
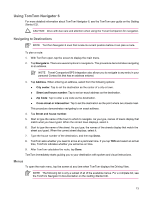
Page 24 highlights
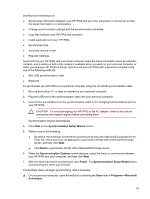
Use Microsoft ActiveSync to: ● Synchronize information between your HP iPAQ and up to two computers or one server so that the latest information is in all locations. ● Change synchronization settings and the synchronization schedule. ● Copy files between your HP iPAQ and computer. ● Install applications on your HP iPAQ. ● Synchronize links. ● Send and receive e-mail. ● Request meetings. Synchronizing your HP iPAQ with a personal computer keeps the same information (such as calendar, contacts, and e-mails) on both units, making it available when you work on your personal computer or when you take your HP iPAQ on the go. Synchronize your HP iPAQ with a personal computer using one of the following methods: ● Mini-USB synchronization cable ● Bluetooth To synchronize your HP iPAQ and a personal computer using the mini-USB synchronization cable: 1. Be sure ActiveSync 4.1 or later is installed on your personal computer. 2. Plug the USB end of the synchronization cable into your personal computer. 3. Connect the mini-USB end on the synchronization cable to the charging/communications port on your HP iPAQ. CAUTION To avoid damaging your HP iPAQ or the AC adapter, check to be sure all connectors are properly aligned before connecting them. Synchronization begins automatically. 4. Click Next on the Synchronization Setup Wizard screen. 5. Perform one of the following: ● By default, the check box is selected to synchronize directly with a Microsoft Exchange Server. Clear this check box if you do not want to synchronize directly with a Microsoft Exchange server, and then click Next. ● Click Next to synchronize directly with a Microsoft Exchange server. 6. When the Synchronization Options screen displays, select the items to synchronize between your HP iPAQ and your computer, and then click Next. 7. After the items have been synchronized, click Finish. The Synchronization Setup Wizard starts synchronizing the items you checked. If ActiveSync does not begin synchronizing, start it manually: ▲ On your personal computer, open ActiveSync by selecting the Start menu > Programs > Microsoft ActiveSync. 18
-
 1
1 -
2
-
3
-
4
-
5
-
6
-
7
-
8
-
9
-
10
-
11
-
12
-
13
-
14
-
15
-
16
-
17
-
18
-
 19
19 -
 20
20 -
 21
21 -
 22
22 -
 23
23 -
 24
24 -
 25
25 -
 26
26 -
 27
27 -
 28
28 -
 29
29 -
30
-
31
-
32
-
33
-
34
-
35
-
36
-
37
-
38
-
39
-
40
-
41
-
42
-
43
-
44
-
45
-
46
-
47
-
48
-
49
-
50
 |
 |
