HP Rx5910 HP iPAQ rx5700/rx5900 Travel Companion Product Information Guide - Page 41
Setting up a POP3, HTTP, or IMAP4 E-mail Account, Save password, Advanced, Settings, Finish, Tools - user manual
 |
UPC - 882780587625
View all HP Rx5910 manuals
Add to My Manuals
Save this manual to your list of manuals |
Page 41 highlights
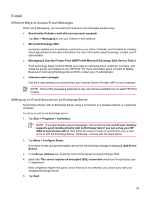
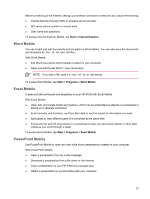
6. Enter your name, password, and domain, and then tap Next. 7. Select the Save password text box if you want to enable automatic sync. 8. To change the rules for resolving synchronization conflicts, tap Advanced. 9. Select the check boxes for the types of information items that you want to synchronize with Exchange Server. 10. To change available synchronization settings, select the type of information and tap Settings. 11. Tap Finish. You can set up your HP iPAQ to synchronize with Exchange Server over a wireless network or through a cable or Bluetooth connection to a personal computer. You must have the following information to sync wirelessly: server name, user name, password, and domain name. NOTE Synchronizing directly with Exchange Server is supported only on Windows Mobilepowered Pocket PC 2002 or later. By clicking Tools > Options, you can determine whether an information type is synchronized with a personal computer or with Exchange Server. Setting up a POP3, HTTP, or IMAP4 E-mail Account To send and receive mail, you need to set up an e-mail account with an Internet Service Provider (ISP) or have an account that you access using a virtual private network (VPN) server connection (typically a work account). Be sure you have the proper plan with your wireless service provider and the connections have been set up correctly. To set up an e-mail account on your HP iPAQ: 1. Tap Start > Messaging. 2. Tap Menu > Tools > New Account. 3. Enter your e-mail address, and tap Next. Auto configuration attempts to download necessary e-mail server settings so that you do not need to enter them manually. 4. Once Auto configuration has finished, tap Next. 5. Enter your name (the name you want displayed when you send e-mail) and your password. If Auto configuration is successful, your user name is already entered. Tap Next, then Finish to complete setting up your account, or tap Options to access additional settings. For example: ● Change the time intervals for downloading new messages ● Download attachments ● Limit the number of messages that are downloaded If Auto configuration is unsuccessful, tap Start > Help and search on email. 35
-
 1
1 -
2
-
3
-
4
-
5
-
6
-
7
-
8
-
9
-
10
-
11
-
12
-
13
-
14
-
15
-
16
-
17
-
18
-
19
-
20
-
21
-
22
-
23
-
24
-
25
-
26
-
27
-
28
-
29
-
30
-
31
-
32
-
33
-
34
-
35
-
 36
36 -
 37
37 -
 38
38 -
 39
39 -
 40
40 -
 41
41 -
 42
42 -
 43
43 -
 44
44 -
 45
45 -
 46
46 -
47
-
48
-
49
-
50
 |
 |