HP Scanjet 4670 hp scanjet 4600 series digital flatbed scanners user manual - Page 20
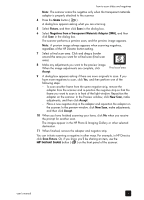
scan negatives, Line up the holes on the side of the negative with the position pegs - adapter
 |
View all HP Scanjet 4670 manuals
Add to My Manuals
Save this manual to your list of manuals |
Page 20 highlights
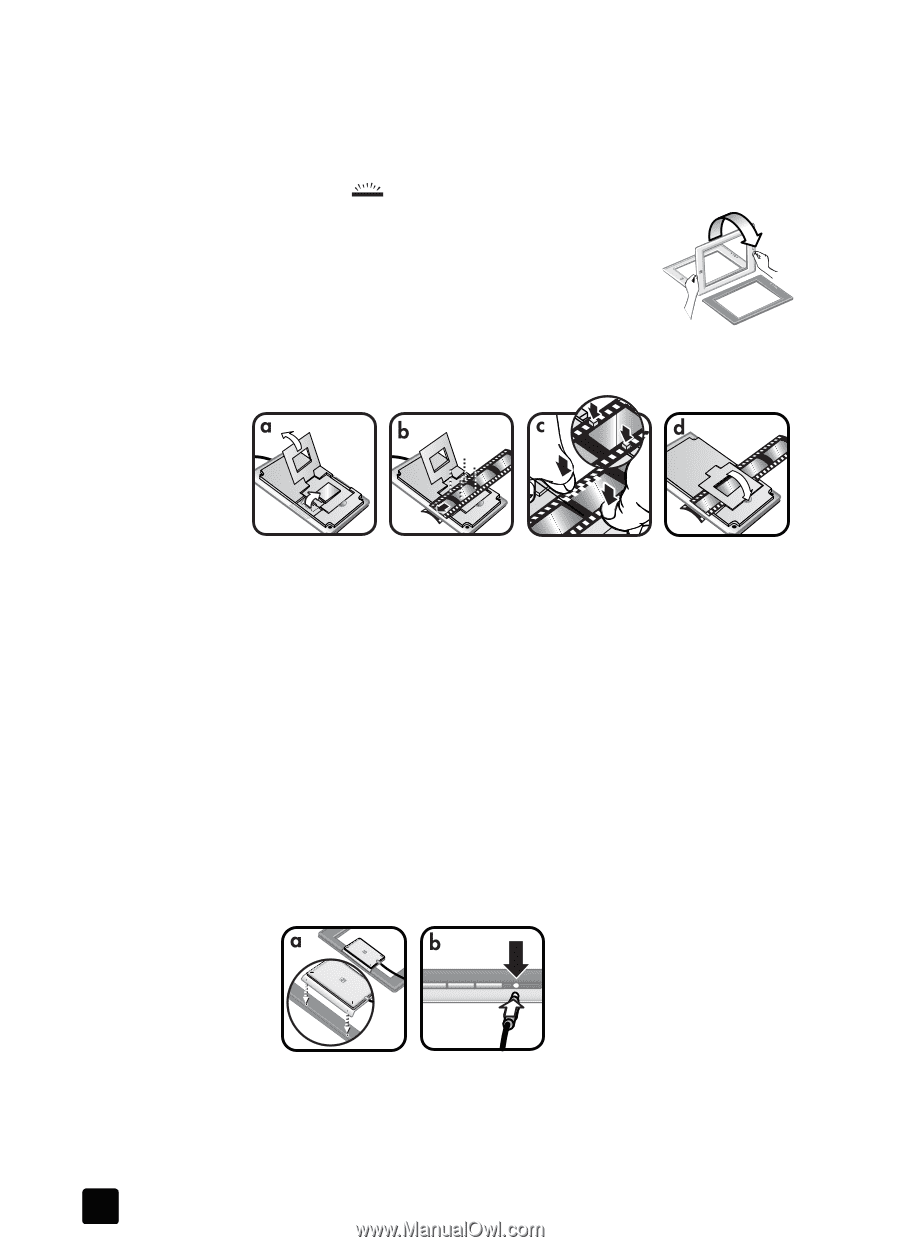
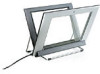
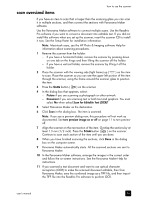
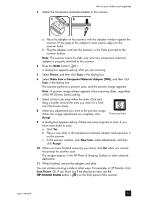
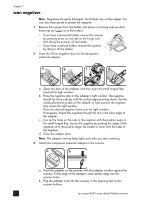
chapter 2 scan negatives Note: Negatives are easily damaged. Touch them only on their edges. You can also wear gloves to protect the negative. 1 Remove the scanner from the holder and place it scanning side up (dark frame up) up ( ) on a flat surface. - If you have a horizontal holder, remove the scanner by pressing down on one tab on the hinge and then lifting the scanner off the holder. - If you have a vertical holder, remove the scanner by lifting it off the holder. 2 Insert the 35mm negative strip into the transparent materials adapter: a. Open the door of the adapter, and then open the small hinged flap towards the light window. b. Place the negative strip on the adapter's light window. The negative should lay shiny side up, with the curled edges pointing down. Use the media placement guides on the adapter to help position the negative strip across the light window. Place the desired negative frame over the light window. If necessary, thread the negative through the slot in the clear edge of the adapter. c. Line up the holes on the side of the negative with the position pegs on the small hinged flap. Secure the negative by pushing the edges of the negative on to the position pegs. Be careful to touch only the sides of the negative. d. Close the adapter door. Note: The adapter viewing lamp lights only after you start scanning. 3 Attach the transparent materials adapter to the scanner: a. Place the adapter on the scanner, with the adapter window against the scanner. Fit the pegs of the adapter's clear plastic edge into the scanner holes. b. Plug the adapter cord into the scanner, in the opening next to the scanner buttons. 15 hp scanjet 4600 series digital flatbed scanners
-
 1
1 -
2
-
3
-
4
-
5
-
6
-
7
-
8
-
9
-
10
-
11
-
12
-
13
-
14
-
 15
15 -
 16
16 -
 17
17 -
 18
18 -
 19
19 -
 20
20 -
 21
21 -
 22
22 -
 23
23 -
 24
24 -
 25
25 -
26
-
27
-
28
-
29
-
30
-
31
-
32
-
33
-
34
-
35
-
36
-
37
-
38
 |
 |