HP Scanjet 4670 hp scanjet 4600 series digital flatbed scanners user manual - Page 7
front panel overview, Feature, Description - manual
 |
View all HP Scanjet 4670 manuals
Add to My Manuals
Save this manual to your list of manuals |
Page 7 highlights
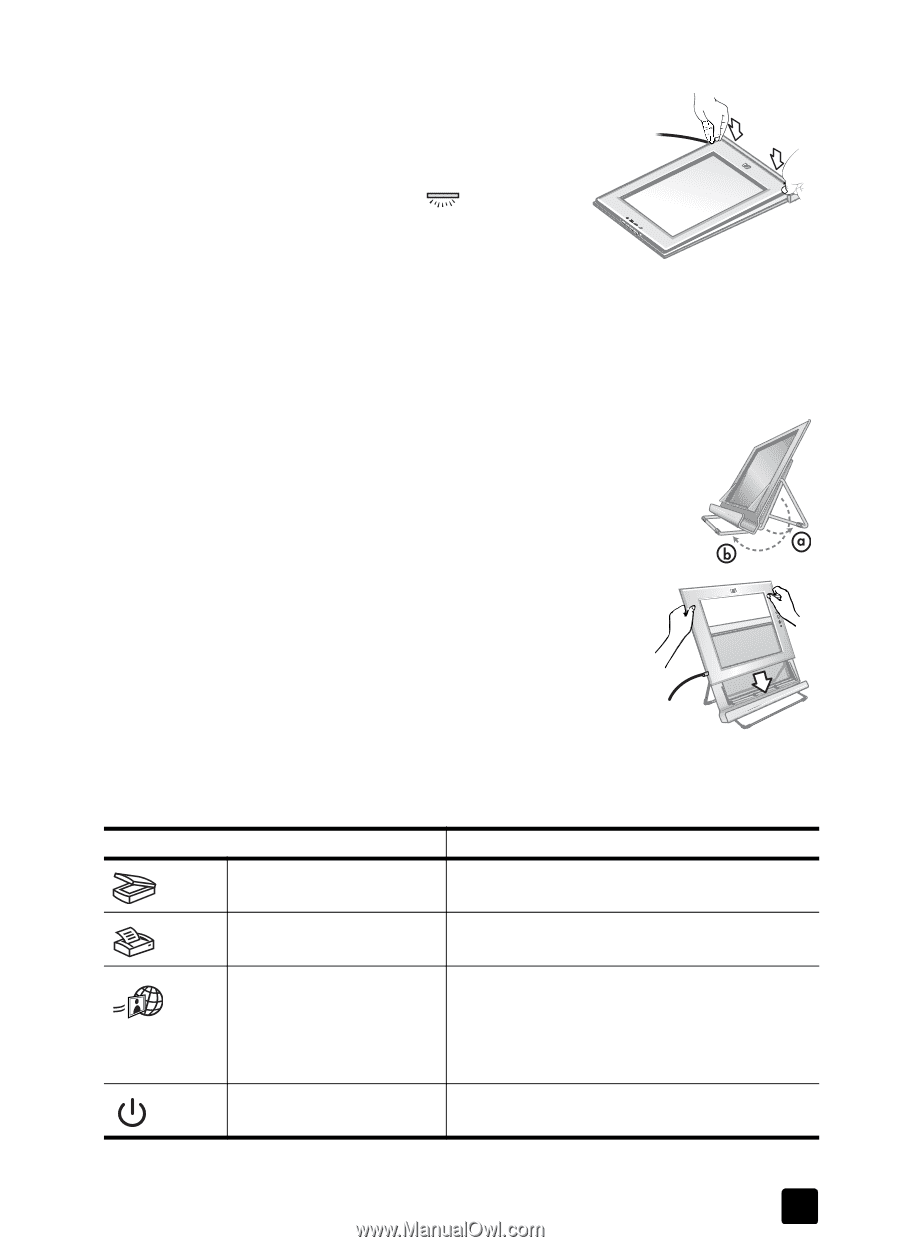
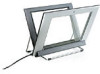
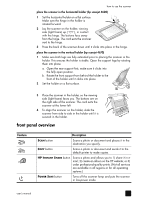
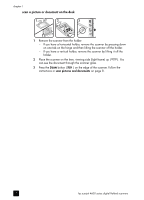
how to use the scanner place the scanner in the horizontal holder (hp scanjet 4600) 1 Set the horizontal holder on a flat surface. Make sure the hinge in the holder is rotated forward. 2 Lay the scanner on the holder, viewing side (light frame) up ( ), in contact with the hinge. The buttons face away from the hinge. The cord exits the scanner next to the hinge. 3 Press the back of the scanner down until it clicks into place in the hinge. place the scanner in the vertical holder (hp scanjet 4670) 1 Make sure both legs are fully extended prior to placing the scanner in the holder. This ensures the holder is stable. Open the support legs by rotating them into place: a. Open the rear support first; make sure it clicks into the fully open position. b. Rotate the front support from behind the holder to the front of the holder until it clicks into place. 2 Set the holder on a flat surface. 3 Place the scanner in the holder, so the viewing side (light frame) faces you. The buttons are on the right side of the scanner. The cord exits the scanner at the lower left. 4 To align the scanner on the holder, slide the scanner from side to side in the holder until it is secured in the holder. front panel overview Feature Description SCAN button Scans a photo or document and places it in the destination you specify. COPY button Scans a photo or document and sends it to the default printer to make copies. HP INSTANT SHARE button Scans a photo and allows you to 1) share it in email; 2) create an album on the HP website; or 3) order professional-quality prints. (Not all services are available in all regions or for all operating systems.) POWER SAVE button Turns off the scanner lamp and puts the scanner in low-power mode. user's manual 2
-
 1
1 -
 2
2 -
 3
3 -
 4
4 -
 5
5 -
 6
6 -
 7
7 -
 8
8 -
 9
9 -
 10
10 -
 11
11 -
 12
12 -
13
-
14
-
15
-
16
-
17
-
18
-
19
-
20
-
21
-
22
-
23
-
24
-
25
-
26
-
27
-
28
-
29
-
30
-
31
-
32
-
33
-
34
-
35
-
36
-
37
-
38
 |
 |