HP Scanjet 4670 hp scanjet 4600 series digital flatbed scanners user manual - Page 9
position the item to scan, scanning side and viewing side, position the item face down and face up - see through scanner
 |
View all HP Scanjet 4670 manuals
Add to My Manuals
Save this manual to your list of manuals |
Page 9 highlights
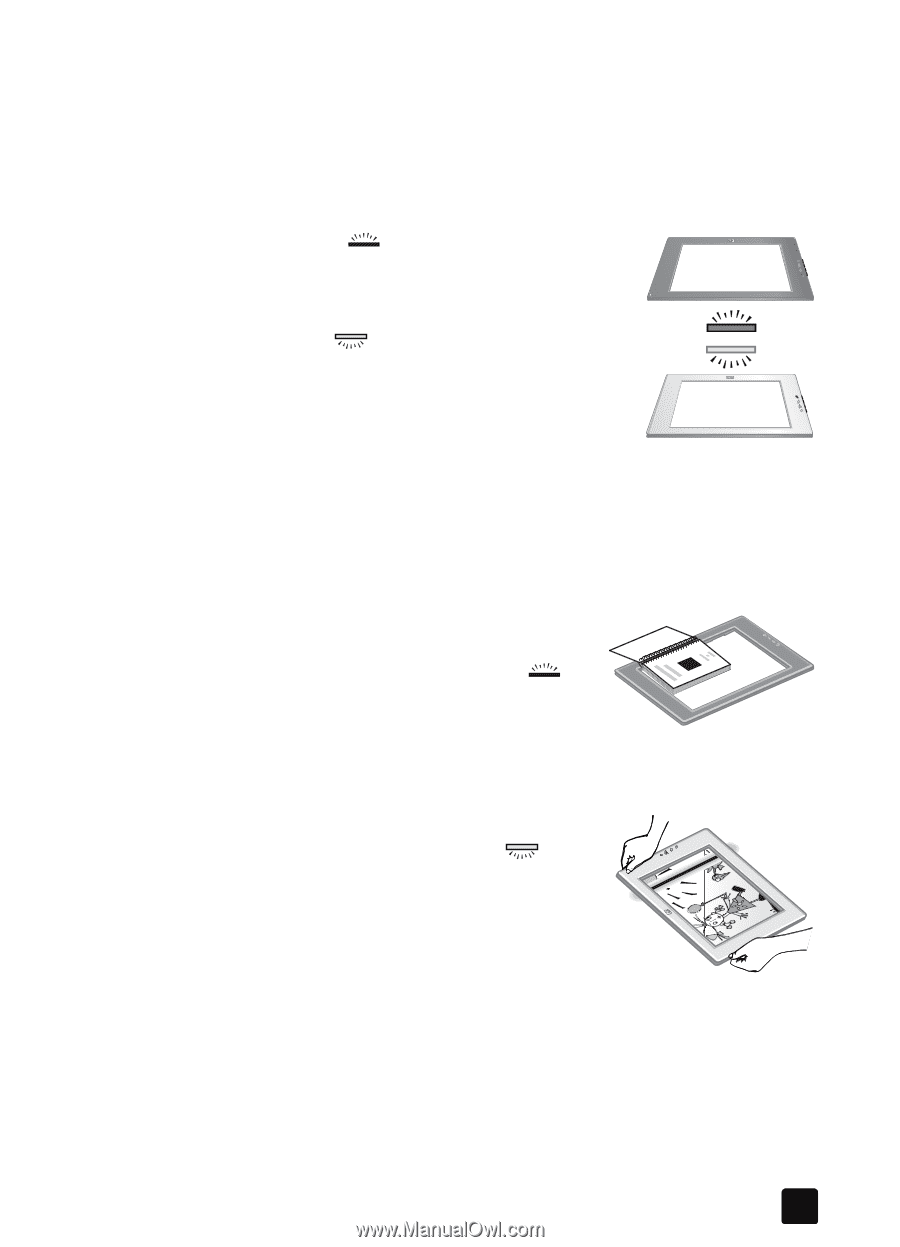
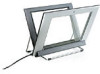
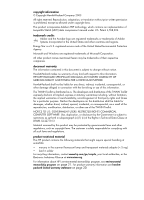
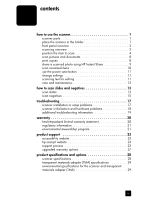
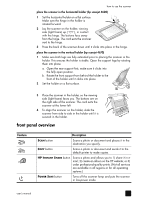
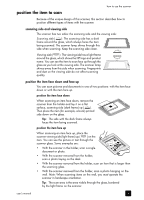
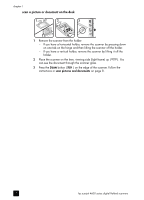
position the item to scan how to use the scanner Because of the unique design of this scanner, this section describes how to position different types of items with the scanner. scanning side and viewing side The scanner has two sides: the scanning side and the viewing side: Scanning side ( ): The scanning side has a dark frame around the glass, which always faces the item being scanned. The scanner lamp shines through this side when scanning. Keep the scanning side clean. Viewing side ( ): The viewing side has a light frame around the glass, which shows the HP logo and product name. You can see the item to scan face up through the glass as you look at the viewing side. The scanner lamp shines away from this side when scanning. Fingerprints and dust on the viewing side do not affect scanning quality. position the item face down and face up You can scan pictures and documents in one of two positions: with the item face down or with the item face up. position the item face down When scanning an item face down, remove the scanner from the holder and lay it on a flat surface, scanning side (dark frame) up ( ). Then place the item (for example, a book) printed side down on the glass. Tip: The side with the dark frame always faces the item being scanned. position the item face up When scanning an item face up, place the scanner viewing side (light frame) up ( ) on the item. You can see the picture or text through the scanner glass. Some examples are: • With the scanner in the holder, scan a single document or photo. • With the scanner removed from the holder, scan a photo laying on the desk. • With the scanner removed from the holder, scan an item that is larger than the scanning glass. • With the scanner removed from the holder, scan a photo hanging on the wall. Note: When scanning items on the wall, you must operate the scanner in landscape orientation. Tip: The scan area is the area visible through the glass, bordered by the light frame on the scanner. user's manual 4
-
 1
1 -
2
-
3
-
 4
4 -
 5
5 -
 6
6 -
 7
7 -
 8
8 -
 9
9 -
 10
10 -
 11
11 -
 12
12 -
 13
13 -
 14
14 -
15
-
16
-
17
-
18
-
19
-
20
-
21
-
22
-
23
-
24
-
25
-
26
-
27
-
28
-
29
-
30
-
31
-
32
-
33
-
34
-
35
-
36
-
37
-
38
 |
 |