HP Scanjet 8200c HP Scanjet 8200 series scanners - (English) User Manual - Page 33
appendix A - SCSI setup and options, why use SCSI?, install the software - scanjet 8200 power cord
 |
View all HP Scanjet 8200c manuals
Add to My Manuals
Save this manual to your list of manuals |
Page 33 highlights
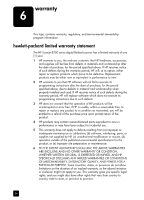
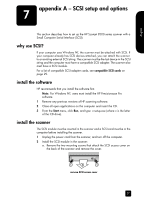
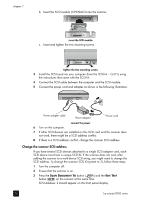
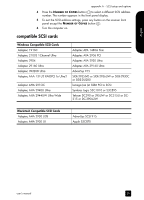
English appendix A - SCSI setup and options 7 This section describes how to set up the HP Scanjet 8200 series scanner with a Small Computer Serial Interface (SCSI). why use SCSI? If your computer uses Windows NT, the scanner must be attached with SCSI. If your computer already has SCSI devices attached, you can attach the scanner to an existing external SCSI string. The scanner must be the last device in the SCSI string and the computer must have a compatible SCSI adapter. The scanner also must have a SCSI module. For a list of compatible SCSI adapter cards, see compatible SCSI cards on page 29. install the software HP recommends that you install the software first. Note: For Windows NT, users must install the HP Precisionscan Pro software. 1 Remove any previous versions of HP scanning software. 2 Close all open applications on the computer and insert the CD. 3 From the Start menu, click Run, and type: x:setup.exe (where x is the letter of the CD drive). install the scanner The SCSI module must be inserted in the scanner and a SCSI card must be in the computer before installing the scanner. 1 Unplug the power cord from the scanner, and turn off the computer. 2 Install the SCSI module in the scanner: a. Remove the two mounting screws that attach the SCSI access cover on the back of the scanner and remove the cover. 1 2 1 remove SCSI access cover 27
-
 1
1 -
2
-
3
-
4
-
5
-
6
-
7
-
8
-
9
-
10
-
11
-
12
-
13
-
14
-
15
-
16
-
17
-
18
-
19
-
20
-
21
-
22
-
23
-
24
-
25
-
26
-
27
-
 28
28 -
 29
29 -
 30
30 -
 31
31 -
 32
32 -
 33
33 -
 34
34 -
 35
35 -
 36
36 -
 37
37 -
 38
38 -
39
-
40
-
41
-
42
-
43
-
44
-
45
-
46
-
47
-
48
-
49
-
50
-
51
-
52
-
53
-
54
-
55
-
56
-
57
-
58
-
59
-
60
-
61
-
62
-
63
-
64
-
65
-
66
-
67
-
68
-
69
-
70
-
71
-
72
-
73
-
74
-
75
-
76
-
77
-
78
-
79
-
80
-
81
-
82
-
83
-
84
 |
 |