HP StorageWorks 7410 HP StorageWorks Virtual Array va 7000 family - Installati - Page 15
Hardware Installation, Step 1. Unpack the array - storageworks all in one
 |
View all HP StorageWorks 7410 manuals
Add to My Manuals
Save this manual to your list of manuals |
Page 15 highlights
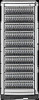
Hardware Installation Step 1. Unpack the array 1 Follow the unpacking instructions printed on the shipping container to unpack the controller enclosure. 2 Follow the unpacking instructions printed on the shipping container to unpack any disk enclosures (VA 7110/7400/7410 only). Step 2. Rack the array WARNING To prevent the rack from tipping over, install the enclosures to maintain the center of gravity as low as possible. A full enclosure may weigh up to 104 pounds (47 kg). To avoid serious injury, use a mechanical lift, or remove all disk modules and power modules before lifting an enclosure into the rack. Refer to "Servicing and Upgrading" in the HP StorageWorks Virtual Array User & Service Guide. To install enclosures into supported racks, refer to the appropriate instructions for your rack in the HP StorageWorks Virtual Array Family Rack Installation Guide. Table 1 shows the supported racks for the virtual arrays. Table 1 Virtual Array Supported Racks Rack Rack Product No. Name Height meters (EIA Units) EIA Units Enclosures Per Encl.1 Per Rack2 J1500A HP Rack System/E41 1.96 m (41 U) 3 13 J1501A HP Rack System/E33 1.60 m (33 U) 3 11 J1502A HP Rack System/E25 1.25 m (25 U) 3 8 C2785A HP Computer Cabinet 1.10 m (21 U) 4 5 C2786A HP Computer Cabinet 1.60 m (32 U) 4 8 C2787A HP Computer Cabinet 1.96 m (41 U) 4 10 9142 Compaq 9000 Rack 2.0 m (42 U) 3 14 9136 Compaq 9000 Rack 1.7 m (36 U) 3 12 9122 Compaq 9000 Rack 1.1 m (22 U) 3 7 1HP Computer Cabinet requires a 1U filler panel to hide the mounting rails. 2Does not include space that may be required for PDUs. Virtual Array Installation Guide 15
-
 1
1 -
2
-
3
-
4
-
5
-
6
-
7
-
8
-
9
-
 10
10 -
 11
11 -
 12
12 -
 13
13 -
 14
14 -
 15
15 -
 16
16 -
 17
17 -
 18
18 -
 19
19 -
 20
20 -
21
-
22
-
23
-
24
-
25
-
26
-
27
-
28
-
29
-
30
-
31
-
32
-
33
-
34
-
35
-
36
-
37
-
38
-
39
-
40
-
41
-
42
-
43
-
44
-
45
-
46
-
47
-
48
-
49
-
50
-
51
-
52
 |
 |
