HP T5545 HP ThinPro Administrator's Guide (HP t5145, t5545 Thin Client) - Page 98
Control Panel, Management, ezUpdate, Enable ezUpdate on system startup
 |
UPC - 884420407690
View all HP T5545 manuals
Add to My Manuals
Save this manual to your list of manuals |
Page 98 highlights
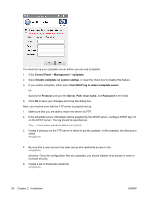
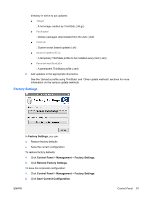
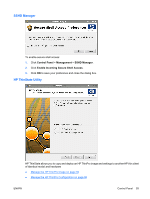
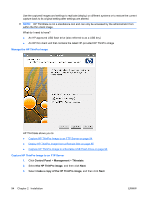
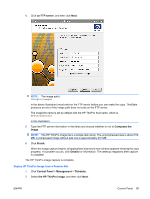
You must set up your ezUpdate server before you can use ezUpdate. 1. Click Control Panel > Management > ezUpdate. 2. Select Enable ezUpdate on system startup, or clear the check box to disable this feature. 3. If you enable ezUpdate, either select Use DHCP tag to detect ezUpdate server Or Specify the Protocol and type the Server, Path, User name, and Password in the fields. 4. Click Ok to save your changes and close the dialog box. Next, you must be sure that the FTP server is properly set up. 1. Make sure that you are able to reach the server via FTP. 2. If the ezUpdate server information will be supplied by the DHCP server, configure DHCP tag 137 on the DHCP server. The tag should be specified as: ftp://username:password@server/path 3. Create a directory on the FTP server in which to put the updates. In this example, the directory is called ezupdate . 4. Be sure that a user account has been set up with read/write access to the ezupdate directory. Once the configuration files are uploaded, you should disable write access in order to increase security. 5. Create a set of directories inside the ezupdate 90 Chapter 2 Installation ENWW
-
 1
1 -
2
-
3
-
4
-
5
-
6
-
7
-
8
-
9
-
10
-
11
-
12
-
13
-
14
-
15
-
16
-
17
-
18
-
19
-
20
-
21
-
22
-
23
-
24
-
25
-
26
-
27
-
28
-
29
-
30
-
31
-
32
-
33
-
34
-
35
-
36
-
37
-
38
-
39
-
40
-
41
-
42
-
43
-
44
-
45
-
46
-
47
-
48
-
49
-
50
-
51
-
52
-
53
-
54
-
55
-
56
-
57
-
58
-
59
-
60
-
61
-
62
-
63
-
64
-
65
-
66
-
67
-
68
-
69
-
70
-
71
-
72
-
73
-
74
-
75
-
76
-
77
-
78
-
79
-
80
-
81
-
82
-
83
-
84
-
85
-
86
-
87
-
88
-
89
-
90
-
91
-
92
-
 93
93 -
 94
94 -
 95
95 -
 96
96 -
 97
97 -
 98
98 -
 99
99 -
 100
100 -
 101
101 -
 102
102 -
 103
103 -
104
-
105
-
106
-
107
-
108
-
109
-
110
-
111
-
112
-
113
-
114
-
115
-
116
-
117
-
118
-
119
-
120
-
121
 |
 |
