HP dx2308 HP Compaq dx2300 and dx2308 Business PC Service Reference Guide, 1st - Page 61
Removing a 3.5” Hard Drive
 |
View all HP dx2308 manuals
Add to My Manuals
Save this manual to your list of manuals |
Page 61 highlights
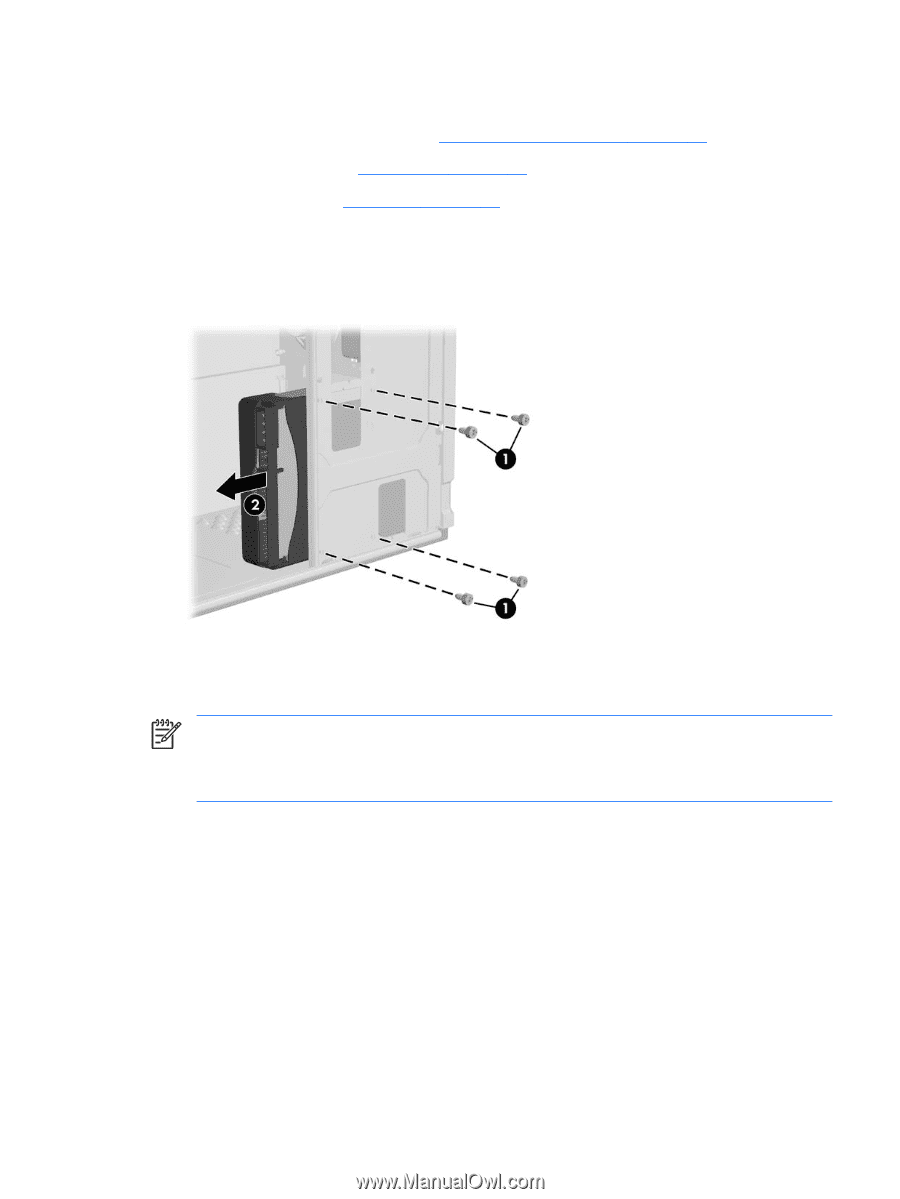
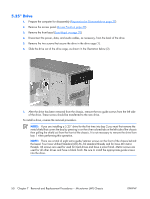
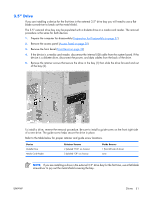
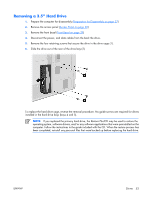
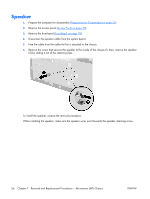
Removing a 3.5" Hard Drive 1. Prepare the computer for disassembly (Preparation for Disassembly on page 37) 2. Remove the access panel (Access Panel on page 38) 3. Remove the front bezel (Front Bezel on page 39) 4. Disconnect the power, and data cables from the back the drive. 5. Remove the four retaining screws that secure the drive in the drive cage (1). 6. Slide the drive out of the rear of the drive bay (2). To replace the hard drive cage, reverse the removal procedure. No guide screws are required for drives installed in the hard drive bays (bays 4 and 5). NOTE: If you replaced the primary hard drive, the Restore Plus!CD may be used to restore the operating system, software drivers, and/or any software applications that were preinstalled on the computer. Follow the instructions in the guide included with the CD. When the restore process has been completed, reinstall any personal files that were backed up before replacing the hard drive. ENWW Drives 53
-
 1
1 -
2
-
3
-
4
-
5
-
6
-
7
-
8
-
9
-
10
-
11
-
12
-
13
-
14
-
15
-
16
-
17
-
18
-
19
-
20
-
21
-
22
-
23
-
24
-
25
-
26
-
27
-
28
-
29
-
30
-
31
-
32
-
33
-
34
-
35
-
36
-
37
-
38
-
39
-
40
-
41
-
42
-
43
-
44
-
45
-
46
-
47
-
48
-
49
-
50
-
51
-
52
-
53
-
54
-
55
-
 56
56 -
 57
57 -
 58
58 -
 59
59 -
 60
60 -
 61
61 -
 62
62 -
 63
63 -
 64
64 -
 65
65 -
 66
66 -
67
-
68
-
69
-
70
-
71
-
72
-
73
-
74
-
75
-
76
-
77
-
78
-
79
-
80
-
81
-
82
-
83
-
84
-
85
-
86
-
87
-
88
-
89
-
90
-
91
-
92
-
93
-
94
-
95
-
96
-
97
-
98
-
99
-
100
-
101
-
102
 |
 |