HP dx2308 HP Compaq dx2300 and dx2308 Business PC Service Reference Guide, 1st - Page 96
Solving Hardware Installation Problems
 |
View all HP dx2308 manuals
Add to My Manuals
Save this manual to your list of manuals |
Page 96 highlights
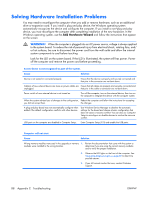
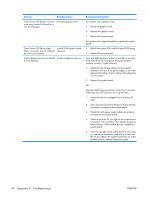
Solving Hardware Installation Problems You may need to reconfigure the computer when you add or remove hardware, such as an additional drive or expansion card. If you install a plug and play device, the Windows operating system automatically recognizes the device and configures the computer. If you install a non-plug and play device, you must reconfigure the computer after completing installation of the new hardware. In the Windows operating system, use the Add Hardware Wizard and follow the instructions that appear on the screen. WARNING! When the computer is plugged into an AC power source, voltage is always applied to the system board. To reduce the risk of personal injury from electrical shock, rotating fans, and/ or hot surfaces, be sure to disconnect the power cord from the wall outlet and allow the internal system components to cool before touching. Look for the LED on the system board. If the LED is illuminated, the system still has power. Power off the computer and remove the power cord before proceeding. A new device is not recognized as part of the system. Cause Solution Device is not seated or connected properly. Ensure that the device is properly and securely connected and that pins in the connector are not bent down. Cable(s) of new external device are loose or power cables are Ensure that all cables are properly and securely connected and unplugged. that pins in the cable or connector are not bent down. Power switch of new external device is not turned on. Turn off the computer, turn on the external device, then turn on the computer to integrate the device with the computer system. When the system advised you of changes to the configuration, Reboot the computer and follow the instructions for accepting you did not accept them. the changes. A plug and play board may not automatically configure when added if the default configuration conflicts with other devices. Use Windows Device Manager to deselect the automatic settings for the board and choose a basic configuration that does not cause a resource conflict. You can also use Computer Setup to reconfigure or disable devices to resolve the resource conflict. USB ports on the computer are disabled in Computer Setup. Enter Computer Setup (F10) and enable the USB ports. Computer will not start. Cause Solution Wrong memory modules were used in the upgrade or memory 1. modules were installed in the wrong location. Review the documentation that came with the system to determine if you are using the correct memory modules and to verify the proper installation. 2. Observe the LED lights on the front of the computer. See Interpreting Diagnostic Lights on page 89 to determine possible causes. 3. If you still cannot resolve the issue, contact Customer Support. 88 Appendix C Troubleshooting ENWW
-
 1
1 -
2
-
3
-
4
-
5
-
6
-
7
-
8
-
9
-
10
-
11
-
12
-
13
-
14
-
15
-
16
-
17
-
18
-
19
-
20
-
21
-
22
-
23
-
24
-
25
-
26
-
27
-
28
-
29
-
30
-
31
-
32
-
33
-
34
-
35
-
36
-
37
-
38
-
39
-
40
-
41
-
42
-
43
-
44
-
45
-
46
-
47
-
48
-
49
-
50
-
51
-
52
-
53
-
54
-
55
-
56
-
57
-
58
-
59
-
60
-
61
-
62
-
63
-
64
-
65
-
66
-
67
-
68
-
69
-
70
-
71
-
72
-
73
-
74
-
75
-
76
-
77
-
78
-
79
-
80
-
81
-
82
-
83
-
84
-
85
-
86
-
87
-
88
-
89
-
90
-
 91
91 -
 92
92 -
 93
93 -
 94
94 -
 95
95 -
 96
96 -
 97
97 -
 98
98 -
 99
99 -
 100
100 -
 101
101 -
102
 |
 |