Hitachi C8FSE Instruction Manual - Page 19
Caution, Warning
 |
UPC - 717709012998
View all Hitachi C8FSE manuals
Add to My Manuals
Save this manual to your list of manuals |
Page 19 highlights
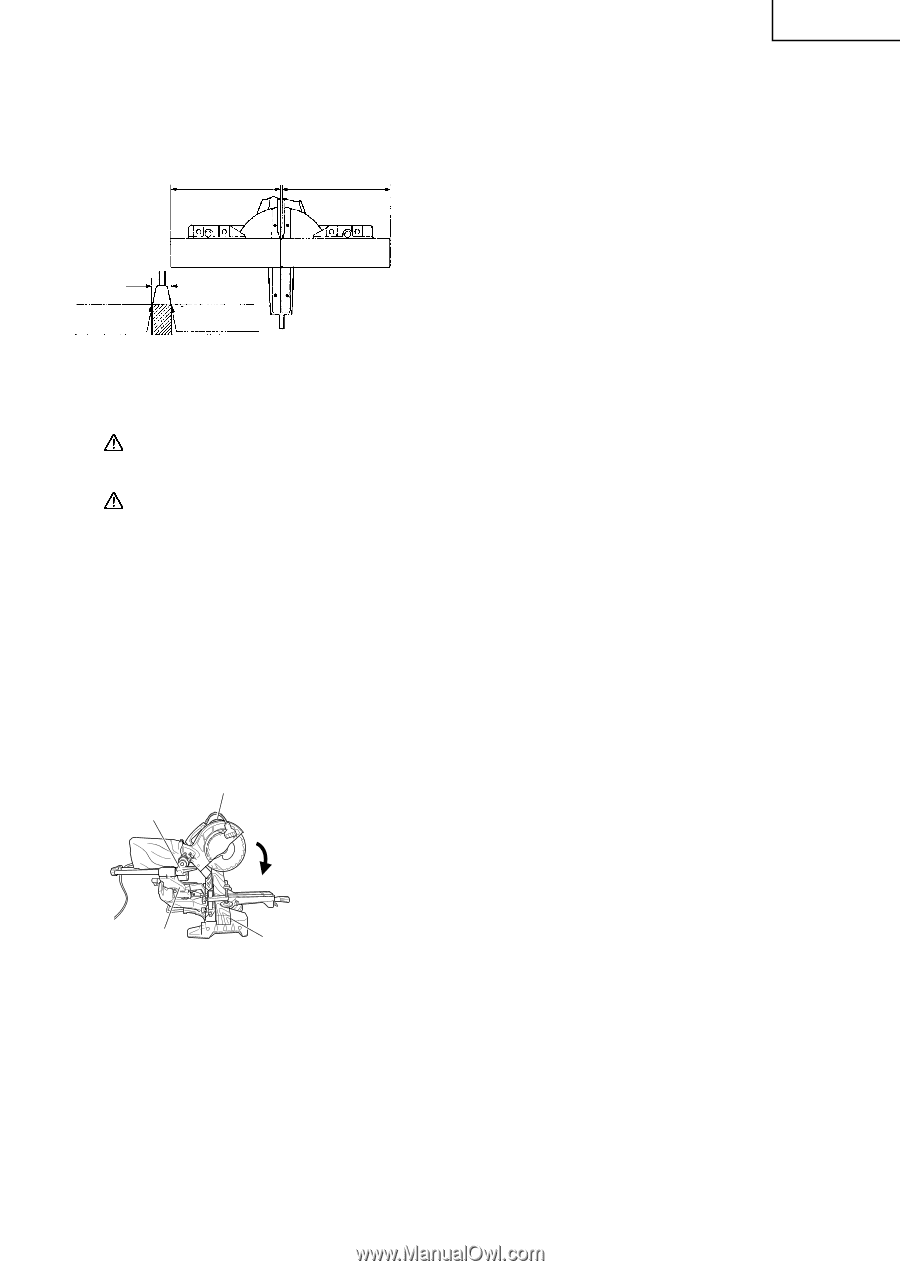
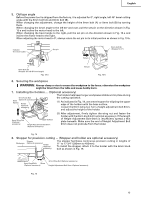
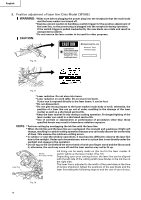
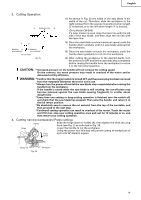
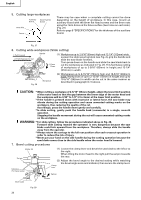
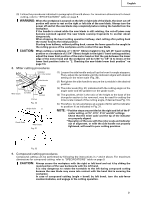
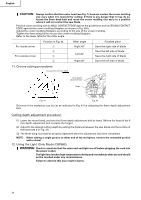
English 3. Cutting Operation a Adjusting Line b (1) As shown in Fig. 25 the width of the saw blade is the width of the cut. Therefore, slide the workpiece to the right (viewed from the operator's position) when length b is desired, or to the left when length a is desired. (Only Model C8FSHE) If a laser marker is used, align the laser line with the left side of the saw blade, and then align the ink line with the laser line. a b Marking a (pre-marked) b Marking (pre-marked) (Front View) (2) Once the saw blade reaches maximum speed, push the handle down carefully until the saw blade approaches the workpiece. (3) Once the saw blade contacts the workpiece, push the handle down gradually to cut into the workpiece. Fig. 25 (4) After cutting the workpiece to the desired depth, turn the power tool OFF and let the saw blade stop completely before raising the handle from the workpiece to return it to the full retract position. CAUTION: * Increased pressure on the handle will not increase the cutting speed. On the contrary, too much pressure may result in overload of the motor and/or decreased cutting efficiency. WARNING: * Confirm that the trigger switch is turned OFF and the power plug has been removed from the receptacle whenever the tool is not in use. * Always turn the power off and let the saw blade stop completely before raising the handle from the workpiece. If the handle is raised while the saw blade is still rotating, the cut-off piece may become jammed against the saw blade causing fragments to scatter about dangerously. * Every time one cutting or deep-cutting operation is finished, turn the switch off, and check that the saw blade has stopped. Then raise the handle, and return it to the full retract position. * Be absolutely sure to remove the cut material from the top of the turntable, and then proceed to the next step. * Continued cutting operation can result in overload of the motor. Touch the motor and if it's hot, stop your cutting operation once and rest for 10 minutes or so, and then restart your cutting operation. 4. Cutting narrow workpieces (Press cutting) Handle Slide the hinge down to holder (A), then tighten the slide securing knob (see Fig. 2) as indicated in Fig. 26. Hinge Lower the handle to cut the workpiece. Using the power tool this way will permit cutting of workpieces of Press Down up to 2-9/16" (65mm) square. Holder (A) Fig. 26 Workpiece 19
-
 1
1 -
2
-
3
-
4
-
5
-
6
-
7
-
8
-
9
-
10
-
11
-
12
-
13
-
 14
14 -
 15
15 -
 16
16 -
 17
17 -
 18
18 -
 19
19 -
 20
20 -
 21
21 -
 22
22 -
 23
23 -
 24
24 -
25
-
26
-
27
-
28
-
29
-
30
-
31
-
32
-
33
-
34
-
35
-
36
-
37
-
38
-
39
-
40
-
41
-
42
-
43
-
44
-
45
-
46
-
47
-
48
-
49
-
50
-
51
-
52
-
53
-
54
-
55
-
56
-
57
-
58
-
59
-
60
-
61
-
62
-
63
-
64
-
65
-
66
-
67
-
68
-
69
-
70
-
71
-
72
-
73
-
74
-
75
-
76
-
77
-
78
-
79
-
80
-
81
-
82
-
83
-
84
-
85
-
86
-
87
-
88
-
89
-
90
-
91
-
92
-
93
-
94
-
95
-
96
 |
 |