Husqvarna AUTOMOWER 435X AWD Owner Manual - Page 34
To measure the distance from the charging station, To do a test of the Lawn Coverage function
 |
View all Husqvarna AUTOMOWER 435X AWD manuals
Add to My Manuals
Save this manual to your list of manuals |
Page 34 highlights
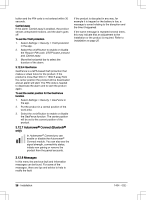
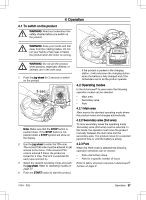
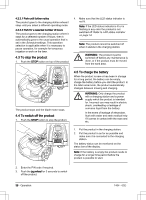
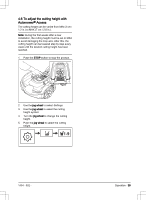
to the point where the guide wire is connected to the boundary wire. To measure the distance from the charging station 1. Put the product in the charging station. 2. Select Settings > Installation > Lawn coverage in the app. 3. Move the horizontal bar to set the distance to the charging station to maximum. 4. Select Test: Area 1-5 setup. 5. Follow the instructions in the app to start the test. 6. Push the STOP button when the product is at the distance you select to measure. The distance shows in the app. To do a test of the Lawn Coverage function 1. Put the product in the charging station. 2. Select Settings > Installation > Lawn coverage in the app. 3. Select Test: Area 1-5 setup. 4. Follow the instructions in the app to start the test. 5. The product will run to the starting point for this area. 3.12.3.3 Drive Past Wire The front of the product always moves past the boundary wire by a specified distance before the product moves back into the work area. The factory setting for the Drive Past Wire function function is 31 cm. You can select a distance of 20-50 cm. Note: With the factory setting the product will cut 11 cm past the wire. To set the Drive past wire 1. Select Settings > Installation > Drive past wire in the app. 2. Move the horizontal bar to set the distance. 3. Select Save. 3.12.3.4 Starting point The Starting point function allows you to control how far the product drives forward from the charging station before it starts to operate. Use this function if the charging station is placed in an area with limited space, for example under a veranda. Note: Starting point must not be set to a distance longer than the distance the guide wire is installed in a line in front of the charging station. Refer to To examine where to put the guide wire on page 25. To set the starting point 1. Select Settings > Installation > Starting point in the app. 2. Move the horizontal bar to set the distance. 3. Select Save. 3.12.4 Accessories In Accessories you can change the settings of the product accessories. To change the settings, obey the instructions in the Automower® Connect app. 3.12.4.1 Headlights There are 4 different headlight settings that control when the headlights are on: • Always ON • Evening only (19:00-00:00) • Evening and night (19:00-07:00) • Always OFF The default setting is Always ON. To set the headlight settings 1. Select Settings > Accessories in the app. 2. Move the horizontal bar to change the settings. 3. Select Save. To set the headlight to flash when fault The factory setting is that Flashes when fault is enabled. The headlights flashes if the product stops to operate because of a fault. 1. Select Settings > Accessories in the app. 2. Select on/off to enable or disable the function. 3. Select Save. 34 - Installation 1404 - 002 -
-
 1
1 -
2
-
3
-
4
-
5
-
6
-
7
-
8
-
9
-
10
-
11
-
12
-
13
-
14
-
15
-
16
-
17
-
18
-
19
-
20
-
21
-
22
-
23
-
24
-
25
-
26
-
27
-
28
-
 29
29 -
 30
30 -
 31
31 -
 32
32 -
 33
33 -
 34
34 -
 35
35 -
 36
36 -
 37
37 -
 38
38 -
 39
39 -
40
-
41
-
42
-
43
-
44
-
45
-
46
-
47
-
48
-
49
-
50
-
51
-
52
-
53
-
54
-
55
-
56
-
57
-
58
-
59
-
60
-
61
-
62
-
63
-
64
-
65
-
66
-
67
-
68
 |
 |