IBM 6400 Operation Guide - Page 36
Changing the Paper Exit Location
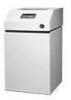 |
View all IBM 6400 manuals
Add to My Manuals
Save this manual to your list of manuals |
Page 36 highlights
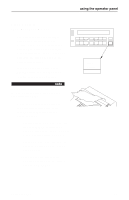
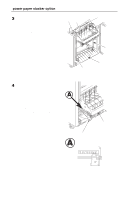
Changing the Paper Exit Location (Pedestal Models Only) On pedestal model printers you can select whether the paper exits from the rear or from the top of the printer. Normally, you should select the top exit only when you will be tearing the forms from the printer and using them soon after printing. Forms will not stack when in this mode. Setting Top Paper Exit 1 Press Stop to place the printer in NOT READY state. note If there is paper in the printer, unload the paper (page 41), then continue with step 2 of this procedure. 2 Open the printer cover. 3 Loosen the two hinge adjustment thumbscrews. 4 Slide the cover toward the rear of the printer until it stops. Thumbscrew 22 Operator's Guide
-
 1
1 -
2
-
3
-
4
-
5
-
6
-
7
-
8
-
9
-
10
-
11
-
12
-
13
-
14
-
15
-
16
-
17
-
18
-
19
-
20
-
21
-
22
-
23
-
24
-
25
-
26
-
27
-
28
-
29
-
30
-
 31
31 -
 32
32 -
 33
33 -
 34
34 -
 35
35 -
 36
36 -
 37
37 -
 38
38 -
 39
39 -
 40
40 -
 41
41 -
42
-
43
-
44
-
45
-
46
-
47
-
48
-
49
-
50
-
51
-
52
-
53
-
54
-
55
-
56
-
57
-
58
-
59
-
60
-
61
-
62
-
63
-
64
-
65
-
66
-
67
-
68
-
69
-
70
-
71
-
72
-
73
-
74
-
75
-
76
-
77
-
78
-
79
-
80
-
81
-
82
-
83
-
84
-
85
-
86
-
87
-
88
-
89
-
90
-
91
-
92
-
93
-
94
-
95
-
96
-
97
-
98
-
99
-
100
-
101
-
102
-
103
-
104
-
105
-
106
-
107
-
108
-
109
-
110
-
111
-
112
 |
 |

Changing the Paper Exit Location
22
Operator’
s Guide
(Pedestal Models Only)
On pedestal model printers you can select
whether the paper exits from the rear or from
the top of the printer
. Normally, you should
select the top exit only when you will be
tearing the forms from the printer and using
them soon after printing. Forms will not stack
when in this mode.
Setting Top Paper Exit
1
Press
Stop
to place the printer in
NOT READY state.
note
If
there is paper in the printer
, unload the
paper (page 41), then continue with step 2
of this procedure.
2
Open the printer cover.
3
Loosen the two hinge adjustment
thumbscrews.
4
Slide the cover toward the rear of the
printer until it stops.
Thumbscrew