IBM 8480 Hardware Maintenance Manual - Page 87
System, board - firmware
 |
UPC - 087944878070
View all IBM 8480 manuals
Add to My Manuals
Save this manual to your list of manuals |
Page 87 highlights
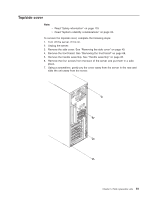
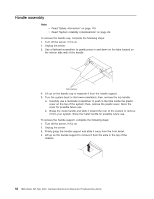
System board Notes: 1. Read "Safety information" on page 119. 2. Read "System reliability considerations" on page 33. 3. When replacing the system board, you must either update the system with the latest firmware or restore the pre-existing firmware that the customer provides on a diskette or CD image. 4. It is recommended that the server be placed on its left side before performing this service procedure. Rotate the feet in toward the server so they do not detach due to the weight of the server. To remove the system board, complete the following steps: 1. Turn off the server, if it is on. 2. Unplug the server. 3. Remove the side cover. See "Removing the side cover" on page 40. 4. Remove the front bezel. See "Removing the front bezel" on page 68. 5. Remove the support bracket. See "Removing the side cover" on page 40. 6. Disconnect the cables. 7. Remove the adapter cards and both adapter retaining brackets (see "Installing an adapter" on page 43). 8. Remove the hot-swap hard disk drive cage. See "Hot-swap hard disk drive cage" on page 72. 9. Remove memory modules. See "Installing memory modules" on page 57. 10. Remove the microprocessor. See "Microprocessor / fan sink" on page 71. 11. Remove screws and lift the system board out of the server. Chapter 5. Field replaceable units 77
-
 1
1 -
2
-
3
-
4
-
5
-
6
-
7
-
8
-
9
-
10
-
11
-
12
-
13
-
14
-
15
-
16
-
17
-
18
-
19
-
20
-
21
-
22
-
23
-
24
-
25
-
26
-
27
-
28
-
29
-
30
-
31
-
32
-
33
-
34
-
35
-
36
-
37
-
38
-
39
-
40
-
41
-
42
-
43
-
44
-
45
-
46
-
47
-
48
-
49
-
50
-
51
-
52
-
53
-
54
-
55
-
56
-
57
-
58
-
59
-
60
-
61
-
62
-
63
-
64
-
65
-
66
-
67
-
68
-
69
-
70
-
71
-
72
-
73
-
74
-
75
-
76
-
77
-
78
-
79
-
80
-
81
-
 82
82 -
 83
83 -
 84
84 -
 85
85 -
 86
86 -
 87
87 -
 88
88 -
 89
89 -
 90
90 -
 91
91 -
 92
92 -
93
-
94
-
95
-
96
-
97
-
98
-
99
-
100
-
101
-
102
-
103
-
104
-
105
-
106
-
107
-
108
-
109
-
110
-
111
-
112
-
113
-
114
-
115
-
116
-
117
-
118
-
119
-
120
-
121
-
122
-
123
-
124
-
125
-
126
-
127
-
128
-
129
-
130
-
131
-
132
-
133
-
134
-
135
-
136
-
137
-
138
-
139
-
140
-
141
-
142
-
143
-
144
-
145
-
146
-
147
-
148
-
149
-
150
-
151
-
152
-
153
-
154
-
155
-
156
-
157
-
158
-
159
-
160
-
161
-
162
-
163
-
164
-
165
-
166
-
167
-
168
-
169
-
170
-
171
-
172
-
173
-
174
 |
 |
