IBM IC35L040AVER07 Reference Manual - Page 21
Replace the computer system cover. - ide
 |
View all IBM IC35L040AVER07 manuals
Add to My Manuals
Save this manual to your list of manuals |
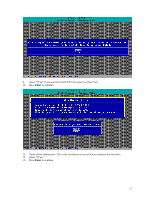
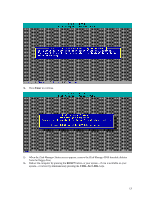
Page 21 highlights
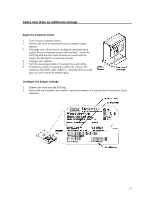
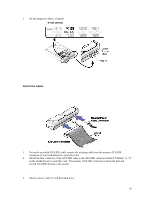
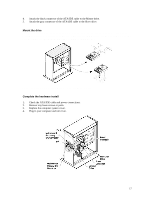
4. Attach the black connector of the ATA/IDE cable to the Master drive. 5. Attach the gray connector of the ATA/IDE cable to the Slave drive. Mount the drive Note: Drive bays and other enclosures vary in size and orientation from system to system. They may be oriented vertically, horizontally, upside down, or sideways. The IBM Deskstar can be mounted with any side or end vertical or horizontal, but must not be mounted in a tilted position. Mount the drive as instructed by your computer system manual. Complete the hardware install 1. Check the ATA/IDE cable and power connections. 2. Recover any loose screws or parts. 3. Replace the computer system cover. 4. Plug in your computer and turn it on. 17
-
 1
1 -
2
-
3
-
4
-
5
-
6
-
7
-
8
-
9
-
10
-
11
-
12
-
13
-
14
-
15
-
 16
16 -
 17
17 -
 18
18 -
 19
19 -
 20
20 -
 21
21 -
 22
22 -
 23
23 -
 24
24 -
 25
25 -
 26
26 -
27
-
28
-
29
-
30
-
31
-
32
-
33
-
34
-
35
-
36
-
37
-
38
-
39
-
40
-
41
-
42
-
43
-
44
-
45
-
46
-
47
-
48
-
49
-
50
-
51
-
52
-
53
-
54
-
55
-
56
-
57
-
58
-
59
-
60
-
61
-
62
-
63
-
64
-
65
-
66
 |
 |

17
4.
Attach the black connector of the ATA/IDE cable to the Master drive.
5.
Attach the gray connector of the ATA/IDE cable to the Slave drive.
Mount the drive
Note: Drive bays and other enclosures vary in size and orientation from system to system.
They may be
oriented vertically, horizontally, upside down, or sideways.
The IBM Deskstar can be mounted with any side
or end vertical or horizontal, but must not be mounted in a tilted position.
Mount the drive as instructed by your computer system manual.
Complete the hardware install
1.
Check the ATA/IDE cable and power connections.
2.
Recover any loose screws or parts.
3.
Replace the computer system cover.
4.
Plug in your computer and turn it on.