Image Fitness 5.2 English Manual - Page 20
bracket
 |
View all Image Fitness 5.2 manuals
Add to My Manuals
Save this manual to your list of manuals |
Page 20 highlights
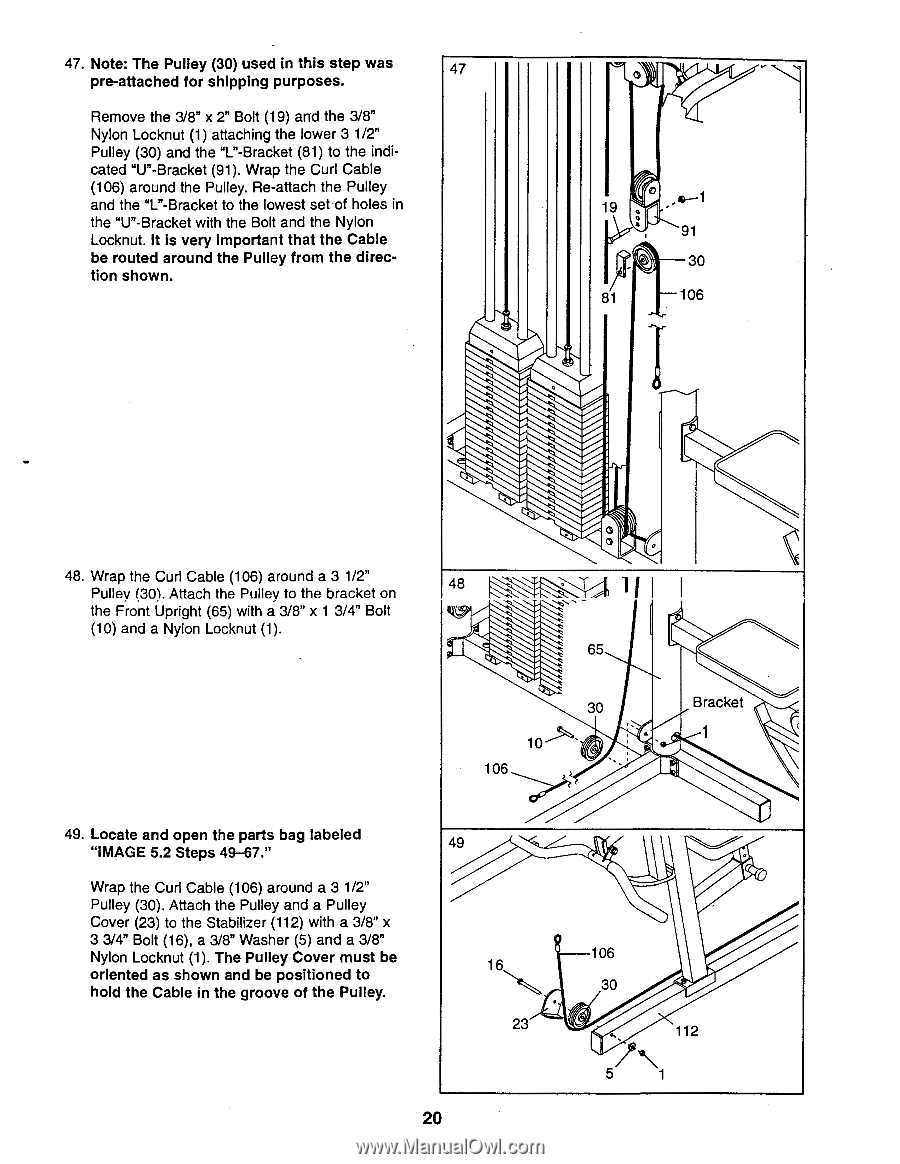
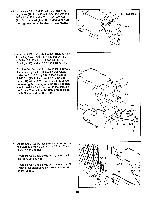
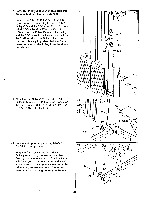
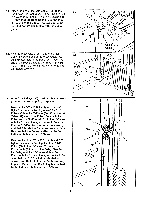
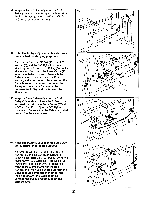
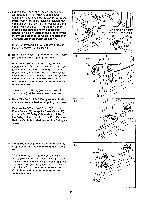
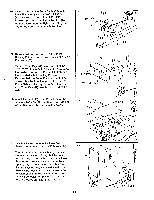
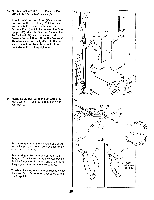
47. Note: The Pulley (30) used in this step was 47 pre-attached for shipping purposes. Remove the 3/8" x 2" Bolt (19) and the 3/8" Nylon Locknut (1) attaching the lower 3 1/2" Pulley (30) and the "L"-Bracket (81) to the indicated "U"-Bracket (91). Wrap the Curl Cable (106) around the Pulley. Re-attach the Pulley and the "L"-Bracket to the lowest set of holes in the "U"-Bracket with the Bolt and the Nylon Locknut. It is very important that the Cable be routed around the Pulley from the direction shown. 0 a a 91 -30 1 106 48. Wrap the Curl Cable (106) around a 3 1/2" Pulley (30). Attach the Pulley to the bracket on the Front Upright (65) with a 3/8" x 1 3/4" Bolt (10) and a Nylon Locknut (1). 0 48 I I 65 10 106 30 ' Bracket 1 49. Locate and open the parts bag labeled "IMAGE 5.2 Steps 49-67." Wrap the Curl Cable (106) around a 3 1/2" Pulley (30). Attach the Pulley and a Pulley Cover (23) to the Stabilizer (112) with a 3/8" x 3 3/4" Bolt (16), a 3/8" Washer (5) and a 3/8" Nylon Locknut (1). The Pulley Cover must be oriented as shown and be positioned to hold the Cable in the groove of the Pulley. 49 16 23 20 106 30 112 57 \ 1
-
 1
1 -
2
-
3
-
4
-
5
-
6
-
7
-
8
-
9
-
10
-
11
-
12
-
13
-
14
-
 15
15 -
 16
16 -
 17
17 -
 18
18 -
 19
19 -
 20
20 -
 21
21 -
 22
22 -
 23
23 -
 24
24 -
 25
25 -
26
-
27
-
28
-
29
-
30
-
31
-
32
-
33
-
34
-
35
-
36
-
37
-
38
-
39
 |
 |