Insignia NS-L19X-10A User Manual (English) - Page 10
Remote control - games
 |
UPC - 600603122453
View all Insignia NS-L19X-10A manuals
Add to My Manuals
Save this manual to your list of manuals |
Page 10 highlights
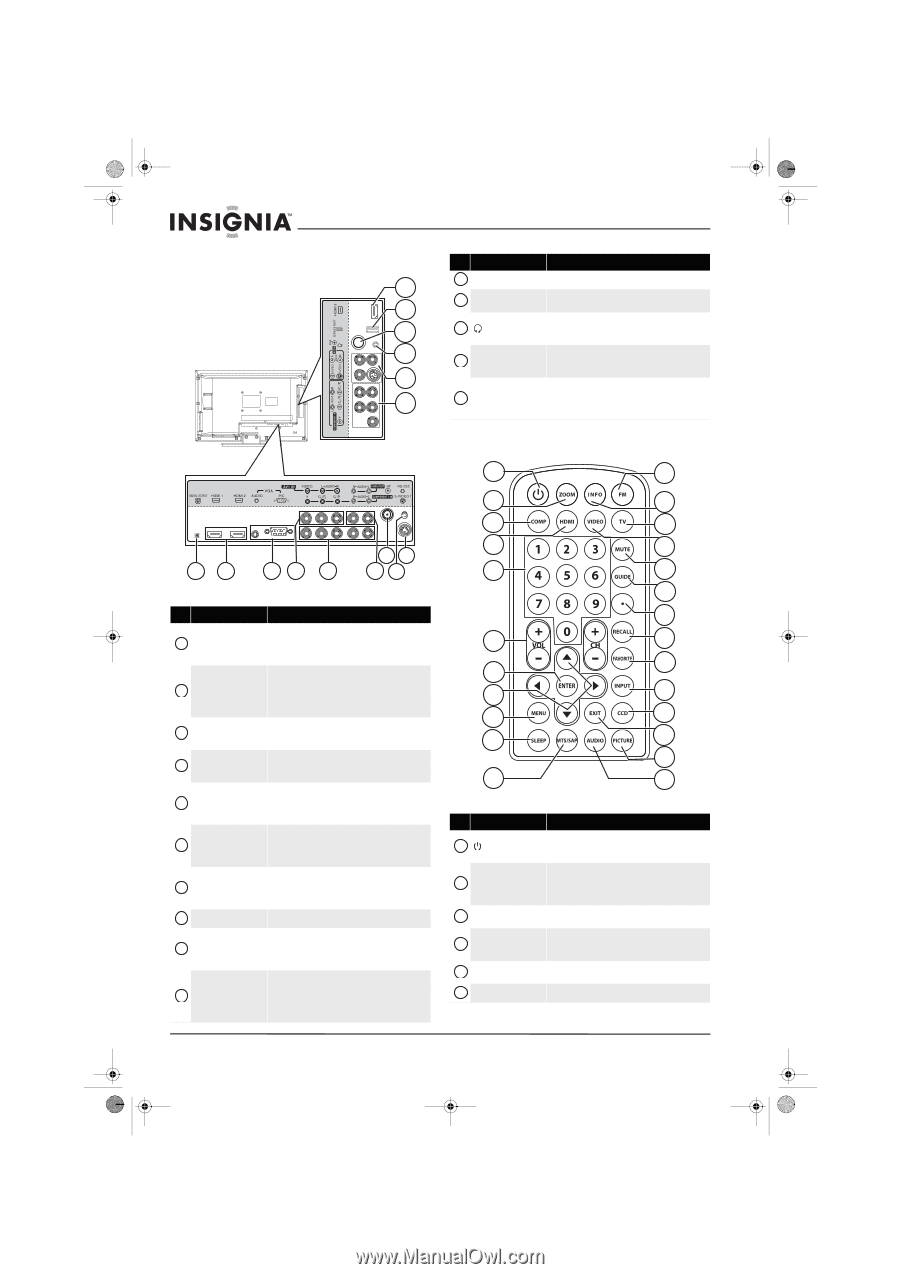
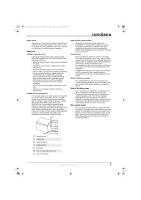
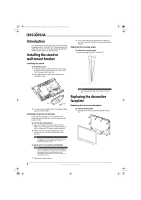
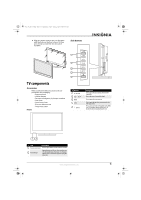
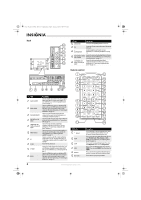
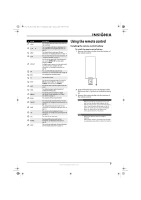
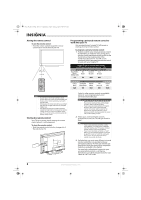
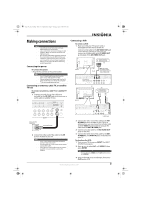
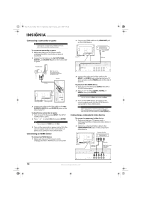
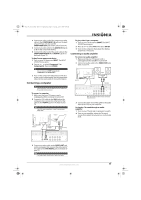
NS-L19X-10A_09-0241_MAN_V2_English.book Page 6 Tuesday, April 7, 2009 9:29 AM Back # Jack Description 10 11 11 SERVICE PORT 12 FM Service port for upgrading firmware. Do not use. Connect the 75 ohm coaxial cable from an FM antenna to this jack. Connect headphones to this jack. For more 12 13 (headphone) information, see "Connecting headphones" on page 12. 13 14 15 14 AV2 IN VIDEO/S-VIDEO2 and L/R AUDIO Connect the video and audio output from an AV device to this jack. For more information, see "Connecting a camcorder or game" on page 10. COMPONENT2 IN Y, 15 Cb/Pb, Cr/Pr and L/R AUDIO Connect the video and audio output from a component video device to these jacks. For more information, see "Connecting a component video device" on page 10. 12 34 5 79 68 # Jack 1 DIGITAL OUTPUT 2 HDMI1/HDMI2 3 VGA AUDIO/VGA PIC 4 AV1 VIDEO and L/R AUDIO COMPONENT1 IN Y, 5 Cb/Pb, Cr/Pr and L/R AUDIO 6 AUDIO OUT L/R 7 RF 8 RS-232 9 S-VIDEO 1 10 HDMI 3 Description Connect a digital optical cable to this jack to output a digital audio signal to a digital audio amplifier. For more information, see "Connecting a digital sound system" on page 12. Connect an HDMI device, such as a cable box or DVD player, to this jack. An HDMI cable carries both video and audio, so you do not need to make an audio connection. For more information, see "Connecting an HDMI device" on page 10. Connect the audio and video outputs from your computer to these jacks. For more information, see "Connecting a computer" on page 11. Connect the video and audio output from an AV device to this jack. For more information, see "Connecting a VCR" on page 9. Connect the video and audio output from a component video device to these jacks. For more information, see "Connecting a component video device" on page 10. Connect these jacks to an external audio amplifier to hear your TV sound through a stereo amplifier. For more information, see "Connecting an audio amplifier" on page 11. Connect an antenna, cable TV, or cable/satellite box output cable to this jack. For more information, see "Connecting an antenna, cable TV, or satellite TV box" on page 9. For service only. Do not use. Connect the S-Video output from a video device such as a DVD player, camcorder, or game console to this jack. For more information, see "Connecting a VCR' on page 9. Connect an HDMI device, such as a cable box or DVD player, to this jack. An HDMI cable carries both video and audio, so you do not need to make an audio connection. For more information, see "Connecting an HDMI device" on page 10. Remote control 1 12 2 13 3 14 4 15 5 16 17 18 6 19 20 7 8 21 9 22 10 23 24 11 25 # Button 1 (power) 2 ZOOM 3 COMP 4 HDMI 5 Numbers 6 VOL +/VOL - Description Press to turn your TV on or off (standby mode). When your TV is turned off, power still flows into it. To disconnect all power, unplug the power cord. Press to select the aspect ratio of the picture. You can select Normal, Zoom, Wide, Cinema, or Auto Zoom. For more information, see "Adjusting the TV picture" on page 16. Press to select a component input source. Press once for Component 1. Press twice for Component 2. Press to select an HDMI input source. Press once for HDMI 1. Press twice for HDMI 2. Press three times for HDMI 3. Press to directly enter channel or FM radio frequency numbers, or to enter the Parental Control password. Press to increase or decrease the volume. 6 www.insigniaproducts.com
-
 1
1 -
2
-
3
-
4
-
 5
5 -
 6
6 -
 7
7 -
 8
8 -
 9
9 -
 10
10 -
 11
11 -
 12
12 -
 13
13 -
 14
14 -
 15
15 -
16
-
17
-
18
-
19
-
20
-
21
-
22
-
23
-
24
-
25
-
26
-
27
-
28
-
29
-
30
-
31
-
32
-
33
-
34
-
35
-
36
-
37
-
38
-
39
-
40
 |
 |