Insignia NS-L19X-10A User Manual (English) - Page 8
Introduction, Installing the stand or, wall-mount bracket, Replacing the decorative, faceplate
 |
UPC - 600603122453
View all Insignia NS-L19X-10A manuals
Add to My Manuals
Save this manual to your list of manuals |
Page 8 highlights
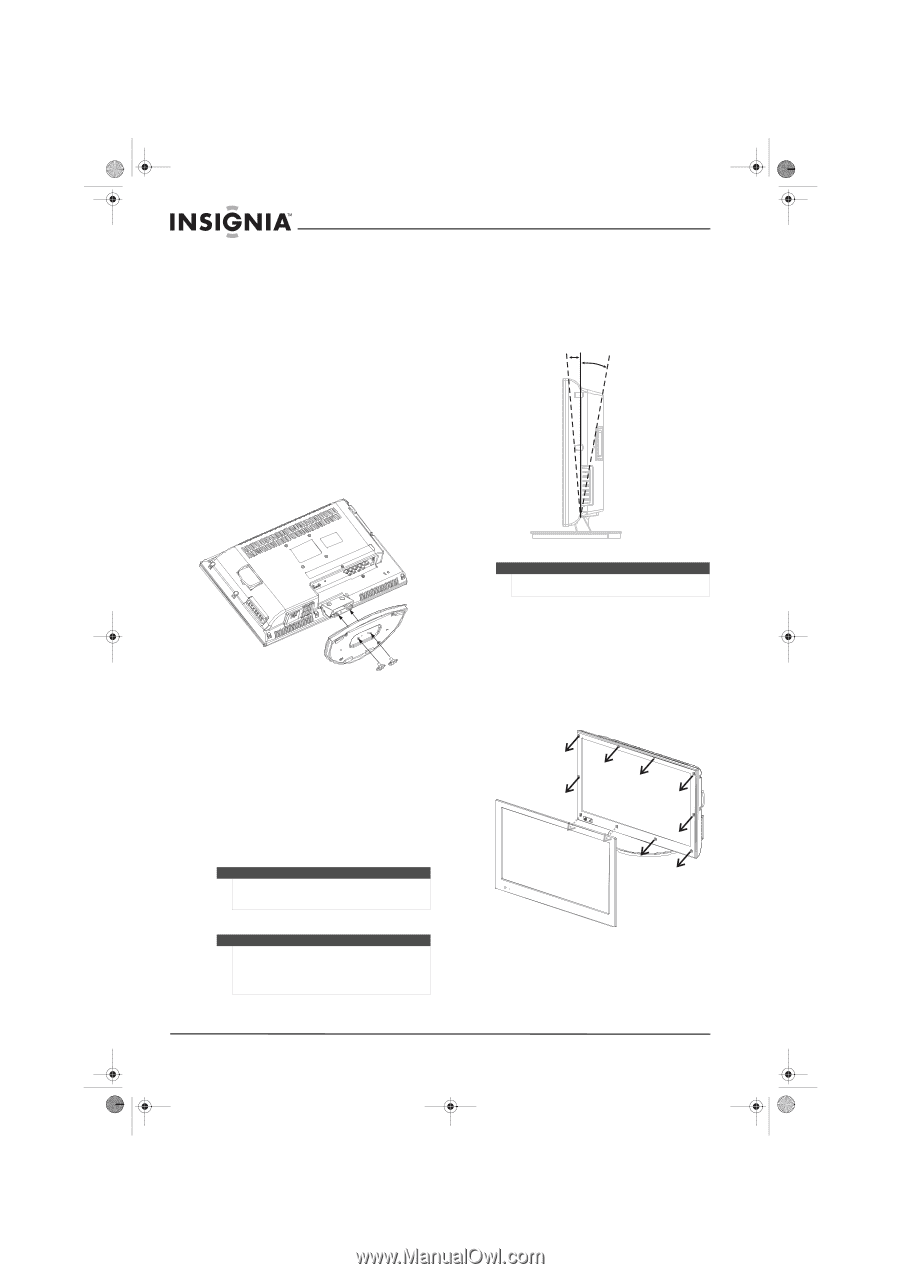
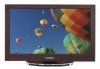
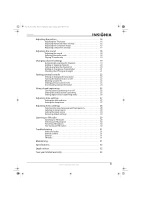
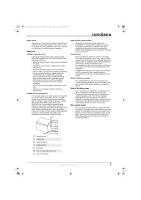
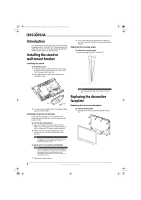
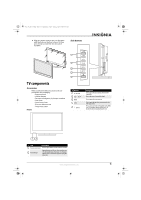
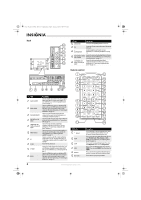
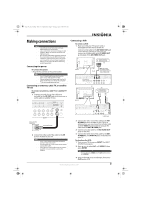
NS-L19X-10A_09-0241_MAN_V2_English.book Page 4 Tuesday, April 7, 2009 9:29 AM Introduction Congratulations on your purchase of a high-quality Insignia product. Your NS-L19X-10A represents the state of the art in LCD TV design and is designed for reliable and trouble-free performance. Installing the stand or wall-mount bracket Installing the stand To install the stand: 1 Carefully place your TV screen face-down on a cushioned, clean surface to protect the screen from damages and scratches. 2 Secure the stand to the screen with the two included screws. 2 Secure the wall-mount bracket to the back of your TV using the four M4 screws provided with bracket. Adjusting the viewing angle To adjust the viewing angle: • Adjust the angle forward 5° to back 10°. -5o 10o Stand Screws 3 To remove the stand from the TV, perform these steps in reverse order. Installing a wall-mount bracket If you want to attach your TV to a wall-mount bracket (not provided), you must first remove the stand column. To remove the stand column: 1 Lay your TV face down on a table or bench. Make sure that you put down a soft cushion or cloth so that your TV does not get scratched. 2 Remove the two screws holding the stand column to your TV, then remove the stand column. Note The appearance of the product in these instructions may differ from your actual product, and is for comparative purposes only. To attach your TV to a wall-mount bracket: Warning These servicing instructions are for use by qualified service personnel only. To reduce the risk of hazards, do not perform any servicing other than that contained in the operating instructions unless you are qualified to do so. 1 Remove the stand column. Caution When adjusting the angle, be careful not to tip the TV. Replacing the decorative faceplate Replacing the decorative faceplate To replace the faceplate: 1 Carefully pull the decorative faceplate off your TV. 4 www.insigniaproducts.com
-
 1
1 -
2
-
 3
3 -
 4
4 -
 5
5 -
 6
6 -
 7
7 -
 8
8 -
 9
9 -
 10
10 -
 11
11 -
 12
12 -
 13
13 -
14
-
15
-
16
-
17
-
18
-
19
-
20
-
21
-
22
-
23
-
24
-
25
-
26
-
27
-
28
-
29
-
30
-
31
-
32
-
33
-
34
-
35
-
36
-
37
-
38
-
39
-
40
 |
 |