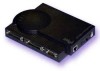
Intel PRO/100 Setup Guide - Page 10
Novell NetWare NDS Print Server Mode, Configuration - listings
 |
UPC - 735858110105
View all Intel PRO/100 manuals
Add to My Manuals
Save this manual to your list of manuals |
Page 10 highlights
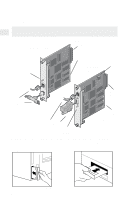
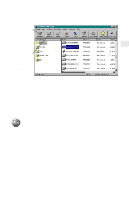
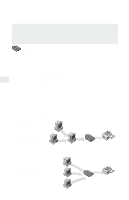
Novell NetWare NDS Print Server Mode Configuration In this mode, the NetportExpress print server replaces the NetWare print server program. The NetportExpress print server polls the NetWare file server queue for print jobs, then sends each job directly to the printer. This speeds up the printing process. Print server mode is recommended because it provides the best printing performance. It requires one NetWare user license for each print server (including multi-port print servers). To set up the print server for NDS print server mode Note: Netport Manager will create any queues or print servers you need for your NetWare setup. You don't have to create these objects in NWADMIN or PCONSOLE. 1 Log in as Admin at the workstation where you installed Netport Manager. 2 Start Netport Manager. 3 Select the print server whose Device ID matches the number of the NetportExpress print server you installed. 4 Click the Configure button. 5 Select Novell NDS Print Server. 6 Select a context for the print server. The context is the container where the print server object will be created. 7 For each printer connected to the print server, click a Port tab and assign an existing queue or add a new queue. • To assign an existing queue, double-click the queue to add it to the Assigned Queues list. • To add a new queue, click New Queues and create the queue. 8 Click OK and exit Netport Manager. To set up a workstation to print At each workstation that will print to this printer, use the capture command or the workstation's print utility to redirect printing to the NetWare queue you set up. For instructions see the NetportExpress Help section on NetWare printing. Tip for NDS print server mode For advanced setup parameters such as LIP (Large Internet Packets), see "Managing the NetportExpress Print Server," page 30. 8
-
 1
1 -
2
-
3
-
4
-
 5
5 -
 6
6 -
 7
7 -
 8
8 -
 9
9 -
 10
10 -
 11
11 -
 12
12 -
 13
13 -
 14
14 -
 15
15 -
16
-
17
-
18
-
19
-
20
-
21
-
22
-
23
-
24
-
25
-
26
-
27
-
28
-
29
-
30
-
31
-
32
-
33
-
34
-
35
-
36
-
37
-
38
-
39
-
40
-
41
-
42
-
43
-
44
-
45
-
46
-
47
-
48
 |
 |
