Intel PRO/100 Setup Guide - Page 30
telnet, smit mkrque
 |
UPC - 735858110105
View all Intel PRO/100 manuals
Add to My Manuals
Save this manual to your list of manuals |
Page 30 highlights
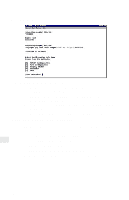
4 Type the NetportExpress IP address in the internet address field and the NetportExpress host name in the Host Name field (Host Name is any valid UNIX host name you choose). 5 Press F12 to exit smit. 6 Connect to the NetportExpress print server by typing: telnet NetportExpress_IP_address 7 Log in as root. 8 From the telnet main menu, choose the TCP/IP Configuration option, such as subnet mask or Gateway address, that you want to configure and press Enter. 9 Define the parameters for each option you want to configure and press Enter. 10 Exit the telnet screen. 11 Test your network setup and connection by typing ping NetportExpress_host_name To set up printing on AIX 4.1 1 Log in as root and type smit mkrque 2 From the Attachment Type field, choose remote. 3 Type an entry for the option you want to configure for remote printing. • Name of queue to add. Type the name of the local print queue. • HOSTNAME of remote server. Type the HOSTNAME of the PRO/100 you added to the host table. • Name of QUEUE on remote server. Valid queue names are: LPT1_PASSTHRU or LPT1_TEXT (for parallel port 1 or the internal card) LPT2_PASSTHRU or LPT2_TEXT (for parallel port 2) COM1_PASSTHRU or COM1_TEXT (for the serial port) Note: Use PASSTHRU for PCL, PostScript, or application files and TEXT for standard AIX text files. • Type of print spooler on remote server. Click list, then click BSD, the printing protocol of the NetportExpress print server. 4 Click OK, then click Done to save your configuration. 5 Click Cancel to exit smit. 6 Test AIX printing with the NetportExpress print server. From the AIX workstation, type 28
-
 1
1 -
2
-
3
-
4
-
5
-
6
-
7
-
8
-
9
-
10
-
11
-
12
-
13
-
14
-
15
-
16
-
17
-
18
-
19
-
20
-
21
-
22
-
23
-
24
-
 25
25 -
 26
26 -
 27
27 -
 28
28 -
 29
29 -
 30
30 -
 31
31 -
 32
32 -
 33
33 -
 34
34 -
 35
35 -
36
-
37
-
38
-
39
-
40
-
41
-
42
-
43
-
44
-
45
-
46
-
47
-
48
 |
 |