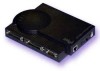
Intel PRO/100 Setup Guide - Page 17
Printing in Windows NT using LPR
 |
UPC - 735858110105
View all Intel PRO/100 manuals
Add to My Manuals
Save this manual to your list of manuals |
Page 17 highlights
To set up a Windows for Workgroups workstation to print to a shared printer 1 From Print Manager, click the Printer menu, and then click Connect to Printer. 2 In the Connect to Printer window, select the Share Name for the printer you set up on the Windows 95 or Windows NT system where you installed the NetportExpress Port Monitor. To set up a Windows for Workgroups workstation to print directly to a printer 1 Start Print Manager on the Windows for Workgroups system. 2 Open Printers. 3 From the Printers menu, choose Connect to Printer. 4 Select the new printer in the Show Shared Printers list. The NetportExpress print server will appear in the domain you configured in Netport Manager. Printing in Windows NT using LPR You can print in Windows NT using lpr. This topic is covered in the NetportExpress Help. The NetportExpress print server must have an assigned IP address to print using lpr. Setting an IP address in Windows NT using ARP (Address Resolution Protocol) 1 Make sure you are in the same network segment as the NetportExpress print server. 2 From a Windows NT or Windows 95 workstation, go to the command prompt. 3 Type: arp -s ip_address network_address where ip_address is the IP address you want to assign to the NetportExpress print server. network_address is the 12-character network address printed on the bottom of the NetportExpress print server. For Windows NT, the address must be typed in this format: xx-xx-xx-xx-xx-xx. Example: 00-A0-C9-12-34-56 4 Set the IP address on the print server by typing ping ip_address where ip_address is the address you used in step 3. 15
-
 1
1 -
2
-
3
-
4
-
5
-
6
-
7
-
8
-
9
-
10
-
11
-
 12
12 -
 13
13 -
 14
14 -
 15
15 -
 16
16 -
 17
17 -
 18
18 -
 19
19 -
 20
20 -
 21
21 -
 22
22 -
23
-
24
-
25
-
26
-
27
-
28
-
29
-
30
-
31
-
32
-
33
-
34
-
35
-
36
-
37
-
38
-
39
-
40
-
41
-
42
-
43
-
44
-
45
-
46
-
47
-
48
 |
 |
