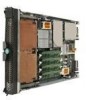
Intel SBXD132 User Guide - Page 59
Completing the Installation, installed. For additional information
 |
UPC - 735858189408
View all Intel SBXD132 manuals
Add to My Manuals
Save this manual to your list of manuals |
Page 59 highlights
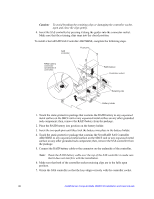
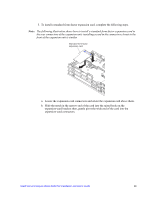
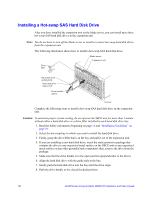
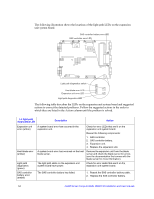
Caution: Make sure that a drive filler is installed in any disk drive bay that does not contain a hard disk drive. 9. Make sure that the host blade server is turned on; then, check the hard disk drive LEDs to make sure that the drive is operating correctly. - If the green hard disk drive activity LED is flashing, the drive is being accessed. - If the amber hard disk drive status LED is lit continuously, that drive is faulty and must be replaced. Completing the Installation To complete the installation, complete the following tasks: 1. Install the cover on the expansion unit (see "Installing the Expansion Unit Cover" on page 43). 2. Insert the combined blade server and expansion unit into the SBCE unit. Note: Make sure that the SBCE unit has the required number of power modules present to supply power to the blade bay in which the expansion unit is installed. For additional information, see the documentation that comes with the SBCE unit. 3. If you have hot-swap hard disk drives to install in the expansion unit, do so now (see "Installing a Hot-swap SAS Hard Disk Drive" on page 50). Make sure that a drive filler is installed in any disk drive bay that does not contain a hard disk drive. 4. Turn on the blade server. 5. If you have just installed a ServeRAID SAS controller, complete the following steps: a. If you want to include the host blade server hard disk drives in the expansion unit RAID, use the configuration utility in the blade server to enable this option (see the documentation that comes with the blade server for more information). b. Use a RAID configuration program to create and manage the RAID (see "Configuring the Expansion Unit RAID Array" on page 52 for more information). Intel® Server Compute Blade SBXD132 Installation and User's Guide 51
-
 1
1 -
2
-
3
-
4
-
5
-
6
-
7
-
8
-
9
-
10
-
11
-
12
-
13
-
14
-
15
-
16
-
17
-
18
-
19
-
20
-
21
-
22
-
23
-
24
-
25
-
26
-
27
-
28
-
29
-
30
-
31
-
32
-
33
-
34
-
35
-
36
-
37
-
38
-
39
-
40
-
41
-
42
-
43
-
44
-
45
-
46
-
47
-
48
-
49
-
50
-
51
-
52
-
53
-
 54
54 -
 55
55 -
 56
56 -
 57
57 -
 58
58 -
 59
59 -
 60
60 -
 61
61 -
 62
62 -
 63
63 -
 64
64 -
65
-
66
-
67
-
68
-
69
-
70
-
71
-
72
-
73
-
74
-
75
-
76
-
77
-
78
-
79
-
80
-
81
-
82
-
83
-
84
-
85
-
86
-
87
-
88
-
89
-
90
-
91
-
92
-
93
-
94
-
95
-
96
-
97
-
98
-
99
-
100
-
101
-
102
-
103
-
104
-
105
-
106
-
107
-
108
-
109
-
110
-
111
-
112
-
113
-
114
-
115
-
116
-
117
-
118
-
119
-
120
-
121
-
122
-
123
-
124
-
125
-
126
-
127
-
128
-
129
-
130
 |
 |