Intel SC450NX Product Guide - Page 84
Installing a Power Supply, See FRU and SDR Load Utility
 |
View all Intel SC450NX manuals
Add to My Manuals
Save this manual to your list of manuals |
Page 84 highlights
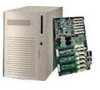
Installing a Power Supply 1. Slide the power supply into its bay. 2. With even force on the flared, vertical edges, push toward the front of the system until the edges rest against the rear of the chassis and the supply engages its connector. 3. Install and tighten the four screws holding the supply to the back of the chassis. 4. Install the access cover. 5. Connect the AC power cable. You must slide the cover on the AC connector to access the connector itself (A in Figure 22). 6. Run the FRUSDR load utility to properly configure the system after adding new components. See "FRU and SDR Load Utility" on page 69. 84
-
 1
1 -
2
-
3
-
4
-
5
-
6
-
7
-
8
-
9
-
10
-
11
-
12
-
13
-
14
-
15
-
16
-
17
-
18
-
19
-
20
-
21
-
22
-
23
-
24
-
25
-
26
-
27
-
28
-
29
-
30
-
31
-
32
-
33
-
34
-
35
-
36
-
37
-
38
-
39
-
40
-
41
-
42
-
43
-
44
-
45
-
46
-
47
-
48
-
49
-
50
-
51
-
52
-
53
-
54
-
55
-
56
-
57
-
58
-
59
-
60
-
61
-
62
-
63
-
64
-
65
-
66
-
67
-
68
-
69
-
70
-
71
-
72
-
73
-
74
-
75
-
76
-
77
-
78
-
 79
79 -
 80
80 -
 81
81 -
 82
82 -
 83
83 -
 84
84 -
 85
85 -
 86
86 -
 87
87 -
 88
88 -
 89
89 -
90
-
91
-
92
-
93
-
94
-
95
-
96
-
97
-
98
-
99
-
100
-
101
-
102
-
103
-
104
-
105
-
106
-
107
-
108
-
109
-
110
-
111
-
112
-
113
-
114
-
115
-
116
-
117
-
118
-
119
-
120
-
121
-
122
-
123
-
124
-
125
-
126
-
127
-
128
-
129
-
130
-
131
-
132
-
133
-
134
-
135
-
136
-
137
-
138
-
139
-
140
-
141
-
142
-
143
-
144
-
145
-
146
-
147
-
148
-
149
-
150
-
151
-
152
-
153
-
154
-
155
-
156
-
157
-
158
-
159
-
160
-
161
-
162
-
163
-
164
-
165
-
166
-
167
-
168
-
169
-
170
-
171
-
172
-
173
-
174
-
175
-
176
-
177
-
178
-
179
-
180
-
181
-
182
-
183
-
184
-
185
-
186
-
187
-
188
-
189
-
190
-
191
-
192
-
193
-
194
-
195
-
196
-
197
-
198
-
199
-
200
 |
 |

84
Installing a Power Supply
1.
Slide the power supply into its bay.
2.
With even force on the flared, vertical edges, push toward the front of the system until the
edges rest against the rear of the chassis and the supply engages its connector.
3.
Install and tighten the four screws holding the supply to the back of the chassis.
4.
Install the access cover.
5.
Connect the AC power cable.
You must slide the cover on the AC connector to access the
connector itself (A in Figure 22).
6.
Run the FRUSDR load utility to properly configure the system after adding new components.
See “FRU and SDR Load Utility” on page 69.