JVC EX A10 Instructions - Page 16
Hold down BASS ADJUST for 2 - subwoofer
 |
UPC - 046838022005
View all JVC EX A10 manuals
Add to My Manuals
Save this manual to your list of manuals |
Page 16 highlights
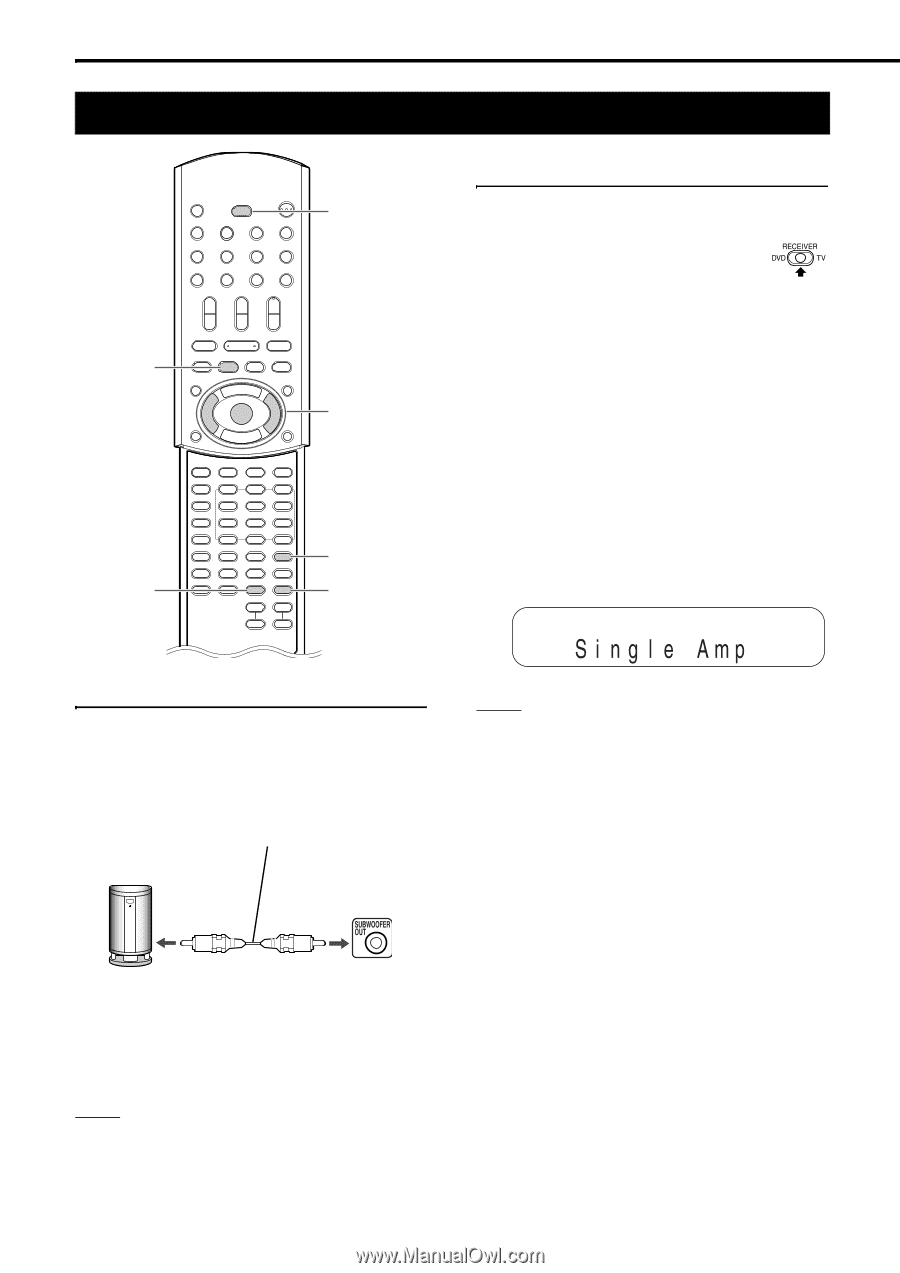
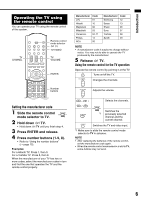
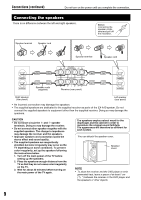
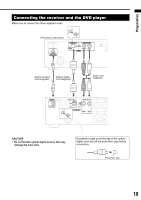
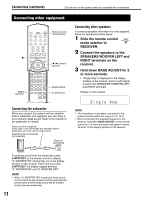
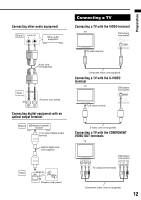
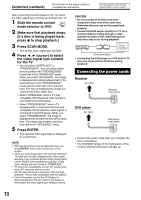
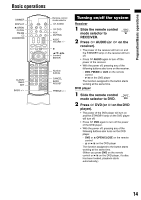
Connections (continued) Do not turn on the power until you complete the connection. Connecting other equipment Remote control mode selector 7 BASS ADJUST 2 /3 (cursor)/ ENTER SCAN MODE S. WFR OUT Connecting other speakers To connect speakers other than the ones supplied, follow the operations shown below. 1 Slide the remote control mode selector to RECEIVER. 2 Connect the speakers to the SPEAKERS WOOFER LEFT and RIGHT terminals on the receiver. 3 Hold down BASS ADJUST for 2 or more seconds. • "Single Amp" is displayed in the display window on the receiver, and no audio signal is sent to the SPEAKERS TWEETER LEFT and RIGHT terminals. Display on the receiver Connecting the subwoofer When you connect this system with an amplifierbuilt-in subwoofer (not supplied), you can enjoy a more dynamic bass sound. Refer to the manual of the subwoofer for details. Audio cord (not supplied) (If an audio cord comes with the amplifier-built-in subwoofer, you can use the audio cord.) Amplifier-built-in subwoofer (not supplied) Receiver (rear panel) NOTE • The impedance of speakers connected to this system must be within the range 6 C to 16 C. • When connecting the supplied speakers to the receiver, hold down BASS ADJUST on the remote control for 2 or more seconds once again to select "Bi-Amp" in the display window on the receiver. To produce sound from the subwoofer, press S.WFR OUT on the remote control to display "S. WOOFER ON" (Subwoofer on) in the display window on the receiver. Each time you press S.WFR OUT, the display toggles between "S. WOOFER ON" and "S. WOOFER OFF". NOTE • When "S. WOOFER ON" is selected, bass sound from the left and right speakers will be automatically turned down and the bass sound will be emitted mainly from the subwoofer. 11
-
 1
1 -
2
-
3
-
4
-
5
-
6
-
7
-
8
-
9
-
10
-
 11
11 -
 12
12 -
 13
13 -
 14
14 -
 15
15 -
 16
16 -
 17
17 -
 18
18 -
 19
19 -
 20
20 -
 21
21 -
22
-
23
-
24
-
25
-
26
-
27
-
28
-
29
-
30
-
31
-
32
-
33
-
34
-
35
-
36
-
37
-
38
-
39
-
40
-
41
-
42
-
43
-
44
-
45
-
46
-
47
-
48
-
49
-
50
-
51
-
52
-
53
-
54
-
55
-
56
-
57
-
58
-
59
-
60
 |
 |