Kenwood TS-480HX Operation Manual - Page 71
Display, Linear Amplifier Control, Lock Functions
 |
View all Kenwood TS-480HX manuals
Add to My Manuals
Save this manual to your list of manuals |
Page 71 highlights
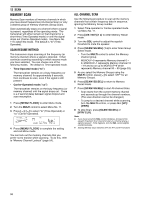
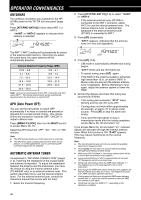
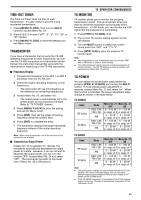
DISPLAY BRIGHTNESS The brightness of the LCD display can be selected from OFF, and 1 to 4 by accessing Menu No. 00. 1 Press [MENU/ F.LOCK], then turn the MULTI control to access Menu No. 00. 2 Press [ ]/ [ ] to select "oFF", "1", "2", "3", or "4". 3 Press [MENU/ F.LOCK] to store the setting and exit Menu mode. KEY ILLUMINATION The Remote Control panel key illumination can be switched ON or OFF. 1 Press [MENU/ F.LOCK], then turn the MULTI control to access Menu No. 01. 2 Press [ ]/ [ ] to select "oFF" or "on". 3 Press [MENU/ F.LOCK] to store the setting and exit Menu mode. LINEAR AMPLIFIER CONTROL When you connect an external HF or 50 MHz linear amplifier to the transceiver using the REMOTE connector, select "1", "2", or "3" to activate the internal relay and/ or DC output (12 V) so you can interface with the HF/ 50 MHz linear amplifier {page 80}. The DC output (12 V) works without any annoying chattering sounds ("1") but the output current is limited to 10 mA. If your linear amplifier control circuit draws more than DC 12 V/ 10 mA, use the relay switching ("2" or "3") instead. Also, some linear amplifiers require a long transmission delay time because of the slow antenna relay switching time. In this case, select "3" for the slow switching (25 ms delay). 1 Press [MENU/ F.LOCK], then turn the MULTI control to select Menu No. 28 (HF) or 29 (50 MHz). 2 Press [ ]/ [ ] to select "oFF", "1", "2", or "3". Parameter oFF (default) 1 2 3 Linear Amp. control All controls Disabled DC output (12 V) Relay TX delay DC output (12 V) Relay TX delay DC output (12 V) Relay TX delay Enabled Disabled 10 ms Enabled Enabled 10 ms Enabled Enabled 25 ms Note: If CW Full Break-in is enabled, 10 ms transmission delay is applied regardless of the settings in Menu Nos. 28 and 29. 13 OPERATOR CONVENIENCES LOCK FUNCTIONS FREQUENCY LOCK FUNCTION Frequency Lock disables some keys and controls to prevent you from accidentally activating a function or changing the current settings. Press [MENU/ F.LOCK] (1 s) to turn the Frequency Lock function ON or OFF. • " " appears while this function is ON. The following keys and controls are disabled by Frequency Lock: Tuning control QMI/ M.IN CW.T A=B/ SPLIT Mic [DWN] MULTI control SCAN/ SG.SEL QMR/ MsVFO MHz ENT MODE A/B / M/V Mic [UP] Note: ◆ After activating Frequency Lock, the MULTI control and [ ]/ [ ] are still available in Menu mode. ◆ After activating Frequency Lock, you can still change the transmission frequency with the Tuning control while in TF-SET mode. ◆ After activating Frequency Lock, the MULTI control is still available for selections other than frequency and memory channel changes. ◆ After activating Frequency Lock, [MTR/ CLR] may be available in some situations. TUNING CONTROL LOCK FUNCTION The Tuning control lock function disables the Tuning control. The function can be used in the following situations: • You do not want to change the operating frequency while you are driving the car. To use the Tuning control lock function, first assign the function to the PF key on the Remote Control panel (or Mic PF keys). 1 Press [MENU/ F.LOCK] and turn the MULTI control to select Menu No. 48. 2 Press [ ]/ [ ] to select "65". 3 Press [MENU/ F.LOCK] to store the setting and exit the Menu mode. 4 Press [PF]. • " " appears and the Tuning control is now locked. To return to normal operation, press [PF] again. 63
-
 1
1 -
2
-
3
-
4
-
5
-
6
-
7
-
8
-
9
-
10
-
11
-
12
-
13
-
14
-
15
-
16
-
17
-
18
-
19
-
20
-
21
-
22
-
23
-
24
-
25
-
26
-
27
-
28
-
29
-
30
-
31
-
32
-
33
-
34
-
35
-
36
-
37
-
38
-
39
-
40
-
41
-
42
-
43
-
44
-
45
-
46
-
47
-
48
-
49
-
50
-
51
-
52
-
53
-
54
-
55
-
56
-
57
-
58
-
59
-
60
-
61
-
62
-
63
-
64
-
65
-
 66
66 -
 67
67 -
 68
68 -
 69
69 -
 70
70 -
 71
71 -
 72
72 -
 73
73 -
 74
74 -
 75
75 -
 76
76 -
77
-
78
-
79
-
80
-
81
-
82
-
83
-
84
-
85
-
86
-
87
-
88
-
89
-
90
-
91
-
92
-
93
-
94
-
95
-
96
-
97
-
98
-
99
-
100
-
101
-
102
-
103
-
104
 |
 |
