Kyocera ECOSYS FS-1120D DRIVER DOWNLOAD Kyocera Command Center RX User Guide R - Page 51
FAX Sub Address, TX Start Speed
 |
View all Kyocera ECOSYS FS-1120D DRIVER DOWNLOAD manuals
Add to My Manuals
Save this manual to your list of manuals |
Page 51 highlights
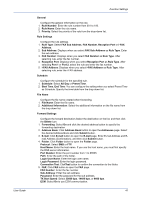
User Guide Function Settings General Configure the general information on the rule. 1. Rule Number: Enter the rule number from 001 to 100. 2. Rule Name: Enter the rule name. 3. Priority: Select the priority of the rule from the drop-down list. Rule Settings Configure the rule settings. 1. Rule Type: Select FAX Sub Address, FAX Number, Reception Port or i-FAX Address. 2. Sub Address: Displays when you select FAX Sub Address as Rule Type. Enter the sub address. 3. FAX Number: Displays when you select FAX Number as Rule Type. After selecting rule, enter the fax number. 4. Reception Port: Displays when you select Reception Port as Rule Type. After selecting Port 1 or Port 2, select the rule and enter the fax number. 5. i-FAX Address: Displays when you select i-FAX Address as Rule Type. After selecting rule, enter the i-FAX address. Schedule Configure the schedule for the specified rule. 1. Schedule: Select All Day or Preset Time. 2. Start Time, End Time: You can configure the setting when you select Preset Time as Schedule. Specify the time table from the drop-down list. File Name Configure the file name created when forwarding. 1. File Name: Enter the file name. 2. Additional Information: Select the additional information on the file name from the drop-down list. Forward Settings Configure the forward destination.Select the destination on the list, and then click the Delete icon. 1. Forwarding: Select On and click the desired address button to specify the forwarding destination. 2. Address Book: Click Address Book button to open the Addresses page. Select the desired Address Book and click Submit button. 3. E-mail: Click E-mail button to open the E-mail page. Enter E-mail Address and E- mail Address (Confirmation), and then click Submit button. 4. Folder: Click Folder button to open the Folder page. Protocol: Select SMB or FTP. Host Name: Enter the host name. If you use the host name, you must first specify the DNS server information. Port Number: Enter the port number from 1 to 65535. Path: Enter the path of the folder. Login User Name: Enter the login user name. Login Password: Enter the login password. Connection Test: ClickTest button to confirm the connection to the folder. 5. FAX: Click FAX button to open the FAX page. FAX Number: Enter the fax number. Sub Address: Enter the sub address. Password: Enter the password for the sub address. TX Start Speed: Select 33600 bps, 14400 bps, or 9600 bps. ECM: Select On to use ECM communication. 47
-
 1
1 -
2
-
3
-
4
-
5
-
6
-
7
-
8
-
9
-
10
-
11
-
12
-
13
-
14
-
15
-
16
-
17
-
18
-
19
-
20
-
21
-
22
-
23
-
24
-
25
-
26
-
27
-
28
-
29
-
30
-
31
-
32
-
33
-
34
-
35
-
36
-
37
-
38
-
39
-
40
-
41
-
42
-
43
-
44
-
45
-
 46
46 -
 47
47 -
 48
48 -
 49
49 -
 50
50 -
 51
51 -
 52
52 -
 53
53 -
 54
54 -
 55
55 -
 56
56 -
57
-
58
-
59
-
60
-
61
-
62
-
63
-
64
-
65
-
66
-
67
-
68
-
69
-
70
-
71
-
72
-
73
-
74
-
75
-
76
-
77
-
78
-
79
-
80
-
81
-
82
-
83
-
84
-
85
-
86
-
87
-
88
-
89
-
90
-
91
-
92
-
93
-
94
-
95
-
96
-
97
-
98
 |
 |
