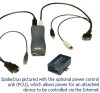
Lantronix SpiderDuo Lantronix Spider / SpiderDuo - User Guide - Page 74
Refresh List, Enable Write support
 |
View all Lantronix SpiderDuo manuals
Add to My Manuals
Save this manual to your list of manuals |
Page 74 highlights
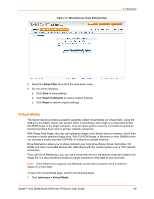
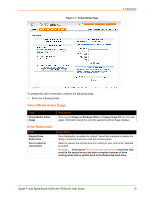
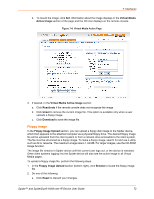
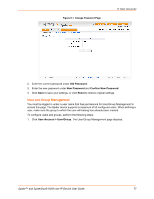
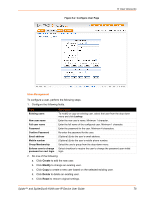
Figure 7-10 Drive Redirection Window 7: Interfaces Figure 7-11 Drive Redirect Buttons 3. Click the Connect Drive button at the top of the page. The Select a drive to redirect dialog box opens. Figure 7-12 Select Drive Redirect Window 4. From the drop-down list, select the drive you want to redirect. Note: To refresh the list after adding or removing a drive, click the Refresh List button. 5. If desired, select the Enable Write support check box. 6. Click OK. Depending on your selections, the following events or warnings display: 7. If you select Enable Write support, the following warning displays: Figure 7-13 Enable Write Support Window Because of the danger of destroying all data on the drive, click Yes only if you are certain of what you are doing. If you select the hard disk from the drop-down list, the following warning may display: Spider™ and SpiderDuo® KVM-over-IP Device User Guide 74
-
 1
1 -
2
-
3
-
4
-
5
-
6
-
7
-
8
-
9
-
10
-
11
-
12
-
13
-
14
-
15
-
16
-
17
-
18
-
19
-
20
-
21
-
22
-
23
-
24
-
25
-
26
-
27
-
28
-
29
-
30
-
31
-
32
-
33
-
34
-
35
-
36
-
37
-
38
-
39
-
40
-
41
-
42
-
43
-
44
-
45
-
46
-
47
-
48
-
49
-
50
-
51
-
52
-
53
-
54
-
55
-
56
-
57
-
58
-
59
-
60
-
61
-
62
-
63
-
64
-
65
-
66
-
67
-
68
-
 69
69 -
 70
70 -
 71
71 -
 72
72 -
 73
73 -
 74
74 -
 75
75 -
 76
76 -
 77
77 -
 78
78 -
 79
79 -
80
-
81
-
82
-
83
-
84
-
85
-
86
-
87
-
88
-
89
-
90
-
91
-
92
-
93
-
94
-
95
-
96
-
97
-
98
-
99
-
100
-
101
-
102
-
103
-
104
-
105
-
106
-
107
-
108
-
109
-
110
-
111
-
112
-
113
-
114
-
115
-
116
-
117
-
118
-
119
-
120
-
121
-
122
-
123
-
124
-
125
-
126
-
127
-
128
-
129
-
130
-
131
-
132
-
133
 |
 |
