Lenovo ThinkPad 560E TP 560Z User's Guide that was provided with the system in - Page 67
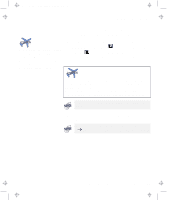
Start the ThinkPad Configuration program., LCD + External Display, External, Display
 |
View all Lenovo ThinkPad 560E manuals
Add to My Manuals
Save this manual to your list of manuals |
Page 67 highlights
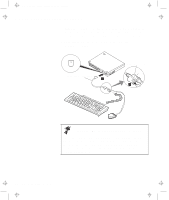
Title: C79FPMST CreationDate: 06/22/98 12:26:52 Attaching an External Monitor Do not change the display output location while a moving picture is being drawn-for example, playing a movie or a game. Stop the application before changing the display output location. 4 Start the ThinkPad Configuration program. See "ThinkPad Configuration Program" on page 25. 5 Change the display output location by clicking on the LCD + External Display ( ) button or the External Display ( ) button (with Windows 98, at the top left of the screen; with Windows NT, a little to the right of the top center of the screen). If you are attaching an external monitor that supports only VGA mode (640-by-480 resolution), do not click on LCD + External Display. Doing so would cause the external monitor screen to be scrambled and the output not to be displayed; in addition, the screen might become damaged. Use External Display instead. You can also change the display output location by pressing Fn+F7. 6 Set your monitor type and display device driver as follows. For information on the supported color depths and resolutions, "Resolutions, Color Depths, and Frame Rates" on page 54. Chapter 2. Extending the Features of Your Computer 53
-
 1
1 -
2
-
3
-
4
-
5
-
6
-
7
-
8
-
9
-
10
-
11
-
12
-
13
-
14
-
15
-
16
-
17
-
18
-
19
-
20
-
21
-
22
-
23
-
24
-
25
-
26
-
27
-
28
-
29
-
30
-
31
-
32
-
33
-
34
-
35
-
36
-
37
-
38
-
39
-
40
-
41
-
42
-
43
-
44
-
45
-
46
-
47
-
48
-
49
-
50
-
51
-
52
-
53
-
54
-
55
-
56
-
57
-
58
-
59
-
60
-
61
-
 62
62 -
 63
63 -
 64
64 -
 65
65 -
 66
66 -
 67
67 -
 68
68 -
 69
69 -
 70
70 -
 71
71 -
 72
72 -
73
-
74
-
75
-
76
-
77
-
78
-
79
-
80
-
81
-
82
-
83
-
84
-
85
-
86
-
87
-
88
-
89
-
90
-
91
-
92
-
93
-
94
-
95
-
96
-
97
-
98
-
99
-
100
-
101
-
102
-
103
-
104
-
105
-
106
-
107
-
108
-
109
-
110
-
111
-
112
-
113
-
114
-
115
-
116
-
117
-
118
-
119
-
120
-
121
-
122
-
123
-
124
-
125
-
126
-
127
-
128
-
129
-
130
-
131
-
132
-
133
-
134
-
135
-
136
-
137
-
138
-
139
-
140
-
141
-
142
-
143
-
144
-
145
-
146
-
147
-
148
-
149
-
150
-
151
-
152
-
153
-
154
-
155
-
156
-
157
-
158
-
159
-
160
-
161
-
162
-
163
-
164
-
165
-
166
-
167
-
168
-
169
-
170
-
171
-
172
-
173
-
174
-
175
-
176
-
177
-
178
-
179
-
180
-
181
-
182
-
183
-
184
-
185
-
186
-
187
-
188
-
189
 |
 |