Lexmark C772N C77x - Setup Guide - Page 20
Installing printer memory or option cards, Accessing the printer system board
 |
UPC - 734646047227
View all Lexmark C772N manuals
Add to My Manuals
Save this manual to your list of manuals |
Page 20 highlights
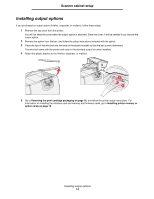
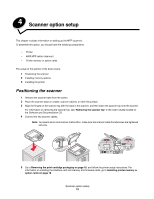
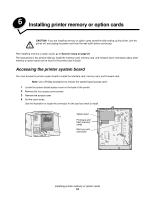
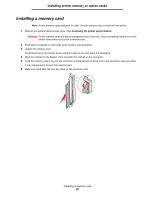
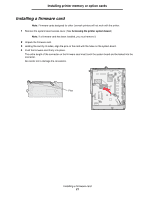
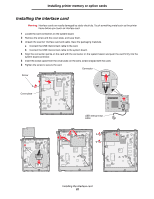
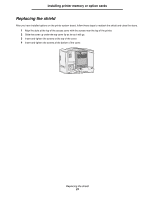
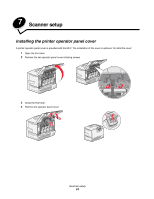
6 Installing printer memory or option cards CAUTION: If you are installing memory or option cards sometime after setting up the printer, turn the printer off, and unplug the power cord from the wall outlet before continuing. After installing memory or option cards, go to Scanner setup on page 24. The instructions in this section help you install the interface card, memory card, and firmware card. Information about other memory or option cards can be found in the printer User's Guide. Accessing the printer system board You must access the printer system board to install the interface card, memory card, and firmware card. Note: Use a Phillips screwdriver to remove the system board access cover. 1 Locate the system board access cover on the back of the printer. 2 Remove the four access cover screws. 3 Remove the access cover. 4 Set the cover aside. Use the illustration to locate the connector for the card you want to install. Option card Firmware and flash memory cards Memory card connector Installing printer memory or option cards 19
-
 1
1 -
2
-
3
-
4
-
5
-
6
-
7
-
8
-
9
-
10
-
11
-
12
-
13
-
14
-
 15
15 -
 16
16 -
 17
17 -
 18
18 -
 19
19 -
 20
20 -
 21
21 -
 22
22 -
 23
23 -
 24
24 -
 25
25 -
26
-
27
-
28
-
29
-
30
-
31
-
32
-
33
-
34
-
35
 |
 |