Lexmark X342N User's Guide - Page 91
Error messages troubleshooting, USB Not Connected - scanner locked
 |
UPC - 734646256292
View all Lexmark X342N manuals
Add to My Manuals
Save this manual to your list of manuals |
Page 91 highlights
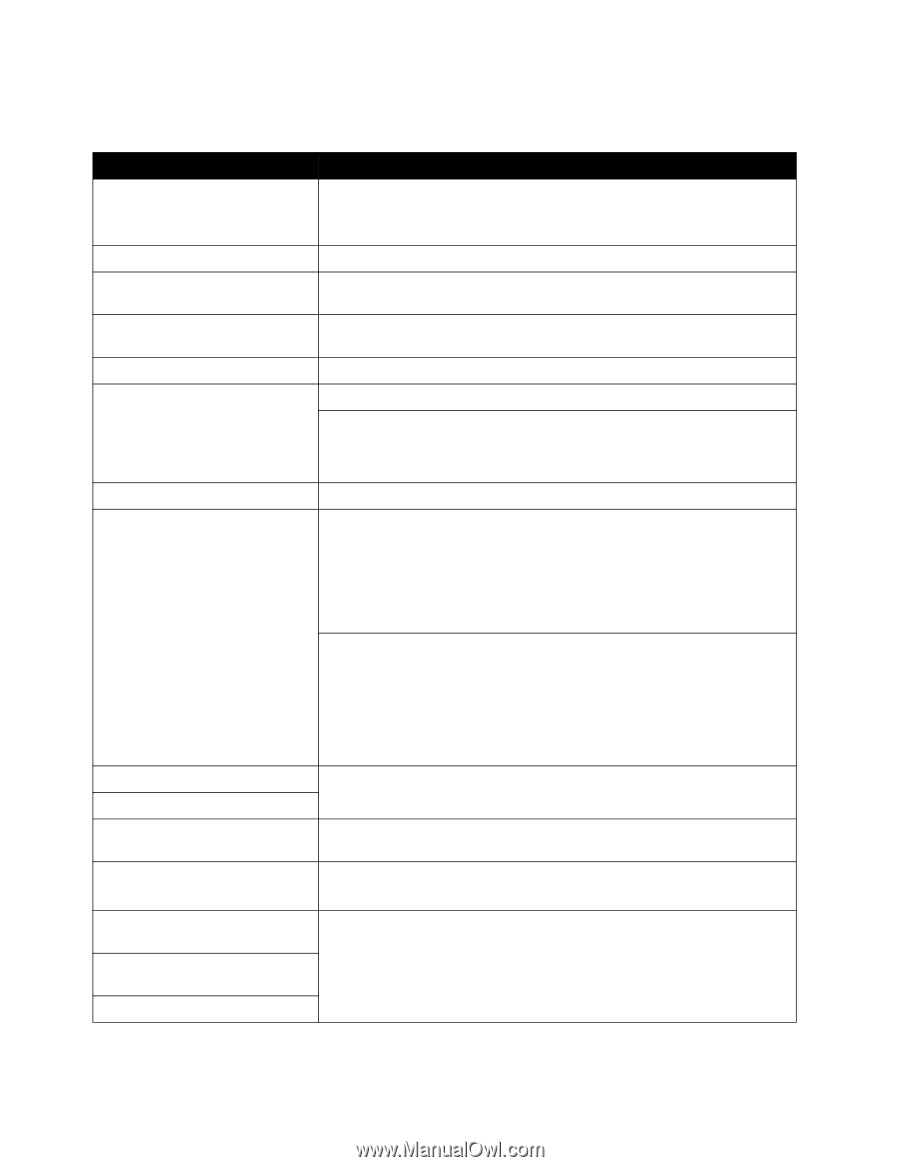
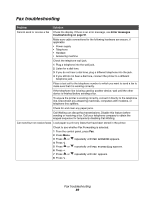
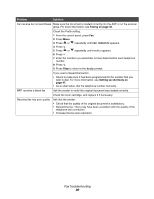
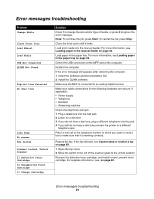
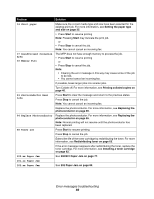
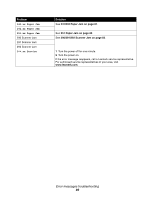
Error messages troubleshooting Problem Change Media Close Front Door Load Manual Load Media USB Not Connected QLINK Not Found Digital Line Detected No dial tone Line Busy No answer Fax failed Scanner Locked, Unlock Scanner 31 Defective Print Cartridge 32 Unsupported Print Cartridge 33 Change Cartridge Solution Press 1 to change the size and/or type of media, or press 2 to ignore the error message. Note: To continue the job, press Start. To cancel the job, press Stop. Close the front cover until it locks. Load print media into the manual feeder. For more information, see Loading paper in the manual feeder on page 32. Load paper in the paper tray. For more information, see Loading paper in the paper tray on page 28. Check the USB connection at the MFP and at the computer. Restart the computer. If the error message still appears after restarting the computer: 1 Insert the Software and Documentation CD. 2 Install the QLINK software. Make sure the MFP is connected to an analog telephone line. Make sure cable connections for the following hardware are secure, if applicable: • Power supply • Telephone • Handset • Answering machine Check the telephone wall jack. 1 Plug a telephone into the wall jack. 2 Listen for a dial tone. 3 If you do not hear a dial tone, plug a different telephone into the jack. 4 If you still do not hear a dial tone,connect the printer to a different telephone jack. Place a test call to the telephone number to which you want to send a fax to make sure that it is working correctly. Resend the fax. If the fax still fails, see Cannot send or receive a fax on page 89. 1 Open the top cover. 2 Move the switch to the left of the scanner glass to the unlock position. Remove the defective toner cartridge, and install a new Lexmark toner cartridge. For supplies information, see on page 69. Error messages troubleshooting 91
-
 1
1 -
2
-
3
-
4
-
5
-
6
-
7
-
8
-
9
-
10
-
11
-
12
-
13
-
14
-
15
-
16
-
17
-
18
-
19
-
20
-
21
-
22
-
23
-
24
-
25
-
26
-
27
-
28
-
29
-
30
-
31
-
32
-
33
-
34
-
35
-
36
-
37
-
38
-
39
-
40
-
41
-
42
-
43
-
44
-
45
-
46
-
47
-
48
-
49
-
50
-
51
-
52
-
53
-
54
-
55
-
56
-
57
-
58
-
59
-
60
-
61
-
62
-
63
-
64
-
65
-
66
-
67
-
68
-
69
-
70
-
71
-
72
-
73
-
74
-
75
-
76
-
77
-
78
-
79
-
80
-
81
-
82
-
83
-
84
-
85
-
 86
86 -
 87
87 -
 88
88 -
 89
89 -
 90
90 -
 91
91 -
 92
92 -
 93
93 -
 94
94 -
 95
95 -
 96
96 -
97
-
98
-
99
-
100
-
101
-
102
-
103
-
104
-
105
 |
 |