Linksys BEFSR11 User Guide - Page 20
Control Panel
 |
UPC - 745883549405
View all Linksys BEFSR11 manuals
Add to My Manuals
Save this manual to your list of manuals |
Page 20 highlights
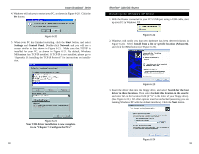
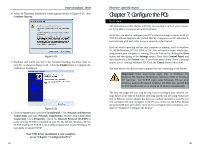
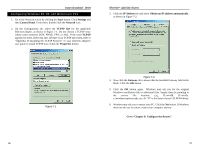
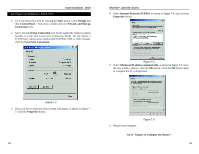
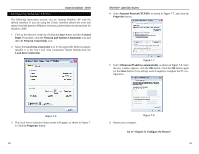
Instant Broadband™ Series 4. Windows will ask you to restart your PC, as shown in Figure 6-20. Click the Yes button. Figure 6-20 5. When your PC has finished restarting, click the Start button, and select Settings and Control Panel. Double-click Network and you will see a screen similar to that shown in Figure 6-21. Make sure that TCP/IP is installed for your PC, as shown in Figure 6-21. By default, Windows Millennium has TCP/IP installed. If TCP/IP is not installed, please go to "Appendix D: Installing the TCP/IP Protocol" for instructions on installation. EtherFast® Cable/DSL Routers Installing the Windows XP Driver 1. With the Router connected to your PC's USB port using a USB cable, start up your PC in Windows XP. Figure 6-22 2. Windows will notify you that new hardware has been detected (shown in Figure 6-22). Select Install from a list or specific location (Advanced), and click the Next button (see Figure 6-23). Figure 6-21 Your USB driver installation is now complete. Go to "Chapter 7: Configure the PCs." 32 Figure 6-23 3. Insert the driver disk into the floppy drive, and select Search for the best driver in these locations. Then select Include this location in the search: and enter A:\ in the location field (if "A" is the letter of your floppy drive). (See Figure 6-24.) All other options must be unchecked (assuming you are running Windows XP with the default interface). Click the Next button. Figure 6-24 33
-
 1
1 -
2
-
3
-
4
-
5
-
6
-
7
-
8
-
9
-
10
-
11
-
12
-
13
-
14
-
 15
15 -
 16
16 -
 17
17 -
 18
18 -
 19
19 -
 20
20 -
 21
21 -
 22
22 -
 23
23 -
 24
24 -
 25
25 -
26
-
27
-
28
-
29
-
30
-
31
-
32
-
33
-
34
-
35
-
36
-
37
-
38
-
39
-
40
-
41
-
42
-
43
-
44
-
45
-
46
-
47
-
48
-
49
-
50
-
51
-
52
-
53
-
54
-
55
-
56
-
57
-
58
-
59
-
60
-
61
-
62
-
63
-
64
-
65
-
66
 |
 |
