Linksys BEFSR11 User Guide - Page 25
Con the Router - software
 |
UPC - 745883549405
View all Linksys BEFSR11 manuals
Add to My Manuals
Save this manual to your list of manuals |
Page 25 highlights
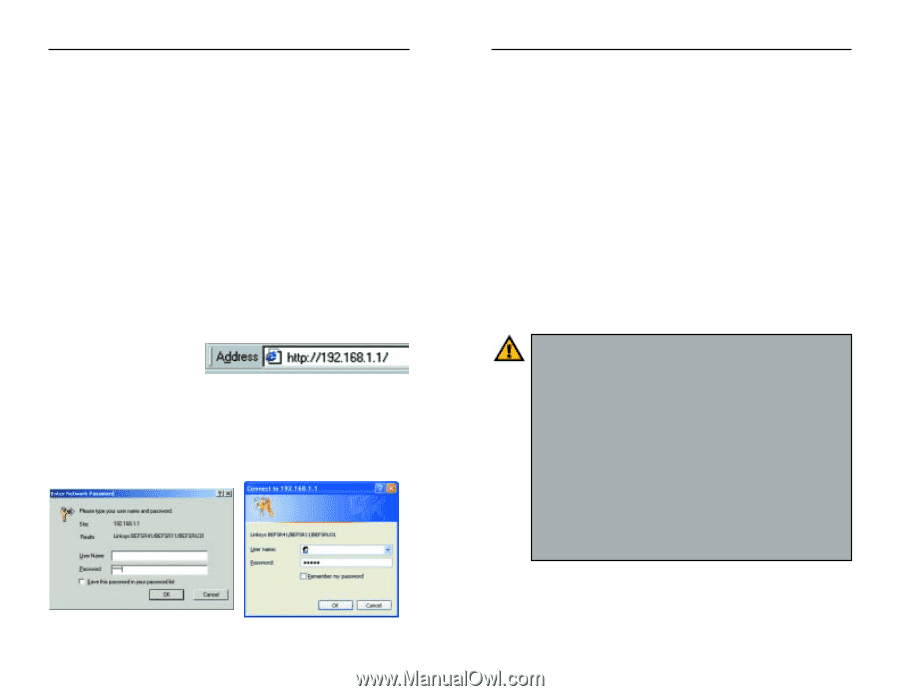
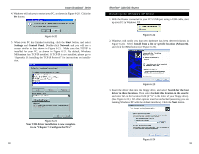
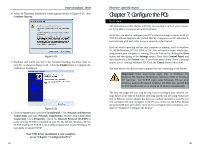
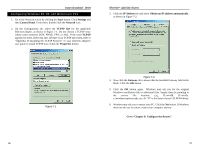
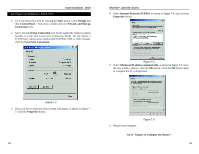
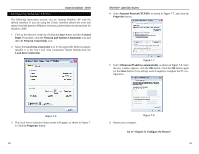
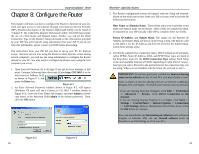
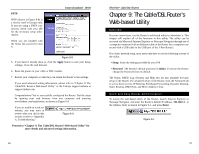
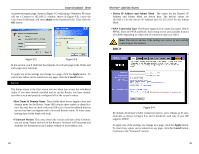
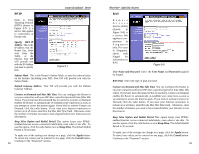
Instant Broadband™ Series Chapter 8: Configure the Router This chapter will show you how to configure the Router to function in your network and gain access to the Internet through your Internet Service Provider (ISP). Detailed description of the Router's Web-based Utility can be found in "Chapter 9: The Cable/DSL Router's Web-based Utility." Your ISP may require the use of a Host Name and Domain Name. Further, you will set the WAN Connection Type on the Router's Setup tab based on the information provided by your ISP. You will need the setup information from your ISP. If you do not have this information, please contact your ISP before proceeding. The instructions from your ISP tell you how to set up your PC for Internet access. Because you are now using the Router to share Internet access among several computers, you will use the setup information to configure the Router instead of your PC. You only need to configure the Router once using the first computer you set up. 1. Open your web browser. (It is all right if you get an error message at this point. Continue following these directions.) Enter http://192.168.1.1 in the web browser's Address field, as shown in Figure 8-1, and press the Enter key. Figure 8-1 2. An Enter Network Password window, shown in Figure 8-2, will appear (Windows XP users will see a Connect to 192.168.1.1 window, shown in Figure 8-3). Leave the User Name field empty, and enter admin in lower- case letters in the Password field (admin is the default password). Then, click the OK button. Figure 8-2 42 Figure 8-3 EtherFast® Cable/DSL Routers 3. The Router configuration screen will appear with the Setup tab selected. Based on the setup instructions from your ISP, you may need to provide the following information. Host Name and Domain Name: These fields allow you to provide a host name and domain name for the Router. These fields are usually left blank. If requested by your ISP (usually cable ISPs), complete these two fields. Device IP Address and Subnet Mask: The values for the Router's IP Address and Subnet Mask are shown on the Setup screen. The default value is 192.168.1.1 for the IP Address and 255.255.255.0 for the Subnet Mask. Leave these settings alone. 4. The Router supports five connection types: DHCP (obtain an IP automatically), PPPoE, Static IP Address, RAS, and PPTP. These types are listed in the drop-down menu for the WAN Connection Type setting. Each Setup screen and available features will differ depending on what kind of connection type you select. Proceed to the instructions for the connection type you are using. When you are finished with the Setup tab, proceed to step 5. IMPORTANT: If you have previously enabled any Internet-sharing proxy server software on any of your PCs, you must disable it now. Some examples of Internet-sharing software are Internet LanBridge, Wingate, ICS, and Sygate. To disable your Internet-sharing software: • If you are running Netscape Navigator, click Edit >> Preferences >> Advanced >> Proxies. Click Direct Connection to the Internet. • If you are running Internet Explorer 5.x or higher, click Start >> Settings >> Control Panel >> Internet Options >> Connections >> LAN Settings. Remove checkmarks from all three boxes. Click the OK button to continue. Also, you must disable any Internet log-on software (such as Ivasion Winpoet or Enternet 300) and any firewall software (such as ZoneAlarm and Watchdog) on all of your PCs. 43
-
 1
1 -
2
-
3
-
4
-
5
-
6
-
7
-
8
-
9
-
10
-
11
-
12
-
13
-
14
-
15
-
16
-
17
-
18
-
19
-
 20
20 -
 21
21 -
 22
22 -
 23
23 -
 24
24 -
 25
25 -
 26
26 -
 27
27 -
 28
28 -
 29
29 -
 30
30 -
31
-
32
-
33
-
34
-
35
-
36
-
37
-
38
-
39
-
40
-
41
-
42
-
43
-
44
-
45
-
46
-
47
-
48
-
49
-
50
-
51
-
52
-
53
-
54
-
55
-
56
-
57
-
58
-
59
-
60
-
61
-
62
-
63
-
64
-
65
-
66
 |
 |