Linksys BEFSR11 User Guide - Page 21
Con the PCs - router setup
 |
UPC - 745883549405
View all Linksys BEFSR11 manuals
Add to My Manuals
Save this manual to your list of manuals |
Page 21 highlights
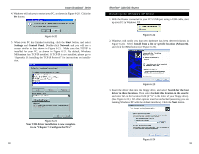
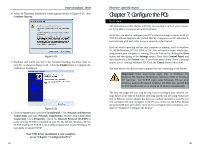
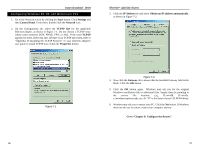
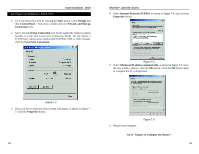
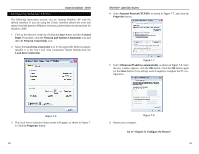
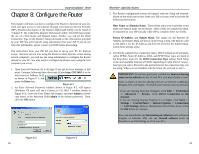
Instant Broadband™ Series 4. When the Hardware Installation screen appears shown in Figure 6-25, click Continue Anyway. Figure 6-25 5. Windows will notify you that it has finished installing the driver files on your PC, as shown in Figure 6-26. Click the Finish button to complete the USB driver installation. Figure 6-26 6. Click the Start button and then Control Panel. Click Network and Internet Connections and then Network Connections. Double-click Local Area Connection. Click Properties. Check for Internet Protocol (TCP/IP) to make sure that TCP/IP is installed on your PC. By default, Windows XP has TCP/IP installed. If TCP/IP is not installed, please refer to your Windows XP user guide to install TCP/IP. Your USB driver installation is now complete. Go to "Chapter 7: Configure the PCs." 34 EtherFast® Cable/DSL Routers Chapter 7: Configure the PCs Overview The instructions in this chapter will help you configure each of your computers to be able to communicate with the Router. To do this, you need to configure your PC's network settings to obtain an IP (or TCP/IP) address automatically (called DHCP). Computers use IP addresses to communicate with each other across a network or the Internet. Find out which operating system your computer is running, such as Windows 95, 98, Millennium, NT 4.0, 2000, or XP. You will need to know which operating system your computer is running. You can find out by clicking the Start button and then going to the Settings option. Then click Control Panel, and then double-click the System icon. If your Start menu doesn't have a Settings option, you're running Windows XP. Click the Cancel button when done. You may need to do this for each computer you are connecting to the Router. Important: These instructions apply only to Windows 95, Windows 98, Windows Millennium, Windows 2000, or Windows XP machines. For TCP/IP setup under Windows NT, see your Windows manual. By default Windows 98, 2000, Me, and XP has TCP/IP installed and set to obtain an IP address automatically. The next few pages tell you, step by step, how to configure your network settings based on the type of Windows operating system you are using. Make sure that an Ethernet card or adapter has been successfully installed in each PC you will configure (the only exception is the PC you connect to the 3-Port Router using the USB port and cable). Once you've configured your computers, continue to "Chapter 8: Configure the Router." 35
-
 1
1 -
2
-
3
-
4
-
5
-
6
-
7
-
8
-
9
-
10
-
11
-
12
-
13
-
14
-
15
-
 16
16 -
 17
17 -
 18
18 -
 19
19 -
 20
20 -
 21
21 -
 22
22 -
 23
23 -
 24
24 -
 25
25 -
 26
26 -
27
-
28
-
29
-
30
-
31
-
32
-
33
-
34
-
35
-
36
-
37
-
38
-
39
-
40
-
41
-
42
-
43
-
44
-
45
-
46
-
47
-
48
-
49
-
50
-
51
-
52
-
53
-
54
-
55
-
56
-
57
-
58
-
59
-
60
-
61
-
62
-
63
-
64
-
65
-
66
 |
 |
