NEC NP-PA622U User's Manual - Page 137
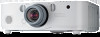
Removing the lens, Slowly pull the lens off the projector.
 |
View all NEC NP-PA622U manuals
Add to My Manuals
Save this manual to your list of manuals |
Page 137 highlights
4. Turn the lens clockwise. Turn until a click is heard. The lens is now fastened onto the projector. 6. Installation and Connections TIP: Mounting the lens theft prevention screw Fasten the lens theft prevention screw included with the projector to the bottom of the projector so that the lens cannot be removed easily. Removing the lens 1. While pressing the lens release button on the projector's front panel fully in, turn the lens counterclockwise. The lens comes off. NOTE: • Check the following areas if the lens unit cannot be removed even when the lens release button is pressed. 1. Check whether the theft prevention screws of the lens unit have been installed. 2. The lens release button may be locked sometimes. In that case, turn the lens fully to the right. The lens release button lock will be released. 2. Slowly pull the lens off the projector. • After removing the lens, mount the lens caps (front and back) included with the lens before storing the lens. • If no lens is going to be mounted on the projector, mount the dust cap included with the projector. 124
-
 1
1 -
2
-
3
-
4
-
5
-
6
-
7
-
8
-
9
-
10
-
11
-
12
-
13
-
14
-
15
-
16
-
17
-
18
-
19
-
20
-
21
-
22
-
23
-
24
-
25
-
26
-
27
-
28
-
29
-
30
-
31
-
32
-
33
-
34
-
35
-
36
-
37
-
38
-
39
-
40
-
41
-
42
-
43
-
44
-
45
-
46
-
47
-
48
-
49
-
50
-
51
-
52
-
53
-
54
-
55
-
56
-
57
-
58
-
59
-
60
-
61
-
62
-
63
-
64
-
65
-
66
-
67
-
68
-
69
-
70
-
71
-
72
-
73
-
74
-
75
-
76
-
77
-
78
-
79
-
80
-
81
-
82
-
83
-
84
-
85
-
86
-
87
-
88
-
89
-
90
-
91
-
92
-
93
-
94
-
95
-
96
-
97
-
98
-
99
-
100
-
101
-
102
-
103
-
104
-
105
-
106
-
107
-
108
-
109
-
110
-
111
-
112
-
113
-
114
-
115
-
116
-
117
-
118
-
119
-
120
-
121
-
122
-
123
-
124
-
125
-
126
-
127
-
128
-
129
-
130
-
131
-
 132
132 -
 133
133 -
 134
134 -
 135
135 -
 136
136 -
 137
137 -
 138
138 -
 139
139 -
 140
140 -
 141
141 -
 142
142 -
143
-
144
-
145
-
146
-
147
-
148
-
149
-
150
-
151
-
152
-
153
-
154
-
155
-
156
-
157
-
158
-
159
-
160
-
161
-
162
-
163
-
164
-
165
-
166
-
167
-
168
-
169
-
170
-
171
-
172
-
173
-
174
-
175
-
176
-
177
-
178
-
179
-
180
-
181
-
182
-
183
-
184
-
185
-
186
-
187
-
188
-
189
-
190
-
191
-
192
-
193
-
194
 |
 |
