NEC NP-PA622U User's Manual - Page 18
(3) Part Names of the Projector, Front/Top, Mounting the strap
 |
View all NEC NP-PA622U manuals
Add to My Manuals
Save this manual to your list of manuals |
Page 18 highlights
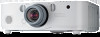
❸ Part Names of the Projector Front/Top The lens is sold separately. The description below is for when the NP13ZL lens is mounted. 1. Introduction Lens Shift Dial (vertical/horizontal) (→ page 19) Zoom Lever/Zoom Ring (→ page 23) Remote Sensor (→ page 11) Ventilation (outlet) Heated air is exhausted from here. Lamp Cover (→ page 143) Control Panel (→ page 7) Security Bar Attach an anti-theft device. The security bar accepts security wires or chains up to 0.18 inch/4.6 mm in diameter. Adjustable Tilt Foot (→ page 23) Monaural Speaker (10 W) Securing lever cover (→ page 135) Indicator Section (→ page 7) Remote Sensor (located on the front and the rear) (→ page 11) Adjustable Tilt Foot (→ page 23) Lens Cap (The optional lens is shipped with the lens cap.) Lens Focus Ring (→ page 20) Lens Release Button (→ page 124) Mounting the strap 1. Mount the strap to the filter cover and lamp cover as shown on the diagram below. 2. Insert the knot in the strap into the hole on the bottom of the projector and pull in the direction of the arrow to fasten. a b How to paste the input selection character sticker of the remote control • Peel off the cover of the sticker and align the sticker holes with Buttons 1 to 6 before pasting. • Please take care not to let the sticker contact the buttons when pasting. • The explanations and illustrations in this manual are provided with the sticker pasted. 5
-
 1
1 -
2
-
3
-
4
-
5
-
6
-
7
-
8
-
9
-
10
-
11
-
12
-
 13
13 -
 14
14 -
 15
15 -
 16
16 -
 17
17 -
 18
18 -
 19
19 -
 20
20 -
 21
21 -
 22
22 -
 23
23 -
24
-
25
-
26
-
27
-
28
-
29
-
30
-
31
-
32
-
33
-
34
-
35
-
36
-
37
-
38
-
39
-
40
-
41
-
42
-
43
-
44
-
45
-
46
-
47
-
48
-
49
-
50
-
51
-
52
-
53
-
54
-
55
-
56
-
57
-
58
-
59
-
60
-
61
-
62
-
63
-
64
-
65
-
66
-
67
-
68
-
69
-
70
-
71
-
72
-
73
-
74
-
75
-
76
-
77
-
78
-
79
-
80
-
81
-
82
-
83
-
84
-
85
-
86
-
87
-
88
-
89
-
90
-
91
-
92
-
93
-
94
-
95
-
96
-
97
-
98
-
99
-
100
-
101
-
102
-
103
-
104
-
105
-
106
-
107
-
108
-
109
-
110
-
111
-
112
-
113
-
114
-
115
-
116
-
117
-
118
-
119
-
120
-
121
-
122
-
123
-
124
-
125
-
126
-
127
-
128
-
129
-
130
-
131
-
132
-
133
-
134
-
135
-
136
-
137
-
138
-
139
-
140
-
141
-
142
-
143
-
144
-
145
-
146
-
147
-
148
-
149
-
150
-
151
-
152
-
153
-
154
-
155
-
156
-
157
-
158
-
159
-
160
-
161
-
162
-
163
-
164
-
165
-
166
-
167
-
168
-
169
-
170
-
171
-
172
-
173
-
174
-
175
-
176
-
177
-
178
-
179
-
180
-
181
-
182
-
183
-
184
-
185
-
186
-
187
-
188
-
189
-
190
-
191
-
192
-
193
-
194
 |
 |
