NEC PX-42M3A PlasmaSync 4200W - Page 38
Example: When a selector is connected setting SE, LECTOR, TUNER, SELECTOR, NO INPUT
 |
View all NEC PX-42M3A manuals
Add to My Manuals
Save this manual to your list of manuals |
Page 38 highlights
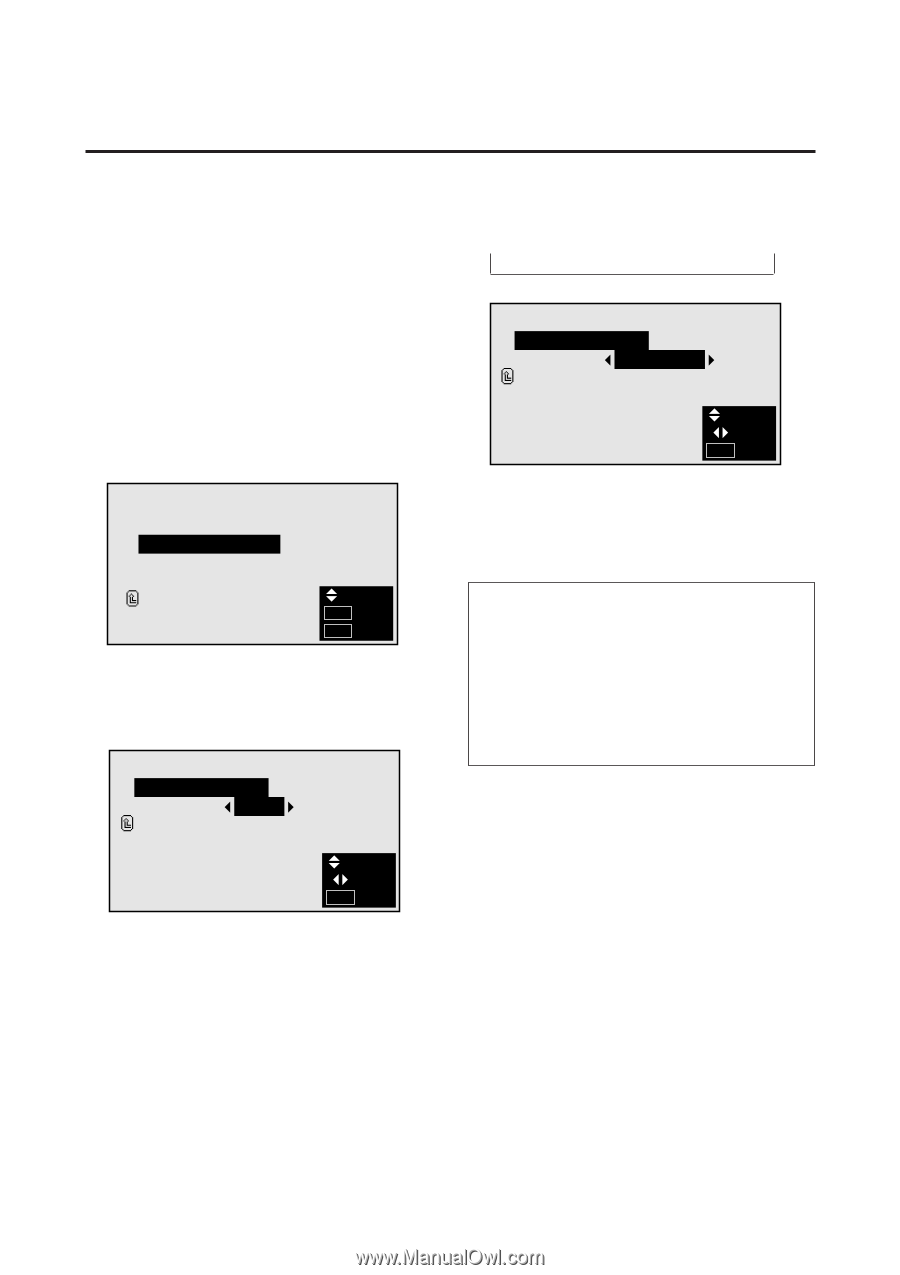
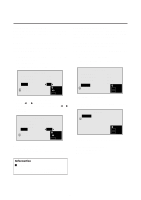
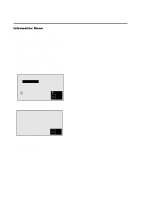
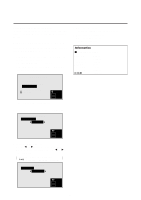
Setting the appropriate main menu display for the system Set the main menu display according to the connected equipment (monitor only, selector). Example: When a selector is connected (setting "SELECTOR") Press the MENU button on the remote controller to display the MAIN MENU on the screen, then... 1. Use the v and w buttons to select "INFORMATION", then press the "OK" button. The "INFORMATION" screen appears. 2. Use the v and w buttons to select "COMMUNICATION", then press the "OK" button. INFORMATION FREQUENCY COMMUNICATION LANGUAGE COLOR SYSTEM RETURN SEL. O K OK MENU EXIT The "COMMUNICATION" screen appears. 3. Use the v and w buttons to select "COMMUNICATION". COMMUNICATION COMMUNICATION : AUTO RETURN SEL. ADJ. MENU EXIT 4. To set to " SELECTOR " ... Use the ᮤ and ᮣ buttons to select "SELECTOR". The mode switches as follows when the ᮤ and ᮣ buttons are pressed: → AUTO ↔ TUNER ↔ SELECTOR ↔ NO INPUT ← COMMUNICATION COMMUNICATION : SELECTOR RETURN SEL. ADJ. MENU EXIT 5. Once the setting is completed ... Press the "MENU" button. The communications setting is set to "SELECTOR" and the menu disappears. Information Ⅵ "COMMUNICATION" settings AUTO Detects the connected equipment automatically. TUNER Not available on this model. SELECTOR ........ Set this when a selector (optional PX-SL1A) is connected. NO INPUT .......... Set this when using the monitor alone. 33
-
 1
1 -
2
-
3
-
4
-
5
-
6
-
7
-
8
-
9
-
10
-
11
-
12
-
13
-
14
-
15
-
16
-
17
-
18
-
19
-
20
-
21
-
22
-
23
-
24
-
25
-
26
-
27
-
28
-
29
-
30
-
31
-
32
-
 33
33 -
 34
34 -
 35
35 -
 36
36 -
 37
37 -
 38
38 -
 39
39 -
 40
40 -
 41
41 -
 42
42 -
 43
43 -
44
 |
 |