Netgear GS418TPP Hardware Installation Guide - Page 17
Step 4: Install the Switch, Wall-Mount the Switch
 |
View all Netgear GS418TPP manuals
Add to My Manuals
Save this manual to your list of manuals |
Page 17 highlights
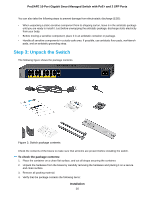
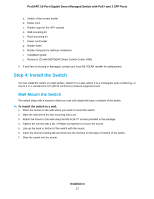
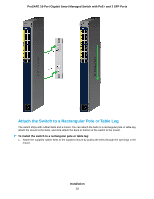
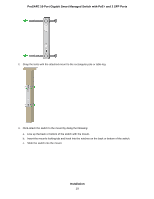
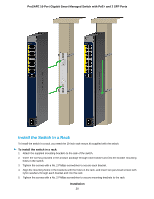
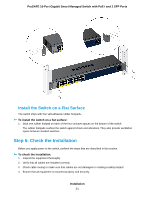
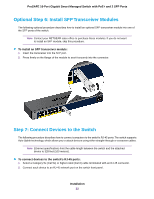
ProSAFE 16-Port Gigabit Smart Managed Switch with PoE+ and 2 SFP Ports a. Switch of the correct model b. Power cord c. Rubber caps for the SFP sockets d. Wall-mounting kit e. Rack-mounting kit f. Power cord locker g. Rubber belts h. Rubber footpads for tabletop installation i. Installation guide j. Resource CD with NETGEAR Smart Control Center Utility 5. If any item is missing or damaged, contact your local NETGEAR reseller for replacement. Step 4: Install the Switch You can install the switch on a flat surface, attach it to a wall, attach it to a rectangular pole or table leg, or mount it in a standard 19 inch (48.26 centimeter) network equipment rack. Wall-Mount the Switch The switch ships with a mount to which you can click-attach the back or bottom of the switch. To install the switch to a wall: 1. Place the mount on the wall where you want to mount the switch. 2. Mark the wall where the two mounting holes are. 3. Attach the mount to the wall using the M3.5x16-TP screws provided in the package. 4. Tighten the screws with a No. 2 Phillips screwdriver to secure the mount. 5. Line up the back or bottom of the switch with the mount. 6. Insert the mount's locking tab and hook into the notches on the back or bottom of the switch. 7. Slide the switch into the mount. Installation 17
-
 1
1 -
2
-
3
-
4
-
5
-
6
-
7
-
8
-
9
-
10
-
11
-
 12
12 -
 13
13 -
 14
14 -
 15
15 -
 16
16 -
 17
17 -
 18
18 -
 19
19 -
 20
20 -
 21
21 -
 22
22 -
23
-
24
-
25
-
26
-
27
-
28
-
29
-
30
 |
 |