Netgear GS418TPP Hardware Installation Guide - Page 21
Install the Switch on a Flat Surface, Step 5: Check the Installation
 |
View all Netgear GS418TPP manuals
Add to My Manuals
Save this manual to your list of manuals |
Page 21 highlights
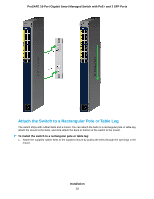
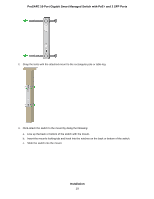
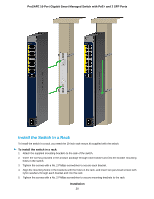
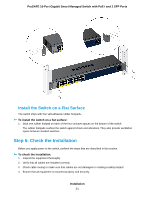
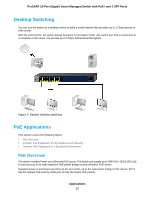
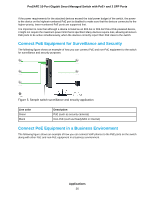
ProSAFE 16-Port Gigabit Smart Managed Switch with PoE+ and 2 SFP Ports Install the Switch on a Flat Surface The switch ships with four self-adhesive rubber footpads. To install the switch on a flat surface: 1. Stick one rubber footpad on each of the four concave spaces on the bottom of the switch. The rubber footpads cushion the switch against shock and vibrations. They also provide ventilation space between stacked switches. Step 5: Check the Installation Before you apply power to the switch, perform the steps that are described in this section. To check the installation: 1. Inspect the equipment thoroughly. 2. Verify that all cables are installed correctly. 3. Check cable routing to make sure that cables are not damaged or creating a safety hazard 4. Ensure that all equipment is mounted properly and securely. Installation 21
-
 1
1 -
2
-
3
-
4
-
5
-
6
-
7
-
8
-
9
-
10
-
11
-
12
-
13
-
14
-
15
-
 16
16 -
 17
17 -
 18
18 -
 19
19 -
 20
20 -
 21
21 -
 22
22 -
 23
23 -
 24
24 -
 25
25 -
 26
26 -
27
-
28
-
29
-
30
 |
 |