Netgear GS716Tv2 GS716Tv2/GS724Tv3 Software Admin Manual - Page 18
Switch Management Interface, System, Management, IP Configuration - firmware upgrade
 |
View all Netgear GS716Tv2 manuals
Add to My Manuals
Save this manual to your list of manuals |
Page 18 highlights
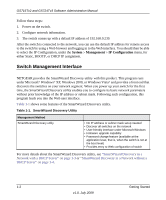
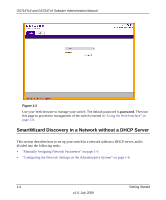
GS716Tv2 and GS724Tv3 Software Administration Manual Follow these steps: 1. Power on the switch. 2. Configure network information. 3. The switch comes up with a default IP address of 192.168.0.239. After the switch is connected to the network, you can use the default IP address for remote access to the switch by using a Web browser and logging in to the Web interface. You should then be able to select the IP Configuration, under the System Management IP Configuration menu, for either Static, BOOTP, or DHCP IP assignment. Switch Management Interface NETGEAR provides the SmartWizard Discovery utility with this product. This program runs under Microsoft® Windows® XP, Windows 2000, or Windows Vista® and provides a front end that discovers the switches on your network segment. When you power up your switch for the first time, the SmartWizard Discovery utility enables you to configure its basic network parameters without prior knowledge of the IP address or subnet mask. Following such configuration, this program leads you into the Web user interface. Table 1-1 shows some features of the SmartWizard Discovery utility. Table 1-1. SmartWizard Discovery Utility Management Method SmartWizard Discovery utility • No IP address or subnet mask setup needed • Discover all switches on the network • User-friendly interface under Microsoft Windows • Firmware upgrade capability • Password change feature (available at the application level, that is, when the switch is not at the boot level) • Provides entry to Web configuration of switch For more details about the SmartWizard Discovery utility, see "SmartWizard Discovery in a Network with a DHCP Server" on page 1-3 or "SmartWizard Discovery in a Network without a DHCP Server" on page 1-4. 1-2 Getting Started v1.0, July 2009
-
 1
1 -
2
-
3
-
4
-
5
-
6
-
7
-
8
-
9
-
10
-
11
-
12
-
 13
13 -
 14
14 -
 15
15 -
 16
16 -
 17
17 -
 18
18 -
 19
19 -
 20
20 -
 21
21 -
 22
22 -
 23
23 -
24
-
25
-
26
-
27
-
28
-
29
-
30
-
31
-
32
-
33
-
34
-
35
-
36
-
37
-
38
-
39
-
40
-
41
-
42
-
43
-
44
-
45
-
46
-
47
-
48
-
49
-
50
-
51
-
52
-
53
-
54
-
55
-
56
-
57
-
58
-
59
-
60
-
61
-
62
-
63
-
64
-
65
-
66
-
67
-
68
-
69
-
70
-
71
-
72
-
73
-
74
-
75
-
76
-
77
-
78
-
79
-
80
-
81
-
82
-
83
-
84
-
85
-
86
-
87
-
88
-
89
-
90
-
91
-
92
-
93
-
94
-
95
-
96
-
97
-
98
-
99
-
100
-
101
-
102
-
103
-
104
-
105
-
106
-
107
-
108
-
109
-
110
-
111
-
112
-
113
-
114
-
115
-
116
-
117
-
118
-
119
-
120
-
121
-
122
-
123
-
124
-
125
-
126
-
127
-
128
-
129
-
130
-
131
-
132
-
133
-
134
-
135
-
136
-
137
-
138
-
139
-
140
-
141
-
142
-
143
-
144
-
145
-
146
-
147
-
148
-
149
-
150
-
151
-
152
-
153
-
154
-
155
-
156
-
157
-
158
-
159
-
160
-
161
-
162
-
163
-
164
-
165
-
166
-
167
-
168
-
169
-
170
-
171
-
172
-
173
-
174
-
175
-
176
-
177
-
178
-
179
-
180
-
181
-
182
-
183
-
184
-
185
-
186
-
187
-
188
-
189
-
190
-
191
-
192
-
193
-
194
-
195
-
196
-
197
-
198
-
199
-
200
-
201
-
202
-
203
-
204
-
205
-
206
-
207
-
208
-
209
-
210
-
211
-
212
-
213
-
214
-
215
-
216
-
217
-
218
-
219
-
220
-
221
-
222
-
223
-
224
-
225
-
226
-
227
-
228
-
229
-
230
-
231
-
232
-
233
-
234
-
235
-
236
-
237
-
238
-
239
-
240
-
241
-
242
-
243
-
244
-
245
-
246
 |
 |