Netgear PR2000 User Manual (Non-Cellular Version) - Page 18
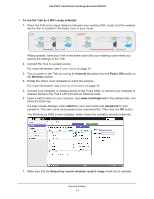
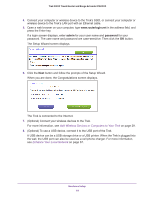
Internet Connection at Home Setup, To save a, name for profile, Apply
 |
View all Netgear PR2000 manuals
Add to My Manuals
Save this manual to your list of manuals |
Page 18 highlights
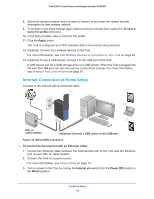
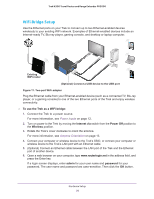
Trek N300 Travel Router and Range Extender PR2000 8. Select the wireless network that you want to connect to and enter the related security information for that wireless network. 9. To be able to use these settings again without having to reenter them, select the To save a name for profile check box. 10. In the field provided, enter a name for the profile. 11. Click the Apply button. The Trek is configured as a WiFi extender after a two-minute setup process. 12. (Optional) Connect your wireless devices to the Trek. For more information, see Add Wireless Devices or Computers to Your Trek on page 29. 13. (Optional) To use a USB device, connect it to the USB port of the Trek. A USB device can be a USB storage drive or a USB printer. When the Trek is plugged into the wall, the USB port can also be used as a cell phone charger. For more information, see Enhance Your Local Network on page 67. Internet Connection at Home Setup Connect to the Internet with an Ethernet cable. PWowireerWdOirfefles NETGEAR Power Internet WiFi USB DSL or cable modem (Optional) Connect a USB device to the USB port Figure 10. Wired WAN connection To connect to the Internet with an Ethernet cable: 1. Connect an Ethernet cable between the Internet/LAN port of the Trek and the Ethernet port of your DSL or cable modem. 2. Connect the Trek to a power source. For more information, see Power Inputs on page 12. 3. Turn on power to the Trek by moving the Internet via switch from the Power Off position to the Wired position. Hardware Setup 18
-
 1
1 -
2
-
3
-
4
-
5
-
6
-
7
-
8
-
9
-
10
-
11
-
12
-
 13
13 -
 14
14 -
 15
15 -
 16
16 -
 17
17 -
 18
18 -
 19
19 -
 20
20 -
 21
21 -
 22
22 -
 23
23 -
24
-
25
-
26
-
27
-
28
-
29
-
30
-
31
-
32
-
33
-
34
-
35
-
36
-
37
-
38
-
39
-
40
-
41
-
42
-
43
-
44
-
45
-
46
-
47
-
48
-
49
-
50
-
51
-
52
-
53
-
54
-
55
-
56
-
57
-
58
-
59
-
60
-
61
-
62
-
63
-
64
-
65
-
66
-
67
-
68
-
69
-
70
-
71
-
72
-
73
-
74
-
75
-
76
-
77
-
78
-
79
-
80
-
81
-
82
-
83
-
84
-
85
-
86
-
87
-
88
-
89
-
90
-
91
-
92
-
93
-
94
-
95
-
96
-
97
-
98
-
99
-
100
-
101
-
102
-
103
-
104
-
105
-
106
-
107
-
108
-
109
-
110
-
111
-
112
-
113
-
114
-
115
-
116
-
117
-
118
-
119
-
120
-
121
-
122
-
123
-
124
-
125
-
126
-
127
-
128
-
129
-
130
-
131
-
132
-
133
-
134
-
135
-
136
-
137
-
138
-
139
-
140
-
141
-
142
-
143
-
144
-
145
 |
 |
