Netgear R9000 User Manual - Page 87
Remote Access, Set Up Remote Management
 |
View all Netgear R9000 manuals
Add to My Manuals
Save this manual to your list of manuals |
Page 87 highlights
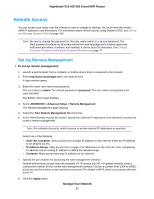
Nighthawk X10 AD7200 Smart WiFi Router Remote Access You can access your router over the Internet to view or change its settings. You must know the router's WAN IP address to use this feature. For information about remote access using Dynamic DNS, see Set Up and Manage Dynamic DNS on page 104. Note Be sure to change the password for the user name admin to a secure password. The ideal password contains no dictionary words from any language and contains uppercase and lowercase letters, numbers, and symbols. It can be up to 30 characters. See Change the admin Password and Enable Password Recovery on page 77. Set Up Remote Management To set up remote management: 1. Launch a web browser from a computer or mobile device that is connected to the network. 2. Enter http://www.routerlogin.net in the address field. A login window opens. 3. Enter the router user name and password. The user name is admin. The default password is password. The user name and password are case-sensitive. The BASIC Home page displays. 4. Select ADVANCED > Advanced Setup > Remote Management. The Remote Management page displays. 5. Select the Turn Remote Management On check box. 6. In the Allow Remote Access By section, specify the external IP addresses to be allowed to access the router's remote management. Note For enhanced security, restrict access to as few external IP addresses as practical. Select one of the following: • Only This Computer. Allow access from a single IP address on the Internet. Enter the IP address to be allowed access. • IP Address Range. Allow access from a range of IP addresses on the Internet. Enter a beginning IP address and an ending IP address to define the allowed range. • Everyone. Allow access from any IP address on the Internet. 7. Specify the port number for accessing the web management interface. Normal web browser access uses the standard HTTP service port 80. For greater security, enter a custom port number for the remote web management interface. Choose a number from 1024 to 65535, but do not use the number of any common service port. The default is 8443, which is a common alternate for HTTP. 8. Click the Apply button. Manage Your Network 87
-
 1
1 -
2
-
3
-
4
-
5
-
6
-
7
-
8
-
9
-
10
-
11
-
12
-
13
-
14
-
15
-
16
-
17
-
18
-
19
-
20
-
21
-
22
-
23
-
24
-
25
-
26
-
27
-
28
-
29
-
30
-
31
-
32
-
33
-
34
-
35
-
36
-
37
-
38
-
39
-
40
-
41
-
42
-
43
-
44
-
45
-
46
-
47
-
48
-
49
-
50
-
51
-
52
-
53
-
54
-
55
-
56
-
57
-
58
-
59
-
60
-
61
-
62
-
63
-
64
-
65
-
66
-
67
-
68
-
69
-
70
-
71
-
72
-
73
-
74
-
75
-
76
-
77
-
78
-
79
-
80
-
81
-
 82
82 -
 83
83 -
 84
84 -
 85
85 -
 86
86 -
 87
87 -
 88
88 -
 89
89 -
 90
90 -
 91
91 -
 92
92 -
93
-
94
-
95
-
96
-
97
-
98
-
99
-
100
-
101
-
102
-
103
-
104
-
105
-
106
-
107
-
108
-
109
-
110
-
111
-
112
-
113
-
114
-
115
-
116
-
117
-
118
-
119
-
120
-
121
-
122
-
123
-
124
-
125
-
126
-
127
-
128
-
129
-
130
-
131
-
132
-
133
-
134
-
135
-
136
-
137
-
138
-
139
-
140
-
141
-
142
-
143
-
144
-
145
-
146
-
147
-
148
-
149
-
150
-
151
-
152
-
153
-
154
-
155
-
156
-
157
 |
 |
