Nikon COOLPIX 4200 User Manual - Page 119
Using the Setup Menu - firmware
 |
UPC - 018208255177
View all Nikon COOLPIX 4200 manuals
Add to My Manuals
Save this manual to your list of manuals |
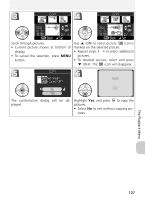
Page 119 highlights
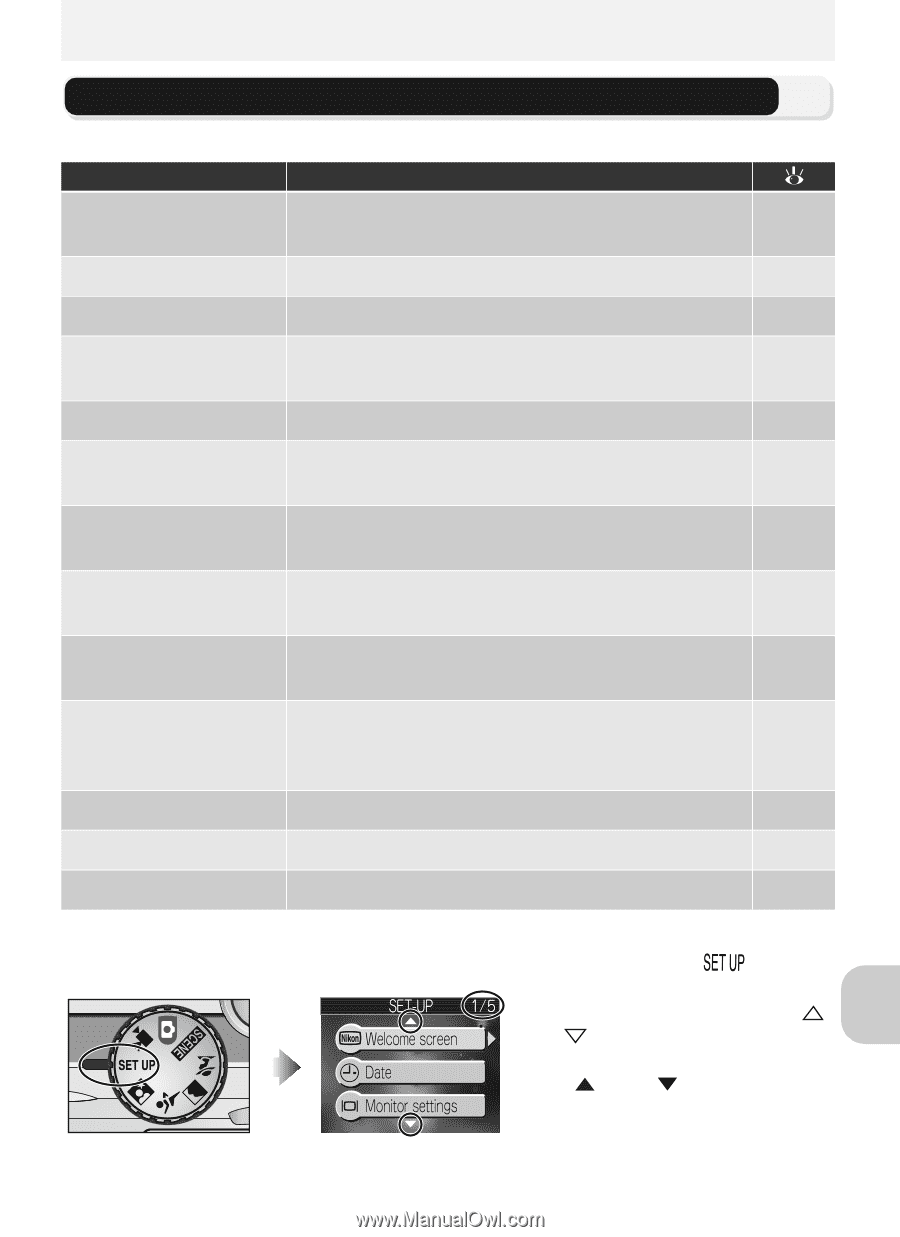
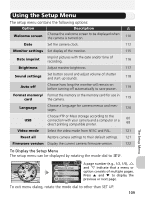
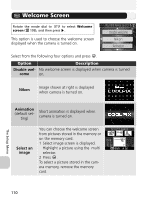
The Setup Menu Using the Setup Menu The setup menu contains the following options: Option Description Welcome screen Choose the welcome screen to be displayed when the camera is turned on. 110 Date Set the camera clock. 112 Monitor settings Set display of the monitor. 115 Date imprint Imprint pictures with the date and/or time of recording. 116 Brightness Adjust monitor brightness. 117 Sound settings Set button sound and adjust volume of shutter and start-up sounds. 118 Auto off Choose how long the monitor will remain on before turning off automatically to save power. 119 Format memory/ Format the memory or the memory card for use in card the camera. 119 Language Choose a language for camera menus and messages. 120 USB Choose PTP or Mass storage according to the connection with your camera and a computer or a direct printing compatible printer. 60 68 Video mode Select the video mode from NTSC and PAL. 121 Reset all Restore camera settings to their default settings. 121 Firmware version Display the current camera firmware version. 122 To Display the Setup Menu The setup menu can be displayed by rotating the mode dial to . The Setup Menu A page number (e.g., 1/2, 1/5), and indicate that a menu or option consists of multiple pages. Press and to display the previous or next page. To exit menu dialog, rotate the mode dial to other than SET UP. 109
-
 1
1 -
2
-
3
-
4
-
5
-
6
-
7
-
8
-
9
-
10
-
11
-
12
-
13
-
14
-
15
-
16
-
17
-
18
-
19
-
20
-
21
-
22
-
23
-
24
-
25
-
26
-
27
-
28
-
29
-
30
-
31
-
32
-
33
-
34
-
35
-
36
-
37
-
38
-
39
-
40
-
41
-
42
-
43
-
44
-
45
-
46
-
47
-
48
-
49
-
50
-
51
-
52
-
53
-
54
-
55
-
56
-
57
-
58
-
59
-
60
-
61
-
62
-
63
-
64
-
65
-
66
-
67
-
68
-
69
-
70
-
71
-
72
-
73
-
74
-
75
-
76
-
77
-
78
-
79
-
80
-
81
-
82
-
83
-
84
-
85
-
86
-
87
-
88
-
89
-
90
-
91
-
92
-
93
-
94
-
95
-
96
-
97
-
98
-
99
-
100
-
101
-
102
-
103
-
104
-
105
-
106
-
107
-
108
-
109
-
110
-
111
-
112
-
113
-
 114
114 -
 115
115 -
 116
116 -
 117
117 -
 118
118 -
 119
119 -
 120
120 -
 121
121 -
 122
122 -
 123
123 -
 124
124 -
125
-
126
-
127
-
128
-
129
-
130
-
131
-
132
-
133
-
134
-
135
-
136
-
137
-
138
-
139
-
140
-
141
-
142
-
143
-
144
-
145
-
146
-
147
-
148
-
149
-
150
-
151
-
152
 |
 |