Nikon COOLPIX P100  P100 User's Manual - Page 41
Using the Zoom, Digital Zoom
 |
View all Nikon COOLPIX P100 manuals
Add to My Manuals
Save this manual to your list of manuals |
Page 41 highlights
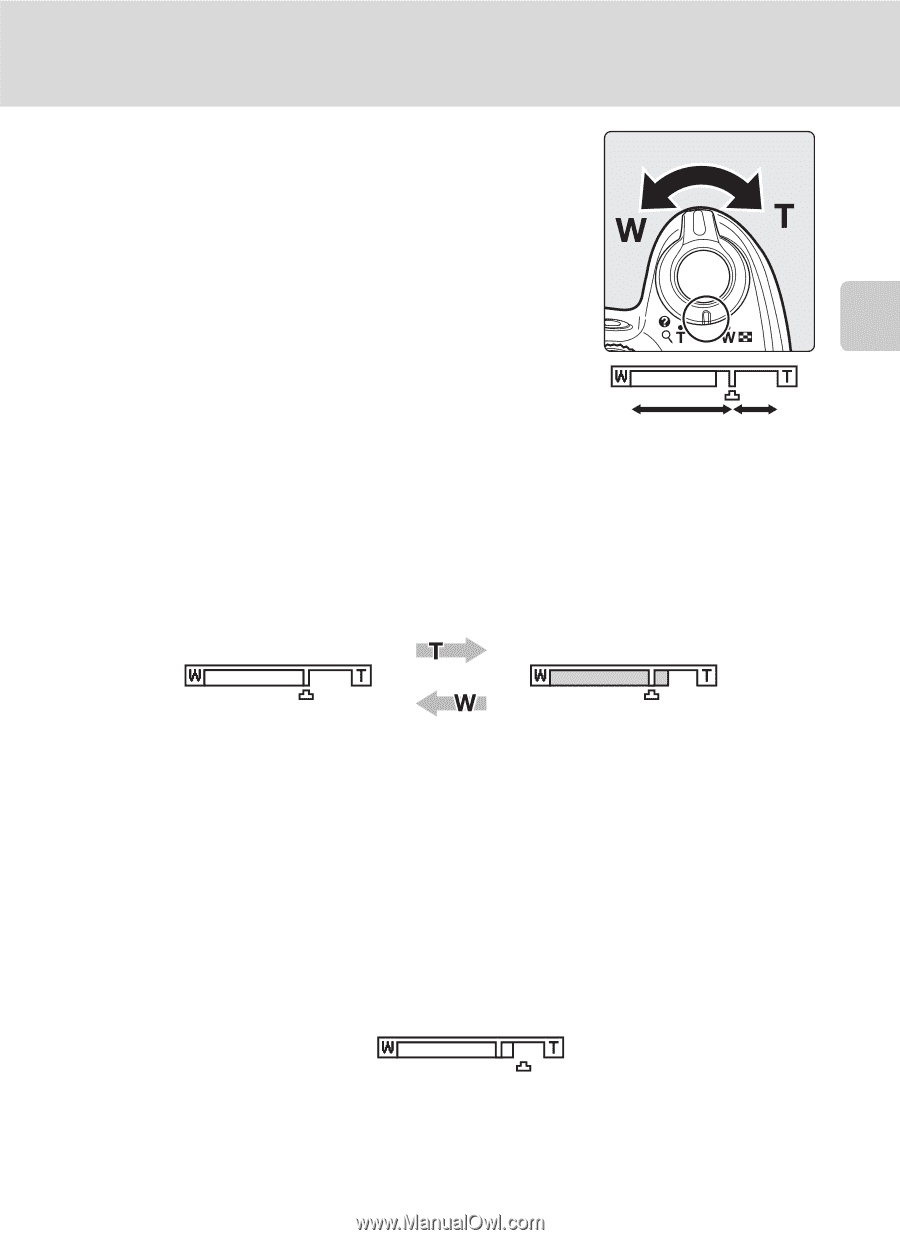
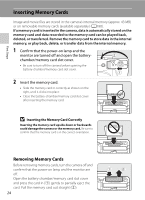
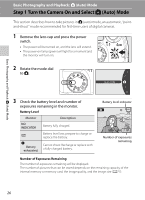
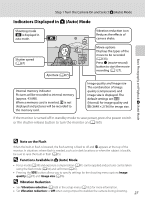
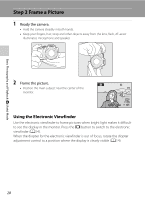
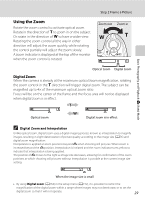
Using the Zoom Rotate the zoom control to activate optical zoom. Rotate in the direction of g to zoom in on the subject. Or rotate in the direction of f to have a wider view. Rotating the zoom control all the way in either direction will adjust the zoom quickly, while rotating the control partially will adjust the zoom slowly. A zoom indicator is displayed at the top of the monitor when the zoom control is rotated. Step 2 Frame a Picture Zoom out Zoom in Optical zoom Digital zoom Digital Zoom When the camera is already at the maximum optical zoom magnification, rotating the zoom control in the g direction will trigger digital zoom. The subject can be magnified up to 4× of the maximum optical zoom ratio. Focus will be on the center of the frame and the focus area will not be displayed when digital zoom is in effect. Basic Photography and Playback: A (Auto) Mode Optical zoom Digital zoom is in effect. C Digital Zoom and Interpolation Unlike optical zoom, digital zoom uses a digital imaging process known as interpolation to magnify images, resulting in slight deterioration of picture quality according to the image size (A76) and digital zoom magnification. Interpolation is applied at zoom positions beyond V when shooting still pictures. When zoom is increased beyond the V position, interpolation is initiated and the zoom indicator turns yellow to indicate that interpolation is being applied. The position of V moves to the right as image size decreases, allowing for confirmation of the zoom positions at which shooting still pictures without interpolation is possible at the current image size setting. When the image size is small • By using Digital zoom (A164) in the setup menu (A152), it is possible to restrict the magnification of the digital zoom within a range where images may not deteriorate, or to set the digital zoom so that it will not operate. 29
-
 1
1 -
2
-
3
-
4
-
5
-
6
-
7
-
8
-
9
-
10
-
11
-
12
-
13
-
14
-
15
-
16
-
17
-
18
-
19
-
20
-
21
-
22
-
23
-
24
-
25
-
26
-
27
-
28
-
29
-
30
-
31
-
32
-
33
-
34
-
35
-
 36
36 -
 37
37 -
 38
38 -
 39
39 -
 40
40 -
 41
41 -
 42
42 -
 43
43 -
 44
44 -
 45
45 -
 46
46 -
47
-
48
-
49
-
50
-
51
-
52
-
53
-
54
-
55
-
56
-
57
-
58
-
59
-
60
-
61
-
62
-
63
-
64
-
65
-
66
-
67
-
68
-
69
-
70
-
71
-
72
-
73
-
74
-
75
-
76
-
77
-
78
-
79
-
80
-
81
-
82
-
83
-
84
-
85
-
86
-
87
-
88
-
89
-
90
-
91
-
92
-
93
-
94
-
95
-
96
-
97
-
98
-
99
-
100
-
101
-
102
-
103
-
104
-
105
-
106
-
107
-
108
-
109
-
110
-
111
-
112
-
113
-
114
-
115
-
116
-
117
-
118
-
119
-
120
-
121
-
122
-
123
-
124
-
125
-
126
-
127
-
128
-
129
-
130
-
131
-
132
-
133
-
134
-
135
-
136
-
137
-
138
-
139
-
140
-
141
-
142
-
143
-
144
-
145
-
146
-
147
-
148
-
149
-
150
-
151
-
152
-
153
-
154
-
155
-
156
-
157
-
158
-
159
-
160
-
161
-
162
-
163
-
164
-
165
-
166
-
167
-
168
-
169
-
170
-
171
-
172
-
173
-
174
-
175
-
176
-
177
-
178
-
179
-
180
-
181
-
182
-
183
-
184
-
185
-
186
-
187
-
188
-
189
-
190
-
191
-
192
-
193
-
194
-
195
-
196
-
197
-
198
-
199
-
200
-
201
-
202
-
203
-
204
-
205
-
206
-
207
-
208
-
209
-
210
-
211
-
212
-
213
-
214
-
215
-
216
 |
 |