Oki MB480 Network Guide Europe - Page 27
Browser, Efault, Password
 |
View all Oki MB480 manuals
Add to My Manuals
Save this manual to your list of manuals |
Page 27 highlights
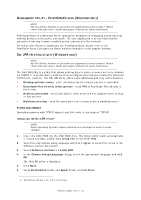
USING A WEB BROWSER If you do not wish to launch or install the Network Card Setup utility, you can access the printer Web Page directly through a web browser. If the printer is connected to the network using TCP/IP, its settings and the printer menu settings can be configured using a web browser. Refer to the relevant manuals for details of how to launch and use the browser. Refer also to "Web browser" on page 53 for instructions on how to prevent your browser caching the printer web pages. DEFAULT USER NAME AND PASSWORD To apply configuration changes using a web browser, you will be prompted for a username and password. The username is root and the default password is aaaaaa. The root password can be changed to allow you to configure the printer by using a Web browser/TELNET/AdminManager. To change the root password from the web browser, select Change Password in the Admin Setup tab and follow the on-screen instructions. ADJUSTING PRINTER SETTINGS The network addresses used in this manual are shown as examples only. Network addresses used in your installation must be generated from your own network. 1. Launch the Web browser and enter the IP Address of the network interface card in Address (Location/Position) and press the Enter key. You can find the IP Address on the Self-Diagnostic Test printout, refer to "Selfdiagnostic test" on page 6. The printer Web Page is displayed. NOTE On the web page you can view printer status, job lists and links. You can also configure the IP Address, Subnet Mask and Gateway for the network card. However, to configure printer settings, you need to log in as "root" and enter the correct password to be able to configure all items. 2. To access and adjust printer control settings, such as printer, network, security and maintenance, click the Administrator Login button in the left-hand pane. 3. Enter the username, "root" and password as aaaaaa. 4. As this is the first time logging into the Printer Web Page, the Printer Identification (basic setup) page is launched. You have two options: > You can enter the printer location, asset number, administrator name and select "Do not show this page again". Click OK to save these details. Allow a few seconds for the settings to save and the printer to restart automatically. > If you do not wish to enter any details, click SKIP. 5. The Printer Web Page with full menu options opens up. Browse the menu and update information as appropriate. Network configuration > 27
-
 1
1 -
2
-
3
-
4
-
5
-
6
-
7
-
8
-
9
-
10
-
11
-
12
-
13
-
14
-
15
-
16
-
17
-
18
-
19
-
20
-
21
-
 22
22 -
 23
23 -
 24
24 -
 25
25 -
 26
26 -
 27
27 -
 28
28 -
 29
29 -
 30
30 -
 31
31 -
 32
32 -
33
-
34
-
35
-
36
-
37
-
38
-
39
-
40
-
41
-
42
-
43
-
44
-
45
-
46
-
47
-
48
-
49
-
50
-
51
-
52
-
53
-
54
-
55
 |
 |
