Oki MB480 Network Guide Europe - Page 35
Onfiguring, Network, Printer, Address
 |
View all Oki MB480 manuals
Add to My Manuals
Save this manual to your list of manuals |
Page 35 highlights
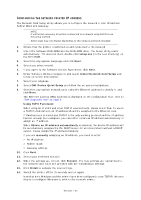
CONFIGURING THE NETWORK PRINTER IP ADDRESS The Network Card Setup utility allows you to configure the network printer IP address, Subnet Mask and Gateway. NOTE It will not be necessary for printers connected to a network using DHCP to use this setup method. Some steps may not display depending on the network protocols installed. 1. Ensure that the printer is switched on and connected to the network. 2. Insert the Software DVD-ROM into the DVD-ROM drive. The Setup Utility starts automatically. If it does not start, double-click setup.exe (in the root directory) on the DVD-ROM. 3. Select the appropriate Language and click Next. 4. Select you printer model. 5. If you agree to the Software Licence Agreement, click Next. 6. Under Software Utilities navigate to and select Install Network Card Setup and follow on-screen instructions. 7. Select your language. 8. Select OKI Device Quick Setup and follow the on-screen instructions. 9. Select the appropriate network card, using the Ethernet address to identify it, and click Next. The Ethernet address (MAC Address) is displayed on the configuration map, refer to "Self-diagnostic test" on page 6. Using TCP/IP protocol When using lpr in UNIX and other TCP/IP environments, please select Yes. To use in a TCP/IP environment, an IP address should be assigned to the Ethernet card. If Yes has been selected and TCP/IP is the only working protocol and the IP address has not already been assigned, you can either obtain an IP address automatically or assign an IP address. When Obtain an IP address automatically is selected, the device IP address will be automatically assigned by the DHCP server. In an environment without a DHCP server, please assign the IP address manually. If you are manually assigning an IP address, you need to enter: > An IP address > Subnet mask > Gateway address 10. Click Next. 11. Select your preferred protocol. 12. When the settings are correct, click Execute. The new settings are transmitted to the network card but it still operates with pre-transmission settings. 13. Click Finish to validate the new settings. 14. Switch the printer off for 15 seconds and on again. Now that both Windows and the printer have been configured to use TCP/IP, the next step is to configure Windows to print to the network printer. Windows > 35
-
 1
1 -
2
-
3
-
4
-
5
-
6
-
7
-
8
-
9
-
10
-
11
-
12
-
13
-
14
-
15
-
16
-
17
-
18
-
19
-
20
-
21
-
22
-
23
-
24
-
25
-
26
-
27
-
28
-
29
-
 30
30 -
 31
31 -
 32
32 -
 33
33 -
 34
34 -
 35
35 -
 36
36 -
 37
37 -
 38
38 -
 39
39 -
 40
40 -
41
-
42
-
43
-
44
-
45
-
46
-
47
-
48
-
49
-
50
-
51
-
52
-
53
-
54
-
55
 |
 |
