Olympus MAUSB-10 Reference Manual - Page 21
Connecting to the computer - driver for windows xp
 |
View all Olympus MAUSB-10 manuals
Add to My Manuals
Save this manual to your list of manuals |
Page 21 highlights
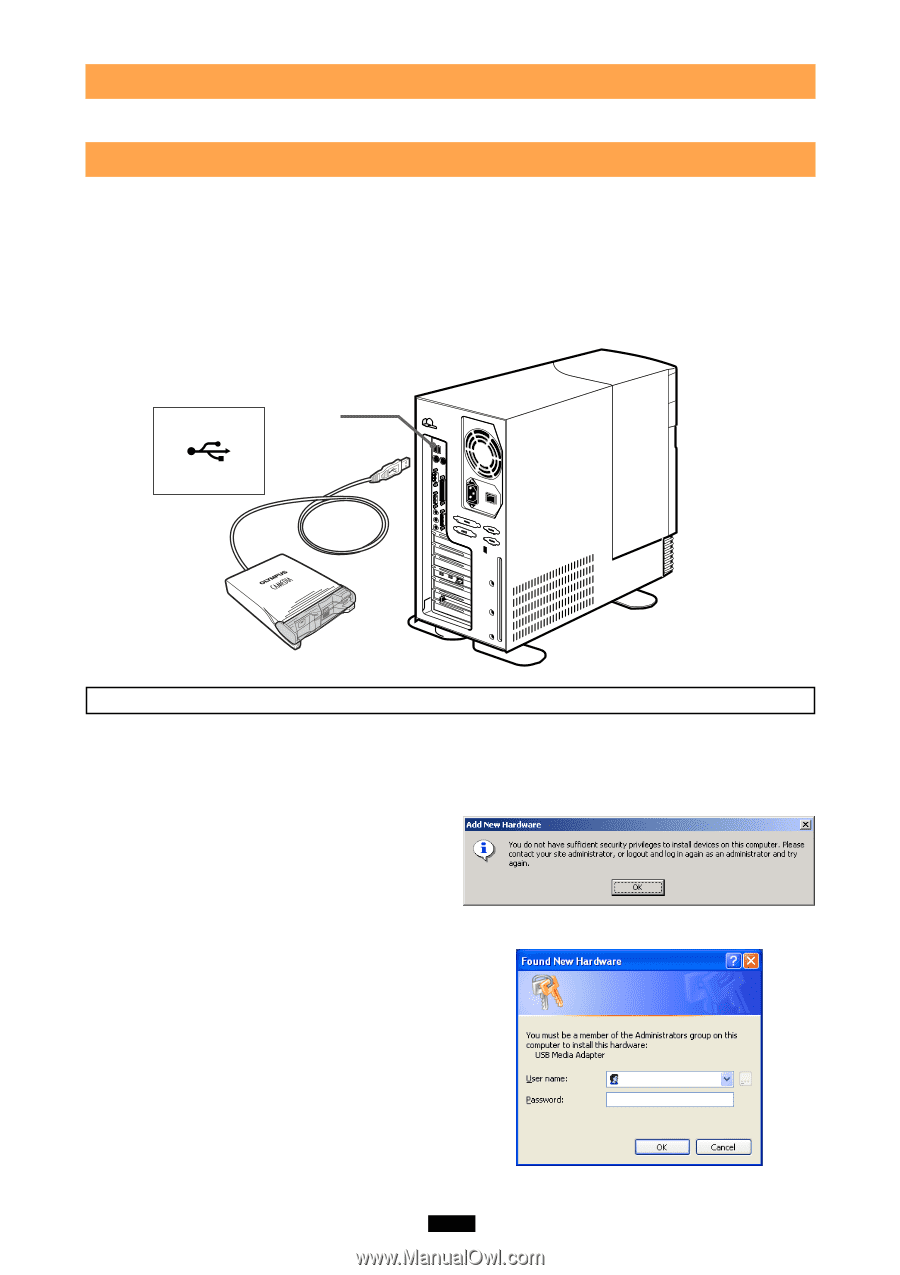
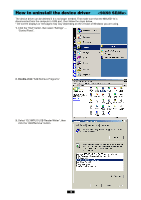
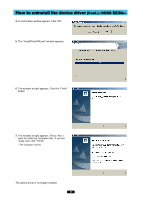
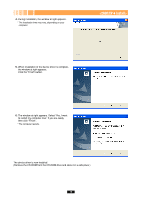
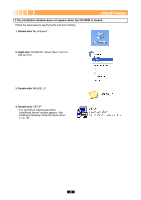
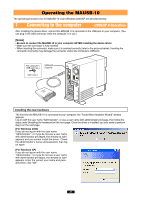
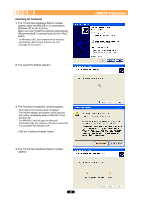
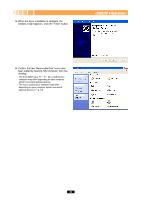
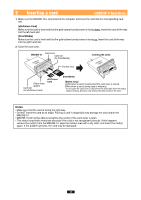
Operating the MAUSB-10 The operating procedures for the MAUSB-10 under Windows 2000/XP are described below. 1 Connecting to the computer After installing the device driver, connect the MAUSB-10's connector to the USB port on your computer. (You can plug in the USB connector while the computer is in use.) [Notes] • Be sure to connect the MAUSB-10 to your computer AFTER installing the device driver. • Make sure the connector is fully inserted. • When inserting the connector, make sure it is oriented correctly (refer to the pictures below). Inserting the connector incorrectly may damage the connector and/or the computer's USB port. The computer's USB port has a USB port (Type A) mark over it. Installing the new hardware The first time the MAUSB-10 is connected to your computer, the "Found New Hardware Wizard" window appears. Log on with the user name "Administrator", or use a user name with administrator privileges, then follow the steps under [Installing the hardware] on the next page. Once the driver is installed, you only need to perform step 6 on the next page. [For Windows 2000] If you do not log on with the user name "Administrator", or if you do not use a user name with administrator privileges, the window at right appears and you cannot install the driver. Check the administrator's name and password, then log on again. [For Windows XP] If you do not log on with the user name "Administrator", or if you do not use a user name with administrator privileges, the window at right appears. Enter the correct user name and password then click "OK". 21
-
 1
1 -
2
-
3
-
4
-
5
-
6
-
7
-
8
-
9
-
10
-
11
-
12
-
13
-
14
-
15
-
 16
16 -
 17
17 -
 18
18 -
 19
19 -
 20
20 -
 21
21 -
 22
22 -
 23
23 -
 24
24 -
 25
25 -
 26
26 -
27
-
28
-
29
-
30
-
31
-
32
-
33
-
34
-
35
-
36
-
37
-
38
-
39
-
40
-
41
-
42
-
43
-
44
-
45
-
46
-
47
-
48
-
49
-
50
-
51
-
52
 |
 |