Olympus MAUSB-10 Reference Manual - Page 45
<Mac, Operation>
 |
View all Olympus MAUSB-10 manuals
Add to My Manuals
Save this manual to your list of manuals |
Page 45 highlights
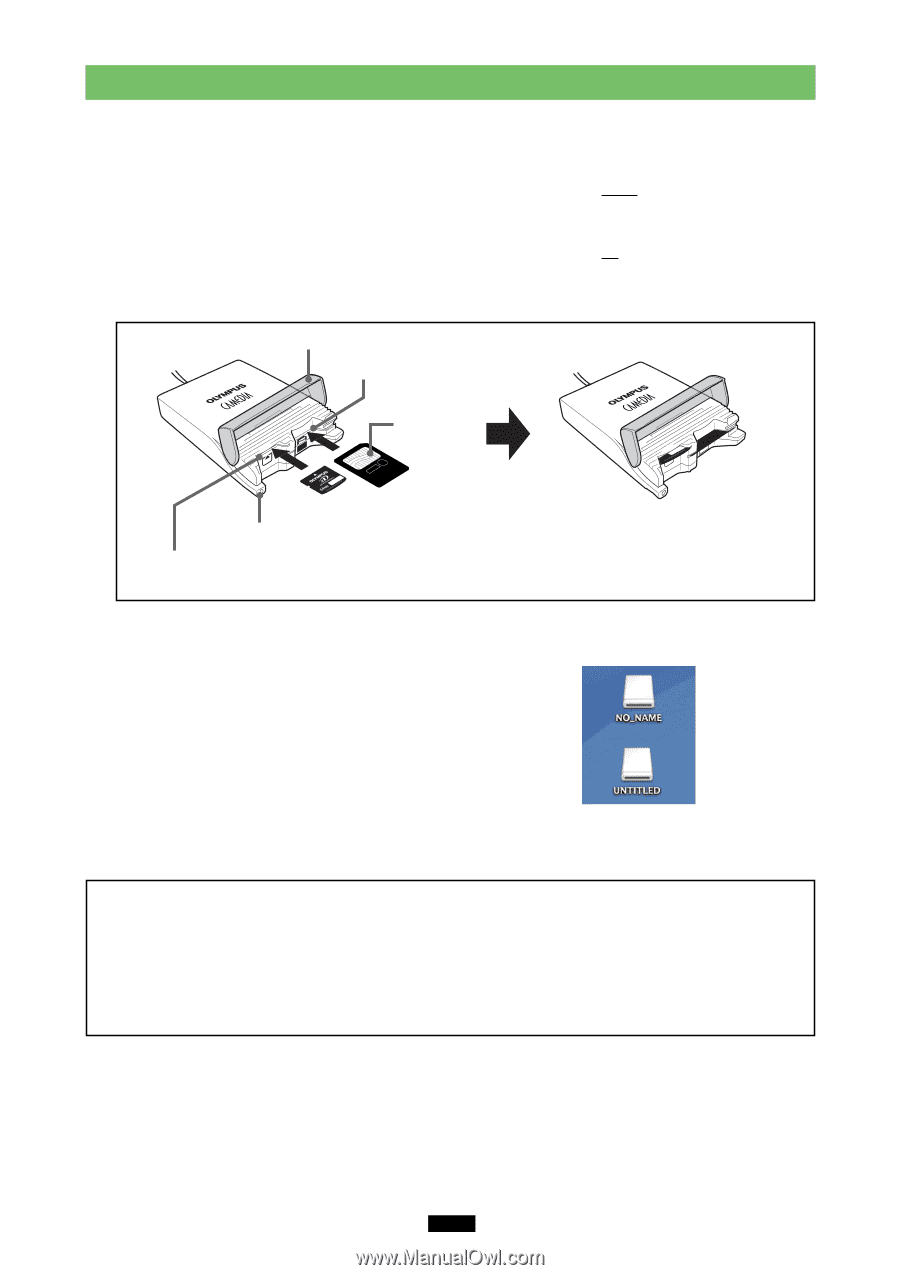
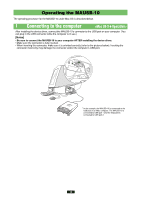
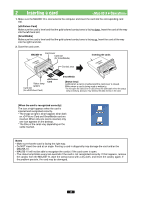
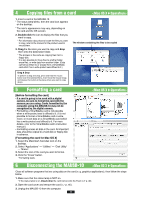
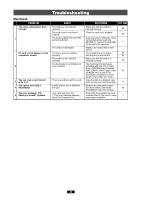
2 Inserting a card 1. Make sure the MAUSB-10 is connected to the computer and insert the card into the corresponding card slot. [xD-Picture Card] Make sure the card is level and that the gold-colored contact area is facing down. Insert the card all the way into the left-hand slot. [SmartMedia] Make sure the card is level and that the gold-colored contact area is facing up. Insert the card all the way into the right-hand slot. 2. Close the card cover. MAUSB-10 Card cover Card slot (for SmartMedia) Inserting the cards Contact area Status lamp (green) Card slot (for xD-Picture Card) xD-Picture Card SmartMedia [Status lamp] Lights when a card is inserted and the card cover is closed. Blinks when a card is being read or written to. * Do not open the card cover or disconnect the USB cable when the status lamp is blinking. Doing so may destroy the data stored on the card. [When the card is recognized correctly] The icon at right appears when the card is inserted and recognized correctly. * The image at right is what happens when both an xD-Picture Card and SmartMedia card are inserted. When only one card is inserted, only one icon appears on the desktop. * The titles of the cards vary depending on the cards inserted. Notes • Make sure that the card is facing the right way. • Do NOT insert the card at an angle. Forcing a card in diagonally may damage the card and/or the MAUSB-10. • MAUSB-10 will not be able to recognize the card(s) if the card cover is open. • The status lamp blinks every two seconds if the card is not recognized correctly. If this happens, remove the card(s) from the MAUSB-10, wipe the contact area with a dry cloth, and insert the card(s) again. If the problem persists, the card may be damaged. 45
-
 1
1 -
2
-
3
-
4
-
5
-
6
-
7
-
8
-
9
-
10
-
11
-
12
-
13
-
14
-
15
-
16
-
17
-
18
-
19
-
20
-
21
-
22
-
23
-
24
-
25
-
26
-
27
-
28
-
29
-
30
-
31
-
32
-
33
-
34
-
35
-
36
-
37
-
38
-
39
-
 40
40 -
 41
41 -
 42
42 -
 43
43 -
 44
44 -
 45
45 -
 46
46 -
 47
47 -
 48
48 -
 49
49 -
 50
50 -
51
-
52
 |
 |