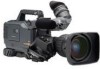
Panasonic AJ-HDX900 Dvcpro Hd Camera - Page 17
Menu operation - firestore settings
 |
UPC - 791871302781
View all Panasonic AJ-HDX900 manuals
Add to My Manuals
Save this manual to your list of manuals |
Page 17 highlights
Chapter 2 Parts and their functions (continued) J DVCPRO connector This is an output connector for video, voice, and data that comply with the IEEE1394 standard. O It is impossible to input signals from external devices. O Power is not supplied from the unit. O Before proceeding to connect or disconnect the DV cable (IEEE1394), be absolutely sure to turn off the power of the units that are to be connected or disconnected using this cable. O Before proceeding to connect the unit which uses a 6-pin type of DV connector, carefully check the shape of the connectors on the DV 6-pin type cable and unit. Connecting a connector upside down may damage the parts inside the 4-pin type camera-recorder and cause malfunctioning. Always connect the DV cable to the unit with the 6-pin type DV connector first. O You can connect a digital video unit equipped with a DV connector and digitally transfer video and audio signals as well as time codes and other information. O When a DV cable has been connected to the DV connector, do not apply any strong external force as this may damage the connector. O To control start/stop of recording operation on the external recording device connected to the DVCPRO connector using the unit, set the 1394 CONTROL item on the menu (OPTION MODE screen on the SYSTEM SETTING page) to "BOTH" (the default setting when shipped from the factory is BOTH). O When the FireStore FS-100 is used in 1080i mode as an external recording device, set the VITC UB MODE item (TC/UB screen on the VTR MENU page) to "FRM RATE", so that the frame rates of the unit can be displayed on the display panel of the FS-100. If it is used in 720P mode, frame rates are not displayed properly but video images will be recorded properly. 2-4 Menu operation section 2 4 3 2 1 1 MENU button This is used to switch the menu ON and OFF. 2 JOG dial button This is used to select the menu items and perform settings when the MENU button 1 is at the ON position. 3 Setup card insertion slot This is where the SD memory card (optional accessory) is inserted into the unit. 4 BUSY (operation mode display) lamp This lamp shows the operation mode of the setup card. It lights during operation. When this lamp is lighted, refrain from inserting or removing the card. 17
-
 1
1 -
2
-
3
-
4
-
5
-
6
-
7
-
8
-
9
-
10
-
11
-
 12
12 -
 13
13 -
 14
14 -
 15
15 -
 16
16 -
 17
17 -
 18
18 -
 19
19 -
 20
20 -
 21
21 -
 22
22 -
23
-
24
-
25
-
26
-
27
-
28
-
29
-
30
-
31
-
32
-
33
-
34
-
35
-
36
-
37
-
38
-
39
-
40
-
41
-
42
-
43
-
44
-
45
-
46
-
47
-
48
-
49
-
50
-
51
-
52
-
53
-
54
-
55
-
56
-
57
-
58
-
59
-
60
-
61
-
62
-
63
-
64
-
65
-
66
-
67
-
68
-
69
-
70
-
71
-
72
-
73
-
74
-
75
-
76
-
77
-
78
-
79
-
80
-
81
-
82
-
83
-
84
-
85
-
86
-
87
-
88
-
89
-
90
-
91
-
92
-
93
-
94
-
95
-
96
-
97
-
98
-
99
-
100
-
101
-
102
-
103
-
104
-
105
-
106
-
107
-
108
-
109
-
110
-
111
-
112
-
113
-
114
-
115
-
116
-
117
-
118
-
119
-
120
-
121
-
122
-
123
-
124
-
125
-
126
-
127
-
128
-
129
-
130
-
131
-
132
-
133
-
134
 |
 |
